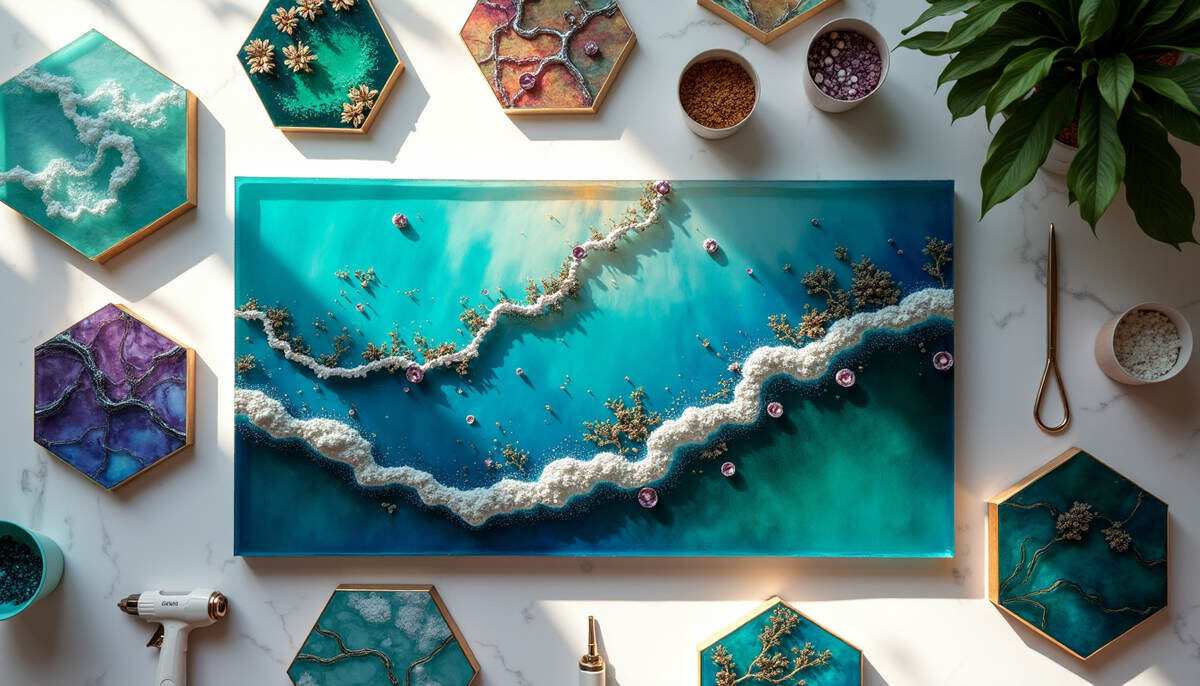
Resin art captivates me like no other medium. The glossy liquid amazes me each time it flows onto a surface. Its potential to become something extraordinary seems limitless.
My team and I found that there was an incredible range of unique resin art ideas that go way beyond simple coasters and jewelry pieces. Epoxy resin has grown into a versatile medium that creates stunning contemporary artwork through light-up sculptures and geometric wall installations. These ideas will get you started in thinking about creativity, whether you’re new to resin art or an experienced artist looking for fresh inspiration.
This piece presents 10 innovative resin art techniques that blend traditional craftsmanship with modern design elements. The techniques range from LED light integration and digital art to professional finishing methods that will raise your next project to new heights.
Exploring Geometric Resin Designs
Geometric designs in resin art are a great way to create structured, precise pieces that catch the eye. I love how working with geometric patterns lets us expand what we can do with this versatile medium.
Creating precise patterns
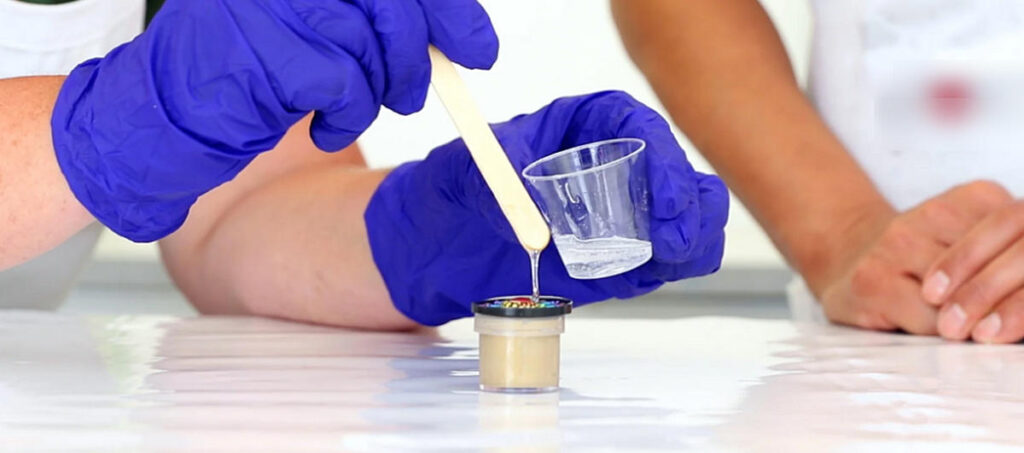
A systematic approach gives the best results with geometric patterns. The secret lies in starting with a clear formula and building from there [1]. My specialized recipes combine different amounts of resin with specific colorants to get precise geometric pours. To cite an instance, I mix six drops of carbon black with 1.18 oz of resin for dark lines, and use mica powder with 1.01 ounces of resin for contrasting elements [2].
Here’s my proven process to create precise geometric patterns:
- Select high-quality silicon molds
- Mix resin in precise measurements
- Layer colors strategically
- Create intentional line work
- Allow proper curing time
Working with shapes and forms
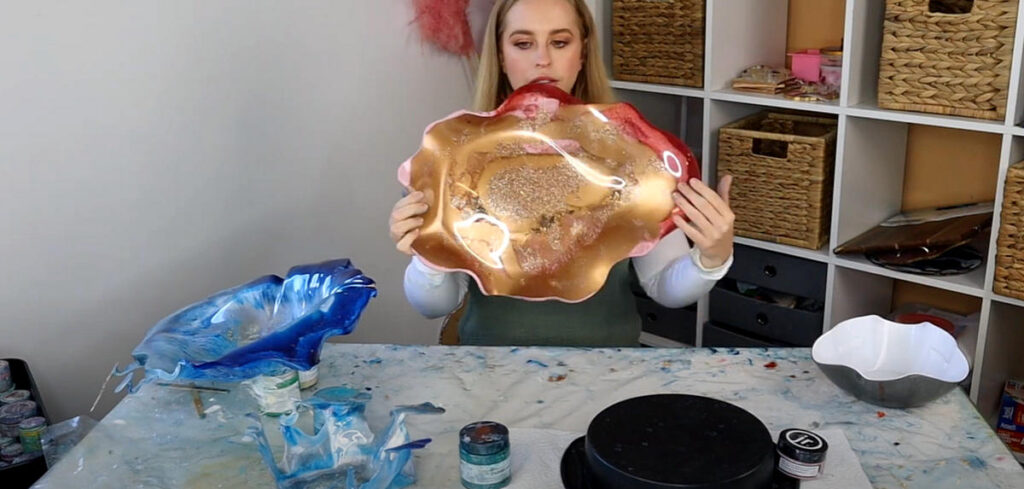
Silicone molds are a great way to get specific shapes and keep precise control over the final outcome [3]. Different techniques help achieve unique effects with geometric forms. The quickest way I’ve found uses a combination of tints and full pigments to create depth within the geometric shapes [4].
Complex shapes need:
- Specialized deep casting resin for larger pieces
- Alternating colors with strategic layering
- Different opacity levels
- Multiple pour techniques
Mastering clean lines
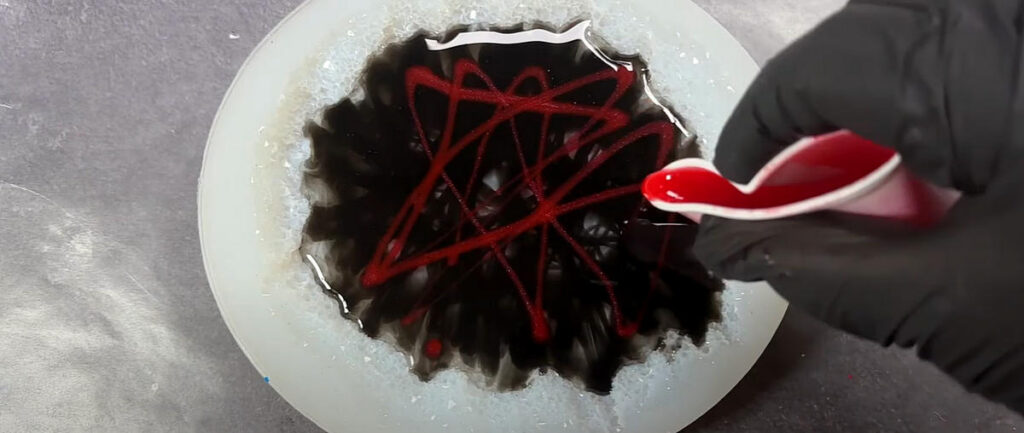
Clean lines in geometric resin art depend on perfect timing and technique. The resin’s pot life lasts 40-50 minutes, and this window is vital to prevent unwanted lines and streaks [5]. Temperature control makes a huge difference. My resin and hardener bottles stay in warm water for 10-15 minutes before mixing. This eliminates streaking and will give better flow [5].
Pristine lines need proper surface preparation. A completely level work surface prevents uneven resin flow [5]. Timing is everything – any movement during the curing phase can ruin those clean lines.
Intricate geometric designs need specific tools and techniques. I alternate colors and add white resin drops to build depth and dimension [6]. This layering approach creates visual interest while keeping the geometric precision that makes these pieces stand out.
Incorporating Light Elements
Light adds a new dimension to resin art and turns static pieces into dynamic, glowing masterpieces. I’ve found that adding light can lift even the simplest designs into captivating works of art.
Working with LED components
The right LED type makes all the difference in my illuminated resin pieces. Heat-resistant and waterproof LED strips with an IP65 or IP67 rating work best [7]. Thin, flexible wires are ideal to embed since they barely disrupt the final piece.
My tested process for LED integration includes:
- Test all LEDs before casting
- Create a hollow tunnel in the resin
- Pour a thin base layer and let it cure
- Position the LED strip with proper spacing
- Complete the pour with additional layers
Creating luminescent effects
I’ve become skilled at creating stunning luminescent effects through careful testing. The right mixing ratio is vital – 1 part glow powder to 4 parts resin gives the best results [8]. You can’t mix different glow powders to create new colors – each shade needs its own specific powder [9].
The best effects come from:
- Using finer particle sizes for better suspension
- Adding resin colors to a white glow powder base
- Creating layered effects for depth
- Testing glow intensity before final application
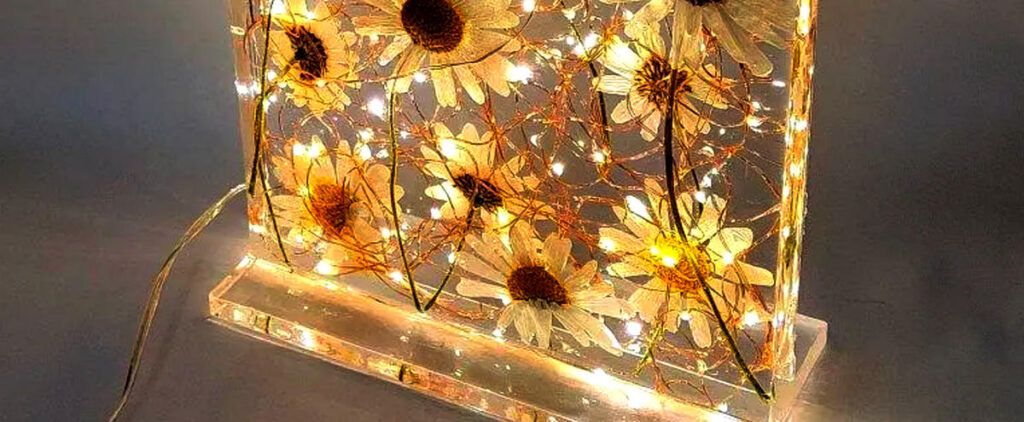
Using phosphorescent pigments
The right charging method is significant to get the best glow effect with phosphorescent pigments. A 15-minute exposure to sunlight or UV light activates the glow properties [9]. The sort of thing I love is how different colors glow for varying durations – yellows and greens last for hours while reds and pinks fade under an hour [9].
Strontium aluminate-based powders give superior results in my experience. These pigments work well in castings, jewelry, and larger installations [10]. Proper encapsulation of pigments makes them compatible with both solvent and water-based mediums [10].
Professional results depend on how well pigments suspend in the resin. Glow powder creates a suspension instead of dissolving, so careful mixing prevents particles from sinking [9]. This detail-oriented approach gives even distribution and consistent illumination throughout the piece.
3D Resin Sculpture Techniques
My passion lies in creating three-dimensional sculptures with resin. This art form brings together technical precision and artistic expression. I found that there was a need to plan carefully and understand structural principles to create successful 3D resin art.
Building structural elements
The foundation is a vital part of working with structural elements. My experience shows that deep casting resin works best for optimal results. You can pour it up to 50mm thick in a single layer [11]. Before starting, I make sure to have all materials ready:
- High-viscosity casting resins
- Structural support materials
- Release agents
- Mixing tools
- Safety equipment
Temperature control plays a huge role in the success of structural elements. My workspace stays at 50-50 degrees throughout the process [12]. These conditions give the best results for complex structures to cure properly.
Creating depth and dimension
I’ve become skilled at several techniques that create compelling depth in resin sculptures. Layering makes all the difference – each layer should be 1/8″ thick [13]. This prevents bubbles and ensures proper curing. Here’s my process to create dynamic effects:
- Pour a clear base layer
- Add metallic elements for dimension
- Layer translucent colors
- Build up structural elements
- Apply final detail work
The right volume calculation matters a lot with deep pours. I multiply the desired thickness by the piece’s area [13]. This helps me get consistent results and save materials.
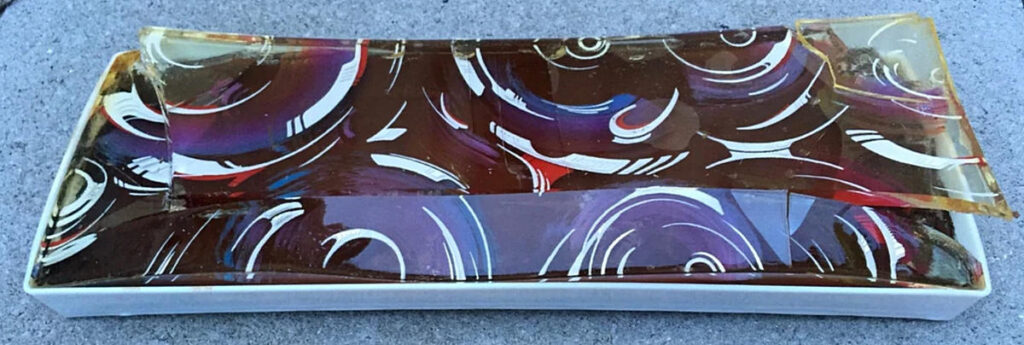
Working with molds and forms
After lots of testing, I found that there was a clear advantage to using higher viscosity casting resins for three-dimensional work. These resins hold their shape better while curing [3]. The final application and design complexity guide my mold selection.
Silicone molds give the most precise shapes and designs [3]. Complex pieces often need block molds instead of mother molds, especially if I’m making multiple pieces [14].
Proper mold preparation is a vital step I never skip. The mold must be cool, clean, and completely dry before pouring. Any moisture can make the resin foam up unexpectedly [14]. A high-quality silicone-based parting compound helps remove pieces easily. It also cuts down surface tension and makes molds last longer [14].
The resin’s pot life gives me a 30-40 minute window to work with intricate sculptures [15]. This timing helps me control the material and lets it flow into detailed areas properly. Creating exciting contrasts and 3D effects needs careful attention to material properties and curing times [16].
Digital Art Integration
Digital technology and resin art blend together to create exciting new possibilities in my artistic experience. I found that digital elements add a modern touch to traditional resin techniques. These pieces bridge the gap between classical and modern art forms.
Embedding printed elements
I became skilled at embedding printed images in resin after careful testing. The right sealing makes all the difference – resin’s chemical heating process can cause discoloration and distortion without it [17]. My proven process for perfect embedment includes:
- Print images on appropriate paper (laser prints work best)
- Cut images to size, slightly smaller than the mold
- Seal completely with Mod-Podge (two coats recommended)
- Allow thorough drying between coats
- Pour base layer and position image
- Complete with clear top coat
Inkjet prints need a clear acrylic spray seal first because water-based inks can bleed when they touch Mod-Podge [17].
Creating holographic effects
I found fascinating ways to achieve holographic effects without traditional molds [18]. Diffracting grating sheets create magical rainbow-like effects that change as light hits the surface [18]. This process needs:
- High-quality epoxy resin
- Holographic vinyl materials
- Precise positioning tools
- Clean working environment
The right lighting during creation helps achieve the desired effect. This technique started in chocolate making but has changed how we create dimensional effects in resin art [18].
Preserving digital art in resin
Digital artwork preservation in resin needs special attention. My methods include scanning and manipulating fineliner drawings digitally before adding them to resin pieces [19]. This approach gives precise control over the final outcome and allows intricate, repetitive designs [19].
The technology integration continues with LED lights and interactive components that respond to environmental changes [20]. This blend of technology and art creates dynamic pieces that come alive and redefine the limits of resin art [20].
Printed elements need thorough sealing to stop resin seepage that can cause dark spots in the paper [21]. A thick, vinyl-like surface with sealant protects delicate printed materials best [21]. High-quality photo paper maintains image clarity and vibrancy throughout the preservation process for photographs or special prints [21].
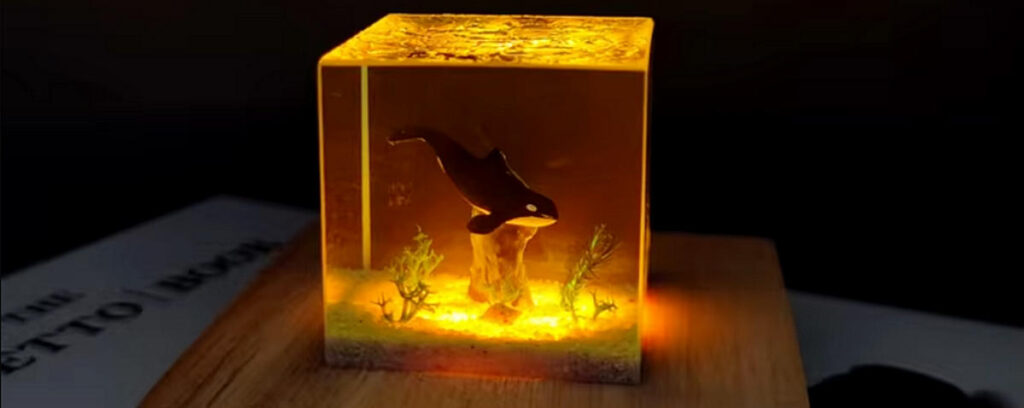
Contemporary Wall Art Applications
Resin art has become my favorite way to redefine the limits of creativity. My years of experimenting have taught me how large-scale resin installations can change ordinary spaces into something extraordinary.
Large-scale installations
Size matters a lot in venue installations. My pieces over 100 cm in width or height need 25 business days for delivery and setup [22]. Ceiling height plays a vital role in my work. Installations under 27 inches work best with ceilings under 10 feet. Taller ceilings between 11-16 feet let me stretch pieces to 40 inches or more [22].
These steps are the foundations of successful large-scale installations:
- Calculate room dimensions carefully
- Think over viewing angles and lighting
- Plan installation points
- Prepare mounting hardware
- Test weight distribution
Creating textured panels
My work with textured panels shows that mixing materials creates stunning effects. Here are the elements I use to achieve different finishes:
- Natural elements (dried flowers, leaves)
- Textiles and fabrics
- Metallic components
- Recycled materials
- Printed graphics [23]
The panels come in standard thicknesses of 0.236″ and 0.354″ [23]. These measurements work perfectly for most projects. The versatility makes these pieces special – they shine in light diffusing applications, from tabletops to wall panels and acoustical tiles [23].
Multi-piece compositions
Proper planning makes all the difference in multi-piece installations. Each piece needs size limits that allow safe movement and installation during venue setups [24].
I’ve become skilled at various surface finishes that create visual interest across multiple pieces. You can get panels in gloss, satin, or matte finishes [23]. This variety lets me create dynamic compositions that play with light and shadow. The panels resist shattering and clean up easily, which makes them perfect for busy areas [23].
“Environmental compositions” rank among my favorite techniques. These pieces work with natural light and include elements that shift appearance as the day progresses. A frozen lake installation I completed recently needed careful weight calculations. The challenge was finding the sweet spot between manageable thickness and the right depth effect [24].
These panels have soared in architectural applications. They do more than just decorate – they serve as ecological building materials with strong chemical and fire resistance [23]. Such durability makes them ideal for both homes and commercial spaces over the long term.
Innovative Surface Treatments
Surface treatments have changed how I approach resin art and opened up endless possibilities to create unique finishes. I found that there was a way the right surface treatment can change a simple piece into something extraordinary.
I became skilled at working with metallic pigments and powders to create stunning effects. The perfect metallic sheen comes from super metallic pigments in silver and gold [25]. The key to success lies in the mixing process – I combine the metallic pigments with the resin to ensure even distribution.

The most dramatic results come from these techniques:
- Bright gold and Caribbean sea black diamond pigments
- Scarlet and liquid fire metallic powders
- Angel white and cosmic blue pigments
- Heat gun with adapted nozzle head
- Propane torch for lacing effects [26]
Mirror finishes need patience and precision. My systematic approach delivers stunning results consistently. Multiple stages of sanding and polishing bring us closer to that perfect reflection [27].
My proven mirror-finish process has:
- Start with coarse cutting compound
- Use ultra-gloss polishing compound
- Apply medium pressure with a foam pad
- Make overlapping passes
- Complete final buffing with microfiber cloth [27]
Glass-like surfaces come from maintaining consistency throughout the process. Temperature control is vital – my workspace stays between 15 and 30°C [28] to get optimal results.

Achieving matte surfaces
A sophisticated matte finish often suits my artistic vision better. My technique uses wet sandpaper and wax to create a beautiful non-gloss finish without harmful chemicals [29]. This method lets me control the exact amount of shine – more polishing creates a shinier surface, while less keeps that perfect matte look [29].
Large surfaces like floors or countertops need resin that works with most surfaces, from concrete to stoneware [28]. Professional results come from surfaces that are clean, dry, and dust-free before application [28].
Different surface effects need attention to detail and proper technique. To name just one example, see how metallic effects often need heat to create intricate lacing patterns. The design develops over multiple layers during a 48-hour period [26]. This patience creates depth and complexity in the final piece.
Surface treatments fascinate me because of their versatility. High-gloss tabletops and matte wall installations need an understanding of how different techniques interact with the resin. Surface preparation remains non-negotiable – any pollutant can compromise the adhesion and final catalysis [28].
Custom Color Effects
Color manipulation in resin art has become one of my favorite skills. It opens up endless ways to express creativity. Years of trying different approaches have taught me that the right color effects can turn simple projects into stunning pieces.
Creating color transitions
The magic behind beautiful color transitions comes from knowing how epoxy takes in different pigments and dyes. Powder pigments create natural-looking patterns with a shimmer or pearlescent look [30]. The best results come when each pigment gets mixed into its own resin batch before combining them [30].
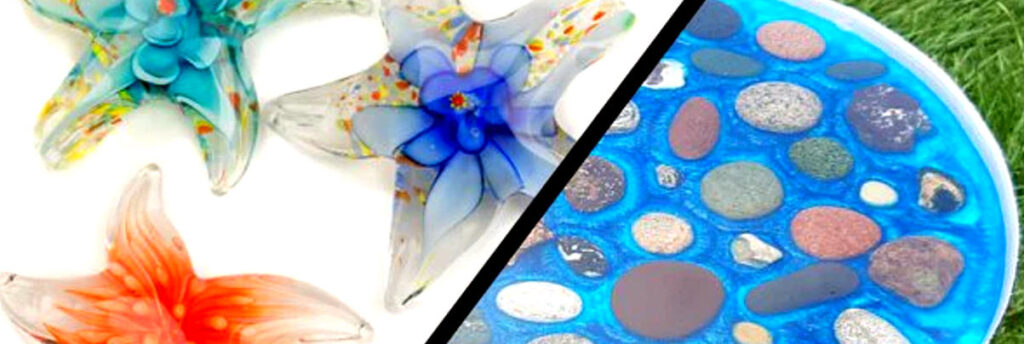
Creating color transitions
My tried-and-true process for perfect color transitions:
- Mix individual color batches
- Pour batches simultaneously
- Control pour speeds to get desired effects
- Monitor batch volumes carefully
- Think about how substrate shape affects the result
Your final pattern depends on how you pour, the size differences between batches, and the substrate shape as the epoxy levels itself [30]. Small batches with specific powder pigments give you better control over pattern creation [30].
Working with transparency
Liquid dyes are my go-to choice for transparency. These pigments mix naturally with the resin and create vibrant colors with beautiful swirls [31]. You can’t take back color once it’s in the mix, so start small and build up the intensity step by step [30].
Here’s what works best for transparency:
- Use alcohol-based inks to tint
- Add pigments bit by bit (no more than 5% to clear resin)
- Mix one part color to twenty parts resin [32]
- Mix well to spread the color evenly
Achieving special effects
Creating unique special effects is what I love most about resin colors. UV resin coloring gives quick-set, vibrant results that last [31]. My spectacular pieces often come from adding layers of glitter while pouring to create amazing depth [31].
Opaque pigments let light pass through and scatter beautifully, which creates a glowing, semi-transparent finish [31]. This works great when you want natural-looking gradients and subtle shading [31].
Color-shifting pigments are among my favorite techniques. These special powders change colors based on their surroundings [33]. Dark base colors bring out their best qualities – Starlight Blue from the diamond series creates a magical transformation [33].
An air blow gun helps me blend multiple colors smoothly for complex patterns [34]. This technique has changed how I work with color mixing in bigger pieces, especially for flowing, organic patterns.
Success with color effects comes from understanding pigment interactions. Powder options like mica and glitter powder pack intense color and shimmer, while liquid pigments give smooth, even tinting [31]. Multiple layers help build depth, with colors added gradually until they look just right [35].
Pro Tip: My most eye-catching pieces combine different types of colorants. A background of subtle liquid dyes paired with dramatic powder pigment accents [30] creates depth you just can’t get from one coloring method.

Professional Finishing Techniques
The final touches on a resin art piece can transform an amateur creation into a professional masterpiece. My years of experience have helped me develop a complete approach to getting that professional finish everyone wants.
Surface preparation methods
You need proper surface preparation to achieve a flawless finish. My workspace temperature stays between 72°F and 78°F to get the best results [36]. The area must be well-ventilated and dust-free before I start any finishing work.
These steps are vital to prepare the surface:
- Clean the workspace
- Control temperature and humidity
- Remove surface contaminants
- Check leveling
- Apply sealants
I found that there was a need to apply a seal coat on porous surfaces. This first step pushes air out of the pores and prevents bubbles from forming. The bond becomes stronger too [37]. Table top epoxy works better than deep pour epoxy for the seal coat in non-marine applications [37].
Final coating applications
The success of final coating depends on how well you mix and apply the materials. High-viscosity topcoat epoxy creates excellent self-leveling properties for flood coats [37]. These coats naturally settle at 1/8 inch thickness and create a uniform, professional finish [37].
Temperature Control makes a huge difference in the coating process. Moderate and stable temperatures prevent warping and cracking [36]. Professional conservators help me ensure the best display conditions for valuable pieces [36].
The edge treatment needs special attention during final coats. Here are some techniques that give professional edges:
- Use flashing tape for clean lines
- Create dams with strong wide tape
- Apply liquid latex that’s easy to remove
- Time the tape removal right [38]
Long-term preservation
The largest longitudinal study helped me identify factors that affect resin artwork’s lifespan. Direct sunlight leads to fading or yellowing. Extreme heat can cause warping or cracking [36]. Display areas need humidity levels between 30% and 50% to curb these problems [36].
A complete care routine helps preserve the artwork. Regular dusting with a soft, dry microfiber cloth keeps the shine intact [36]. Specialized polishing cloths work great on minor scratches or dull spots [36].
Strategic placement is a vital part of long-term preservation. Protection from direct sunlight and stable temperatures are must-haves [36]. UV-protective display cases work great for valuable pieces [36].
Each repair job needs careful attention. Minor cracks or chips usually need specialized repair kits. Testing products on hidden areas comes first [36]. Professional art conservators should handle major damage with their specialized skills and materials [36].
Documentation has become a key part of my preservation process. High-quality photos taken right after completion serve as reference points. Regular inspections help me spot and fix potential issues early.
Conclusion
Resin art amazes me as a versatile medium with endless creative possibilities. I’ve found success by mastering basic techniques while challenging creative limits. My work ranges from precise geometric patterns to innovative digital integrations.
This creative experience has shown me how professional results depend on careful attention to detail. The right surface preparation, temperature control, and finishing methods transform amateur projects into gallery-worthy pieces. Traditional methods blend perfectly with modern approaches. LED integration and holographic effects create exciting new ways for artistic expression.
The resin art world grows and changes constantly. Artists now have fresh ways to create stunning pieces. Each project you complete builds expertise, whether you craft intricate geometric designs or large-scale wall installations. Simple techniques lead to experiments with different effects, and your creative confidence grows with every pour.
References
[1] – https://www.artresin.com/blogs/artresin/how-to-make-mandala-resin-art?srsltid=AfmBOopRoduHAhNjFs3qZZ3tphvzTyl6CaHsqW2SOunD77VIs5r51hEX
[2] – https://www.youtube.com/watch?v=D-sfYj17g18
[3] – https://www.justresin.com.au/single-post/a-guide-to-resin-art
[4] – https://www.youtube.com/watch?v=aVr2JyjTRRg
[5] – https://www.craft-resin.com/blogs/news/why-do-lines-streaks-appear-in-resin-projects-how-to-fix-them-if-they-do?srsltid=AfmBOoqpMxlciUm1f9lNMxr9W74YAlirOTr-RQ3S2jzhtkLGyY2OBXXp
[6] – https://www.instructables.com/Geometric-Resin-ShapesPaper-Weights/
[7] – https://hirosarts.com/blog/how-to-embed-leds-in-resin/?srsltid=AfmBOorjpoERIOf-_KB866_N2JkuNENyQK12xkIl5gDDqfhPt3nBsZ8_
[8] – https://www.artnglow.com/blogs/news/how-to-make-a-glow-in-the-dark-resin-casting?srsltid=AfmBOoq3Oum5DG06zaBDn_6WZ–fOsB3YJqRhRhEn71bDF0UoyU2h6Wy
[9] – https://www.resinobsession.com/resin-frequently-asked-questions/glow-in-the-dark-epoxy-resin/
[10] – https://www.artnglow.com/products/glow-in-the-dark-powder?srsltid=AfmBOoop8z4nm_5QhcdY5s4ggMjtxVttWchSRaES8zp_-iSN6_W9tsFU
[11] – https://pourawayfluidarts.com/blogs/resin-art-fundamentals/dive-into-the-world-of-resin-art-exploring-techniques-and-products-to-take-your-resin-art-to-whole-new-level?srsltid=AfmBOoqigJUP_yblfigBqMHJ4wEEJPCzjMWvvRJfx5_aVxrf9GcNmy4h
[12] – https://www.youtube.com/watch?v=Uym0BuuTBcg
[13] – https://www.instructables.com/3D-Painting-Layered-Resin-and-Acrylic-Paint/
[14] – https://www.instructables.com/From-3D-to-Reality-Making-a-Resin-Sculpture-from/
[15] – https://www.youtube.com/watch?v=pvNEfzpqzoQ&pp=sAQA
[16] – https://resin-kunst.com/structure/
[17] – https://www.youtube.com/watch?v=zcuBZTOCqz4
[18] – https://www.youtube.com/watch?v=xmN25sBBxOc&pp=ygUQI2hvbG9yYXBoaWNyZXNpbg%3D%3D
[19] – https://leia-tatucu.com/blogs/news/learning-my-journey-with-resin-mixed-media-art?srsltid=AfmBOorE6SY7tm3q-sA8uommZdMnI0wpMhvj3Rdc5fOQ3t0lO1MiWPf6
[20] – https://www.craft-resin.eu/blogs/news/frozen-in-resin-crafting-three-dimensional-wonders?srsltid=AfmBOoocdW4DBMsDUdn5Za69f2w8IuDd8e9p09j0K0LsM5bXftaUlJa0
[21] – http://skinnerstudio.blogspot.com/2008/08/how-to-embed-paper-in-resin-part-one.html
[22] – https://designsandinspirations.com/products/emerald-3-piecereen-agate-wall-art?srsltid=AfmBOorT1yjWmzdkQZhTy0x7ik7lCYXdz789_3Qs6au-cv1_s5KALGJ6
[23] – https://www.novadisplay.com/design-customization/materials-and-finishes/designer-encapsulated-resin-panels/
[24] – https://www.youtube.com/watch?v=anqyJuozy8o
[25] – https://www.youtube.com/watch?v=Ct6UYn_xgVU
[26] – https://www.youtube.com/watch?v=Y5RdCB0KvmI
[27] – https://www.instructables.com/How-to-Flat-and-Polish-Epoxy-Resin-to-a-Mirror-Fin/
[28] – https://resinpro.eu/floor-resins-artistic-surface-resin/
[29] – https://www.artresin.com/blogs/artresin/how-to-get-a-matte-resin-finish?srsltid=AfmBOoqFV1WxxG3Ejm7VaA3gJUx-hK1781thkAE3pMs82zTSB_1csfgV
[30] – https://www.bestbartopepoxy.com/blogs/ultraclear/how-to-color-epoxy
[31] – https://www.carved.com/blogs/life-at-carved/how-to-color-resin?srsltid=AfmBOooR1JRwSR3O_0JkEmpaP95i-gP1LrzjwkgFVoPsT7qpmFwZxPlQ
[32] – https://paintpouracademy.com/color-or-dye-resin/
[33] – https://www.youtube.com/watch?v=E_kgiVk9xtQ
[34] – https://www.youtube.com/watch?v=FzqOXwlsur4
[35] – https://www.moyresinenvy.com/create-depth-in-resin-art/
[36] – https://artsshala.com/blogs/resin-art/resin-art-preservation-long-term-care-and-maintenance-tips
[37] – https://www.bestbartopepoxy.com/blogs/ultraclear/epoxy-coat-types
[38] – https://www.craft-resin.com/blogs/news/how-to-finish-off-the-edges-to-your-craft-resin-epoxy-artwork?srsltid=AfmBOopa9CHwDHnPxQhOHysGBle_UBTTT8vahT3H3SK0P4nLCUq6QtdA

