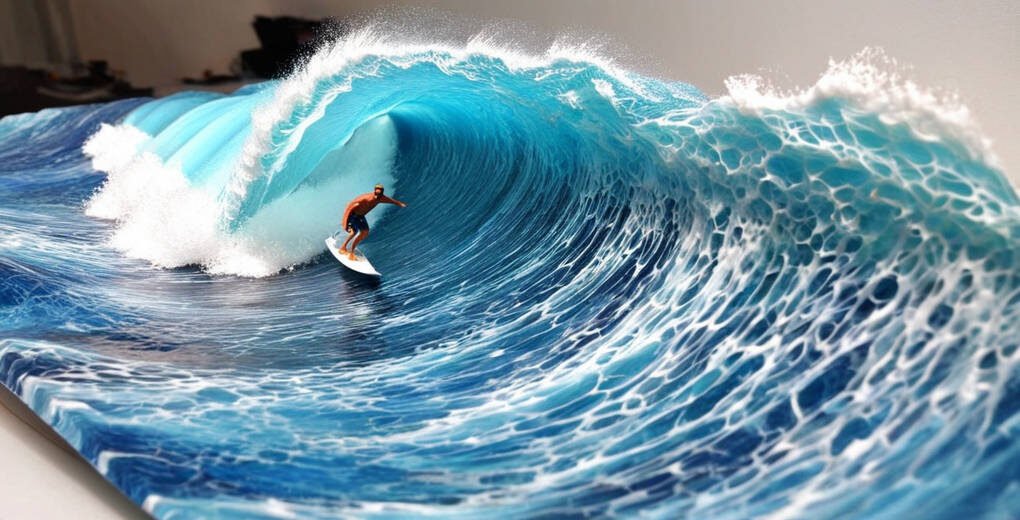
Have you ever dreamed of bringing the beauty of ocean waves into your home? With a little creativity and some basic materials, you can make a stunning 3D resin wave that captures that essence. This guide will walk you through the process step-by-step, so you can craft your own unique piece of art.
Understanding the Basics of 3D Waves
To create a 3D wave using resin, you typically need a mold to shape your resin as it cures. Traditionally, artists mix two-part epoxy resin and pour it into molds, waiting for the material to set before manipulating it further. However, there’s a faster method that doesn’t require constant attention and forming—a technique you’ll love for its simplicity.
Materials You’ll Need
Before you start, gather the following materials:
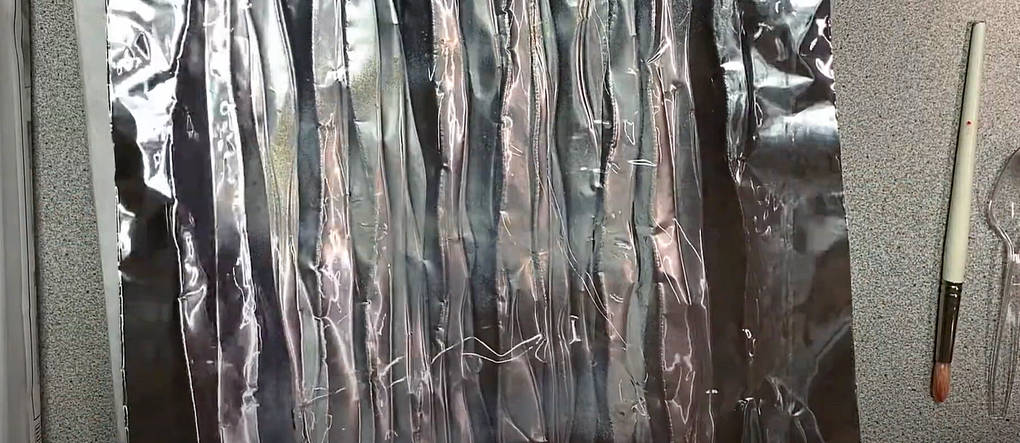
- Shaper Sheet: This modeling material acts as your mold.
- Vinyl Tablecloth: A clear layer to ensure easy release of the resin.
- Resin: Two-part epoxy resin like Liquid Diamonds for clear, vibrant colors.
- Coloring Agents: Alcohol inks, universal tints, or glow powders for color variations.
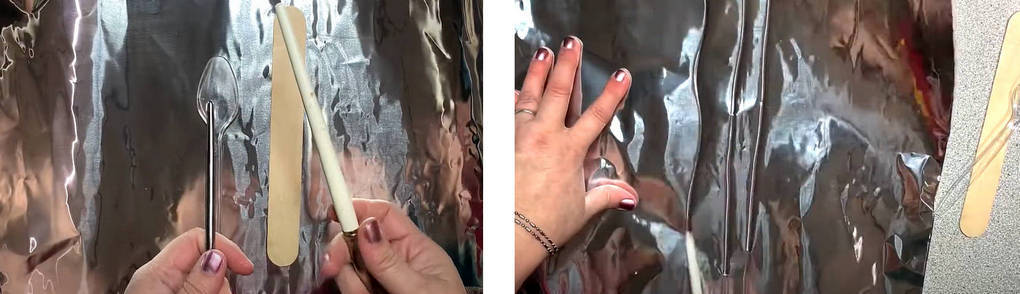
- Tools: Popsicle sticks, sculpting tools, and pliers for shaping.
Preparing the Mold
Start by cutting a piece of Shaper Sheet to your desired size. This material is durable and provides excellent support for your resin. Then, lay a piece of the vinyl tablecloth over it to ensure the resin won’t stick.
Adding Details for Realism
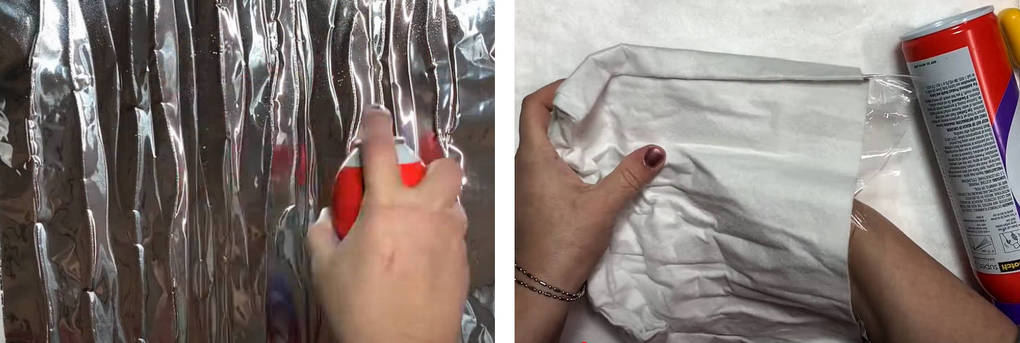
Use an oversized popsicle stick or sculpting tools to shape the Shaper Sheet into wave-like patterns. Think about the movement of water and create undulating lines that mimic the ocean’s surface. You can also use spray adhesive to bond the vinyl to the Shaper Sheet, helping the resin fill in any small crevices.
Forming the Wave Shape
Fold the prepared Shaper Sheet into a pocket that resembles a wave. Make sure to crimp the edges to seal it well. The goal is to create a secure pocket for the resin that captures the wave’s motion. This part is essential—take your time to ensure the mold is tightly sealed to prevent leaks.
Mixing and Pouring the Resin
Once the mold is ready, it’s time to mix your resin. Follow the manufacturer’s instructions carefully. If using Liquid Diamonds, remember it typically comes in a two-to-one ratio.
Choosing Coloration
This is where creativity shines. You may prefer the swirling beauty of marbled colors. Use toothpicks to add drops of universal tints or alcohol inks to your mixed resin, swirling gently to avoid fully blending the colors. Consider shades of blue and green to reflect the ocean’s colors, and don’t forget a touch of white for foam effects.
Pour the resin into the mold, starting from the bottom and working your way up. Allow the colors to flow and mix naturally, creating a beautiful wave-like appearance.

Curing and Demolding
Once the resin is poured, let it cure undisturbed. This process can vary based on the resin brand you use, so refer to the instructions. After a few hours, the resin may not be fully cured but should be firm enough for demolding.
Carefully peel back the vinyl layer and remove the Shaper Sheet. If the mold is tightly sealed, you shouldn’t encounter significant leaks, but it’s wise to keep an eye on it during curing.

Finishing Touches
After you’ve demolded your wave, assess its edges. You can trim any rough spots for a clean finish. Feel free to enhance the wave with crystals or additional resin highlights for added depth. If you want to add even more sparkle, consider using UV resin over the surface.

Displaying Your 3D Resin Wave
Place your resin wave on a lighted base to enhance its beauty. The light will shine through the clear parts and reveal the vibrant colors, creating an enchanting display. Create a Stunning Epoxy Resin Tray with Flowers and Butterflies.
Conclusion
Creating a 3D resin wave is not only a fun project but also a chance to express your artistic vision. With simple materials and a bit of patience, you can capture the beauty of the ocean in a stunning piece of art. So why wait? Gather your supplies, mix your colors, and dive into the world of resin crafting. Enjoy the process and happy creating!