One of the best aspects of woodworking is noodling out a process to accomplish a task. In my experience though, I then look for a different approach that offers a simpler way of getting the same result. The obstacle this time was cutting angled tenons. A couple of recent projects illustrate this.
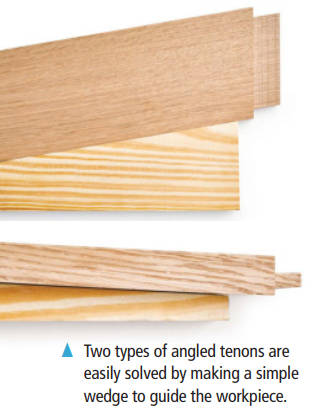
ROCKING CHAIR. First up is a rocking chair. The design calls for the seat to be wider at the front and narrower at the back. This means the side rails angle from front to back. So I needed a way to cut an angled tenon on each end to fit the front and back legs, as shown in the photo at left.
My usual approach to straight and square tenons is to use a dado blade in the table saw and guiding the workpiece with a miter gauge. I use the rip fence as an end stop to get consistent tenon lengths.
I tried modifying this method in order to cut the tenons for the rocking chair. It can work, but you end up with quite a few setups where errors can creep in. Doing a little research in some books and online led me to a shockingly straightforward solution — a wedge.
WEDGE SECRET. The gist is that you make a wedge that matches the angle of the tenon. Then you use it to position the workpiece in relation to the saw blade. One of the main advantages is that the one wedge serves as a reference for all the cuts, so it guarantees consistency.
Another advantage is that the saw blade remains fixed at 90°.
MAKING THE WEDGE. For wedges, I like using pine construction lumber. It cuts easily, and I can refine the shape with hand tools with little effort.
Lay out the slope of the angle you need along a face. Cut close to that line at the band saw (though a jigsaw works, too). I use a hand plane to trim the wedge down to the layout line. Just be sure to keep the edge square to the face.
I want to make a point here about accuracy. In very few instances do you need to hit the angle dead on. If you end up a fraction of a degree off, don’t sweat it. Since the wedge is your reference, all the joints are going to be consistent and things will turn out just fine.
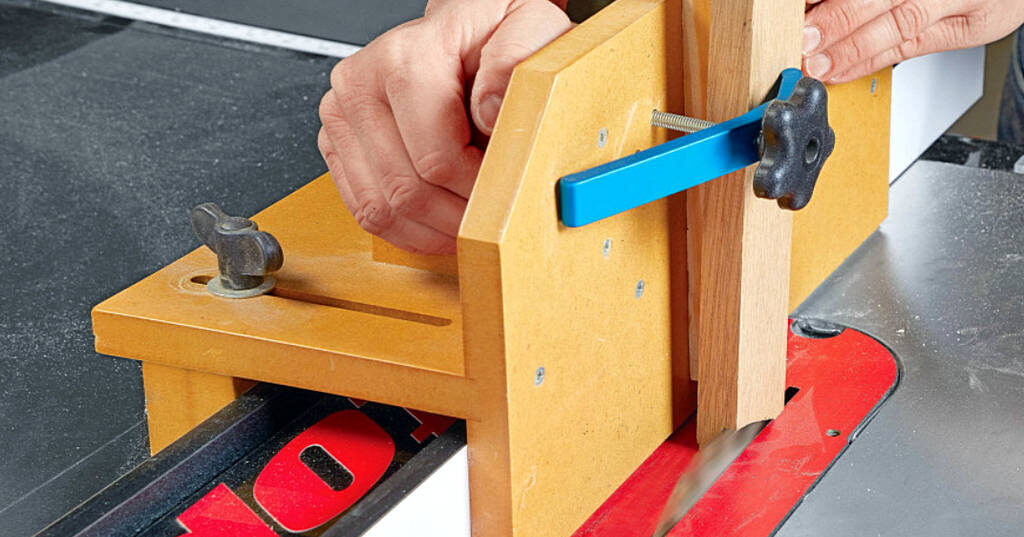
CUTTING THE TENON. It’s time to put the wedge to work. For this, I’m using a tenon jig that rides along the rip fence, as in the main photo on the previous page. Secure the wedge to the jig and high enough to remain clear of the dado blade.
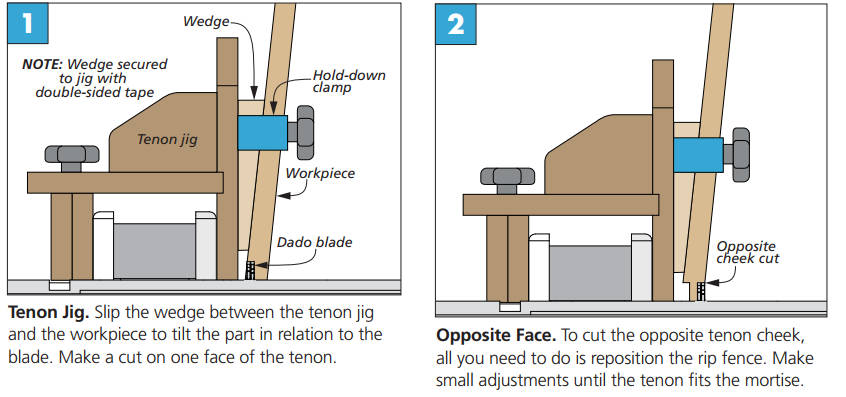
Figure 1 at right shows the setup for the first cut. Side note: It doesn’t matter which tenon cheek you start with. Install a dado blade to form the cheek in a single pass. It’s always a good idea to make test cuts on a scrap piece to dial in the settings.
To cut the opposite cheek, all that’s necessary is to reposition the fence (Figure 2). To form the top and bottom shoulders of the tenon, I’ve found a hand saw works just a well as making another setup on the saw.
GARDEN BENCH. The other project (and another type of angled tenon) is a garden bench. Here the legs angle out, so the tenons on the stretcher that connects them must be angled as well (left photo on the previous page).
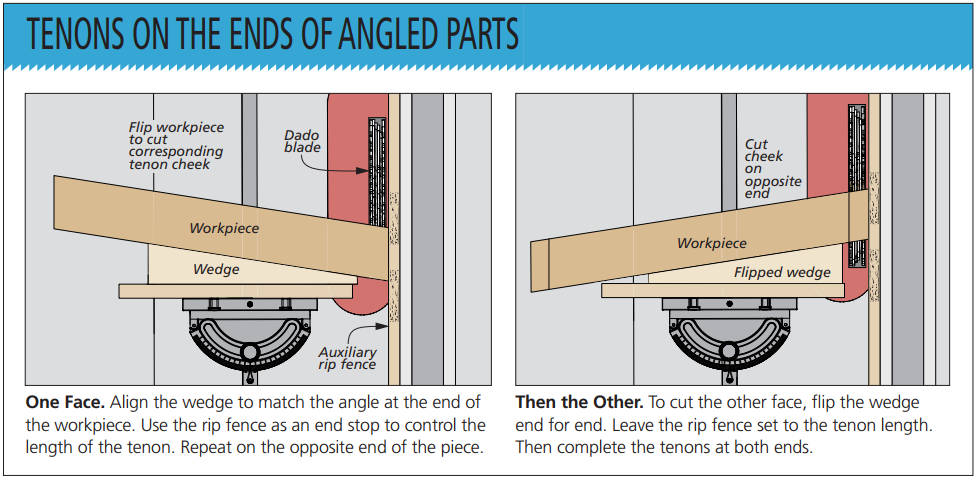
The drawings below show how a wedge works here. The wedge fits between the workpiece and the miter gauge (which stays at 90°). To cut the opposing cheek, all you need to do is flip the wedge around.
Angled tenons don’t come up often. However, knowing a simple solution for accurate results means you can approach the project with confidence.

