Charles Mak explains the uses of this simple but versatile joineryjig.
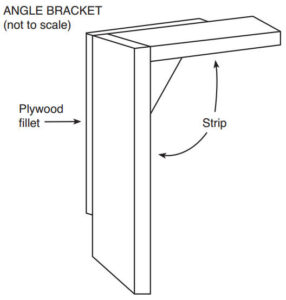 Woodworking teacher and author Robert Wearing was well known as the creator of many shop-made jigs and devices, including what he called the right-angle holding bracket’, or simply ‘angle bracket, the subject of this article. In Wearing’s design, the angle bracket is two hardwood strips formed at a right angle, which is reinforced by a plywood fillet (see the drawing on the right). Examples of uses he gave for the jig include holding a dovetail joint to mark the pins, and assembling nailed and glued butt joints and lapped joints.
An alternative design
I have found that a right-angle bracket without a fillet is just as sturdy and accurate, while offering two advantages. Firstly, without the fillet getting in the way, the jig can be used flat on the bench without the presence of a vice. Secondly, there will be also no need for both right-and left-hand versions of the bracket.
British author and teacher David Barron takes this a step further, and makes his angle bracket – called a dovetail alignment board -with removable side fences added (photo 1).
The side fences can include a dust groove to maintain accuracy (photo 2).
To use the alignment board to mark pins, hold the mating tail and pin boards against the fences on the jig (with the tail board on the horizontal top), and lay out the pins from the tails (photo 3).

As Wearing points out, the angle bracket has more uses than just marking dovetails. I use the right-angle jig for various joinery-related tasks, three of which are covered here.
Routing to the baseline
With its horizontal side fence removed, you can use the right-angle jig like a dovetail jig to hold a workpiece vertically and work on it with a router. For example, Canadian teacher Richard Mallach used the angle bracket in his class, allowing his students to fine-tune finger joints to their baseline with a trim router and flush-trim bit (photo 4).
Making through-tenon drawers
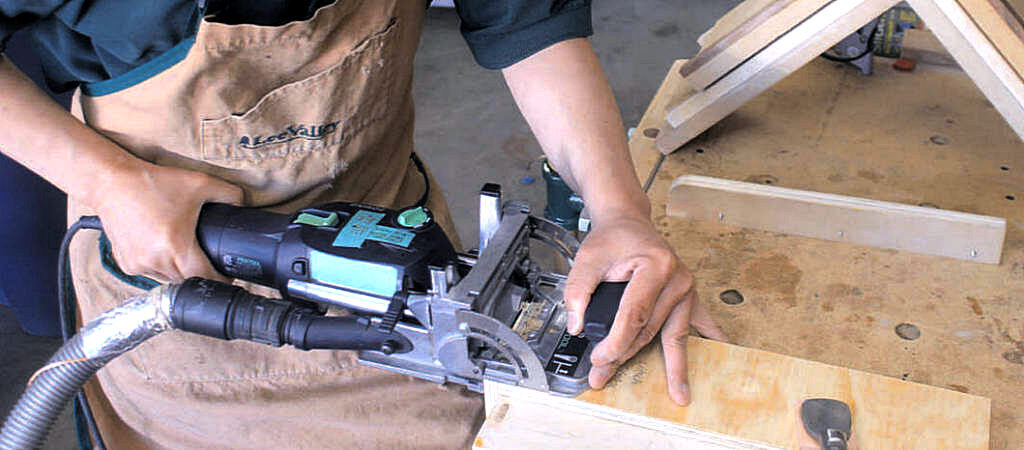
Wearing also lists drilling dowel led joints as one of the many uses for his bracket. Instead of dowels, I use the Domino Joiner with the jig to put together drawers quickly with through tenons. The mortising steps are as follows:
1. Secure the drawer front/back on the horizontal board and against the fence (photo 5).
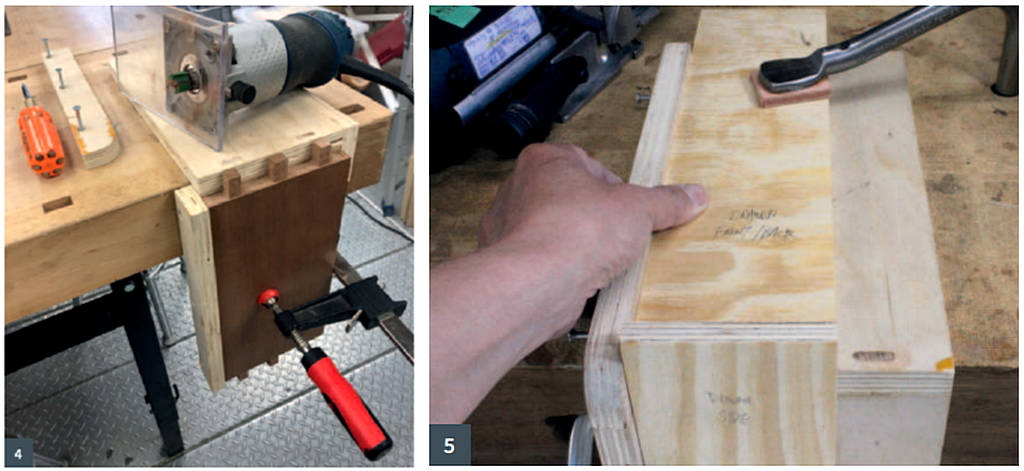
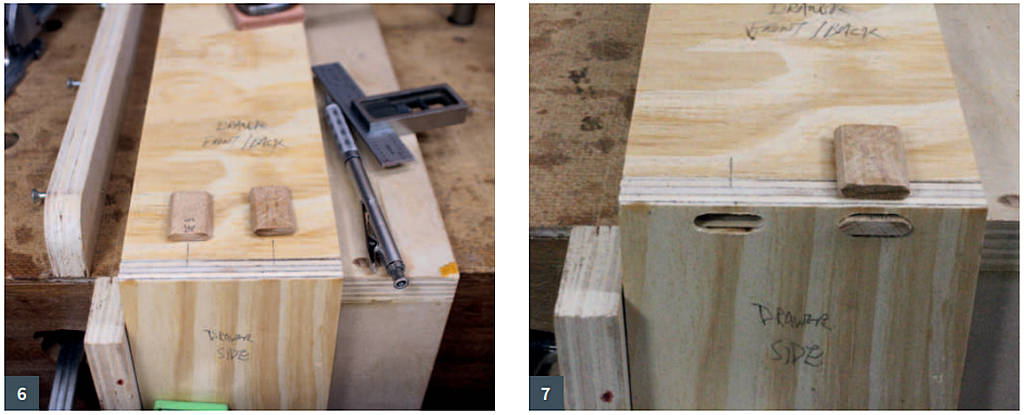
2. Clamp the drawer side to the vertical side of the jig, also against the side fence, and lay out the placement lines (photo 6).
3. Lastly, remove the side fence from the top of the jig, and mill the mortises (photo 7).
Marking angled dovetails
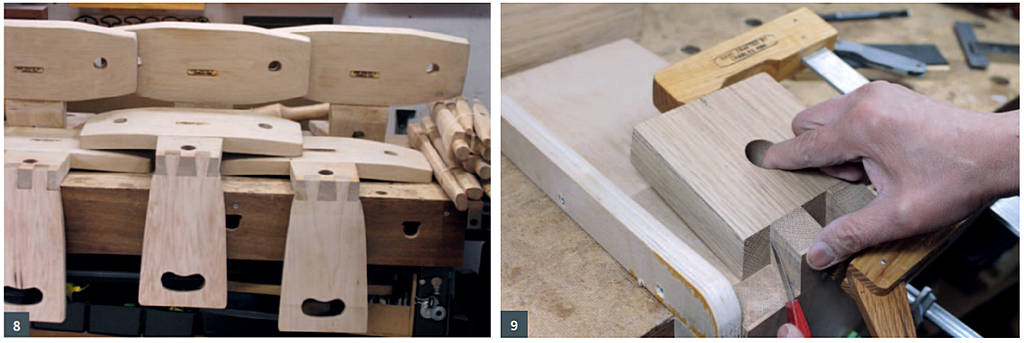
Although the bracket is right-angled, it can be used to mark angled dovetails. For instance, Danish woodworker Tage Frid’s iconic three-legged stools have a backrest that is joined to the seat extension with a dovetail joint angled at 75° (photo 8). When I made those stools, I used the right-angle jig to mark the pins on the angled seat extension.
To do this, first, cut the tails on the backrest. Clamp the backrest vertically to the jig (and against the side fence). Centre and hold the angled end of the seat extension against the backrest, and mark out the pins on the seat extension (photo 9).
Wearing asserts that the angle bracket ‘is another workshop accessory that readers will wonder how they managed without’. “The angle jig does indeed excel and trumps other workholding or alignment methods in certain joinery tasks. I have made three such right-angle jigs – with variations in size or material – and wish I had known about it a lot earlier.