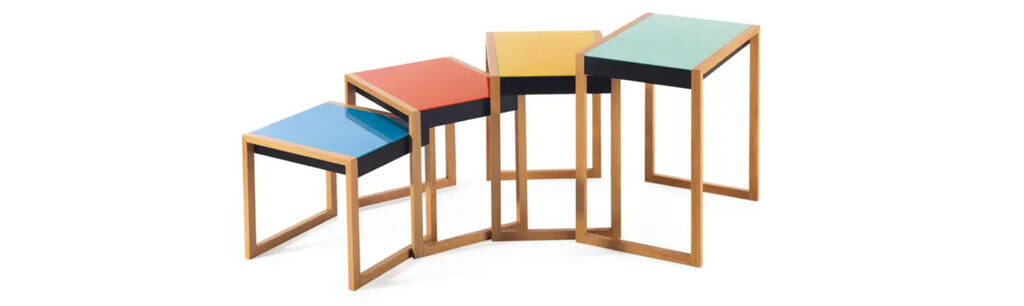
Like many design nerds, the first style of furniture I fell in love with back in architecture school was the work that came out of the Bauhaus, a German art school that ran from 1919 to 1933 and served as an incubator for artists and designers whose work would lead into the post-war mid-century modern movement. The Bauhaus style featured meticulously-designed, yet deceptively-simple geometry coupled with straightforward functionality. A great example of this is found in a set of nesting tables designed by Josef Albers in 1926. Each table featured a different-colored glass top, black aprons, and oak legs. In revisiting these tables nearly 100 years later, I wanted to challenge myself to execute Albers’ clean and precise geometry, while swapping in a few different techniques. Instead of glass, my variation utilizes plastic laminate to bring similarly bright colors to the surface. Dyed black beech inlay and edge banding wrap each tabletop in a cartoon-like outline. And while my beech leg assemblies are geometrically similar to Albers’ they employ exposed joinery where his do not. Small bolts attach the tabletops to threaded inserts in the leg assemblies, and like the original, all four tables nest neatly into one footprint, waiting to be deployed as needed. I hope you’ll give this project a try, or maybe develop your own variation on the theme!
Four tabletops, shrinking in one dimension
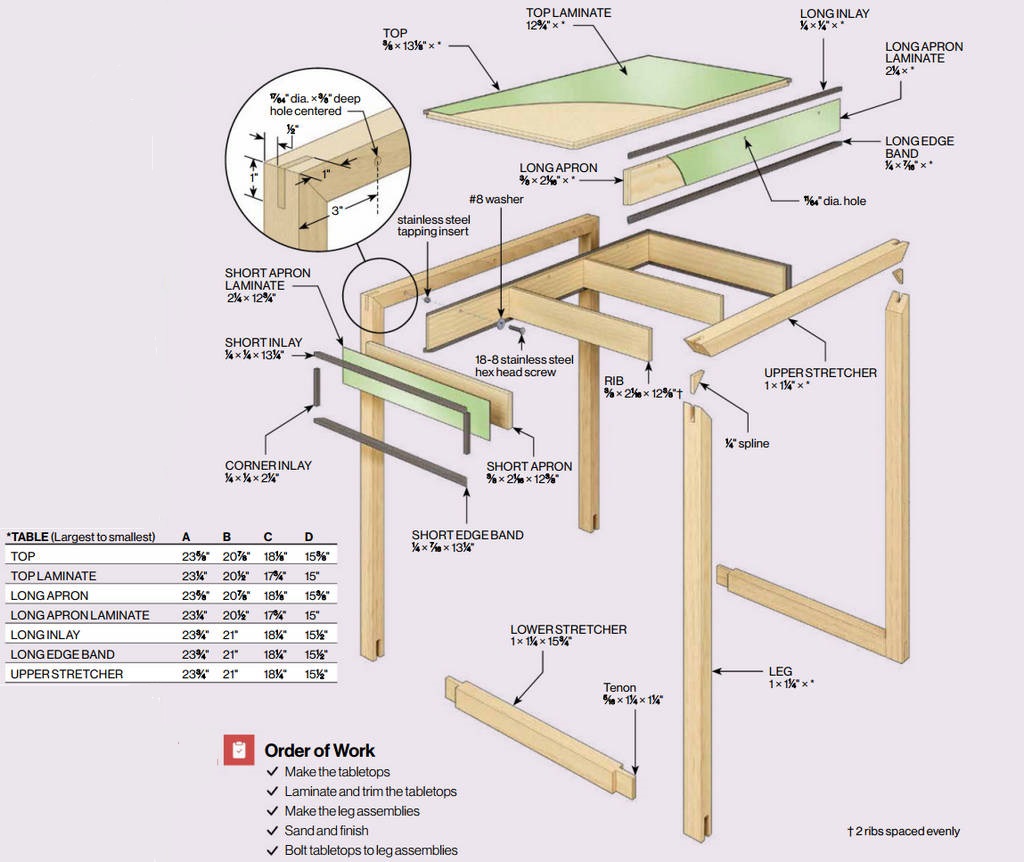
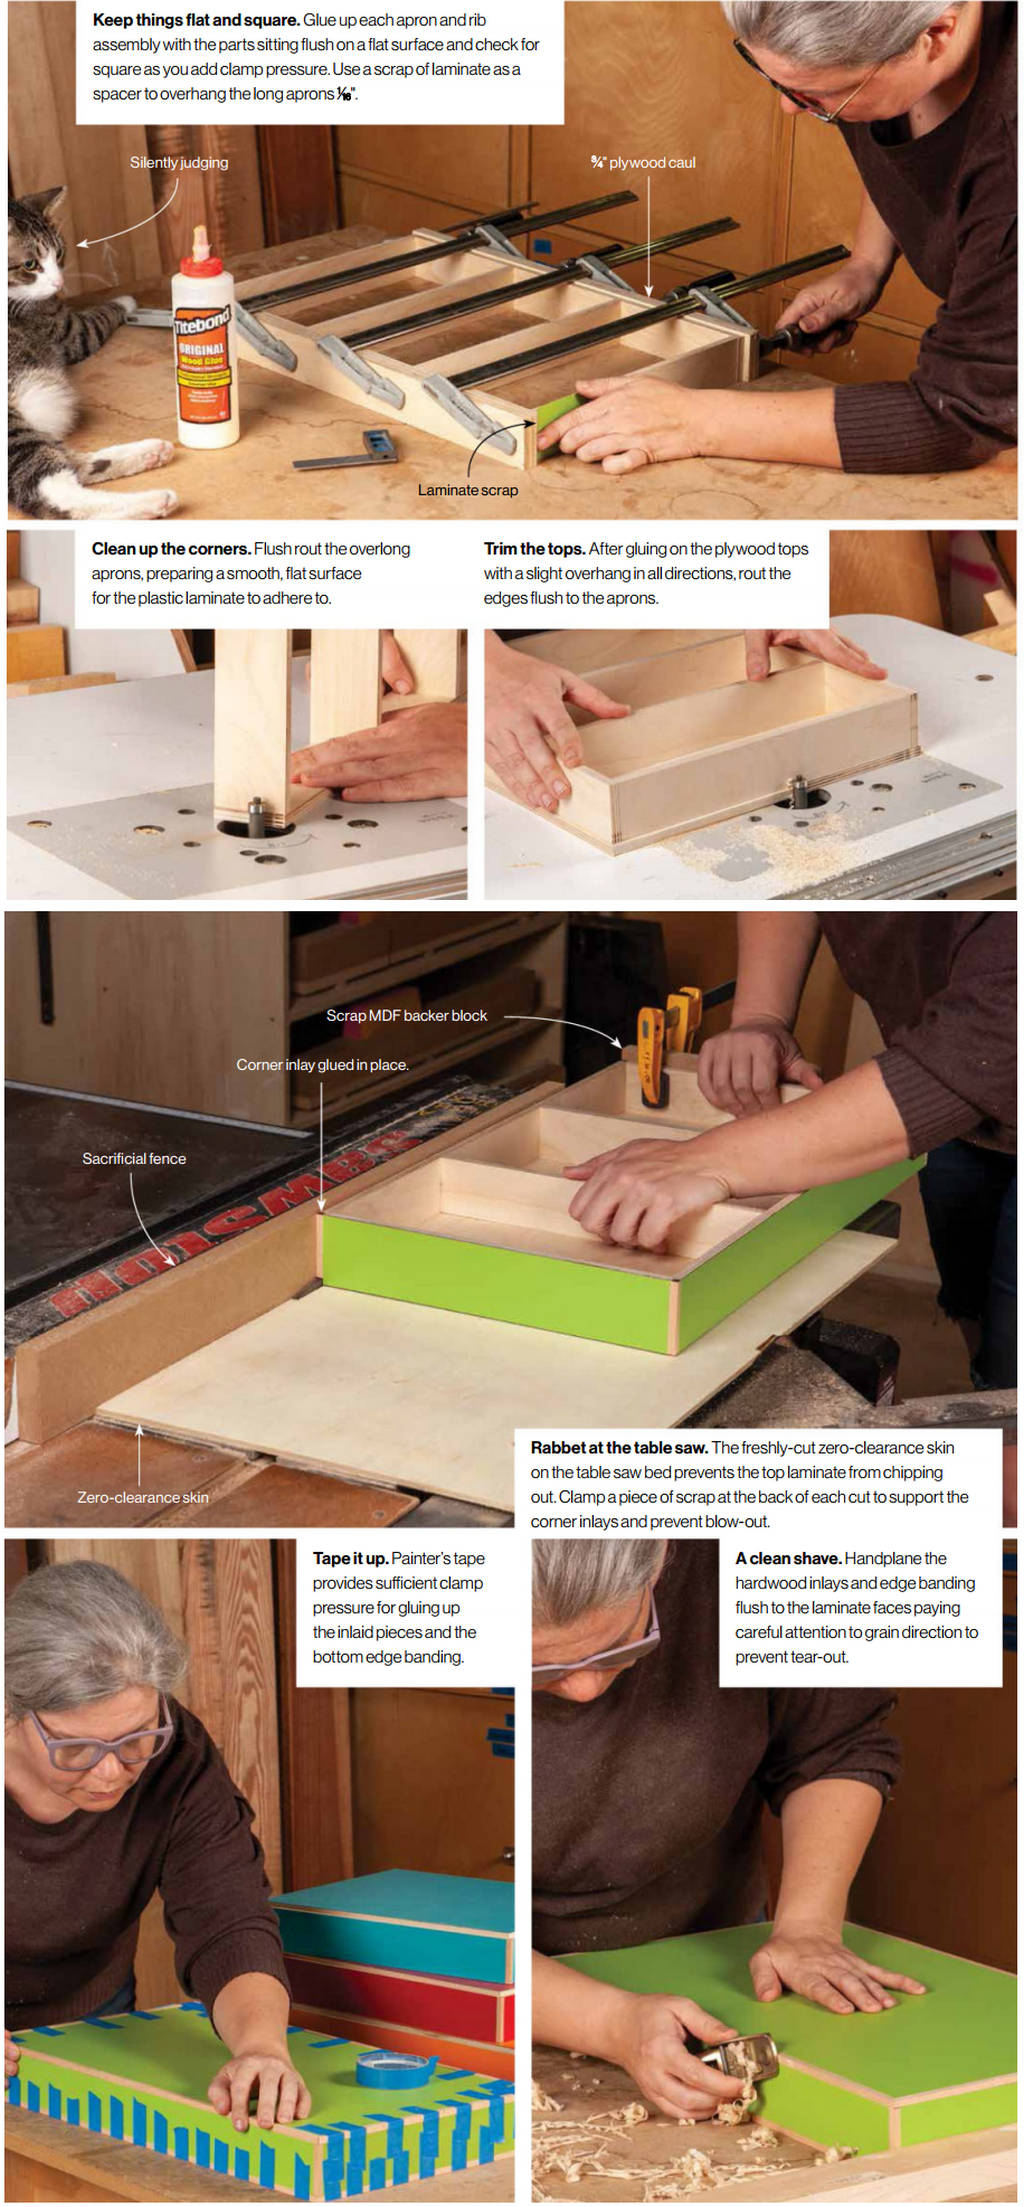
Cut the plywood table parts to size, leaving the long aprons ⅛” overlong and the tops ⅛” overlarge in both directions. Mill strips of ¼” x ¼” beech for the inlays and ¼” x 7/16″ for the bottom edge banding. On a flat surface, glue up the apron and rib assembly for each table, leaving the long aprons overhanging the short aprons by 1/16″. Flush these corners at the router table. Glue on the oversized tops before flush routing as shown. Apply laminate to the five show sides of the table top assemblies, using the methods outlined in Working with Plastic Laminate. I used a mix of Formica and Wilsonart laminate to get the colors I wanted (see Buyers Guide). Bury a dado set in a sacrificial fence attached to your table saw fence, revealing a hair less than ¼” width of cutting surface. Raise the set through a fresh zero-clearance skin or throat plate until the cutting height reaches just under ¼”. Saw the rabbets for the corner inlays and glue in short lengths of the ¼” x ¼” stock, leaving the inlay just shy of the laminate top and slightly overhanging the apron bottoms. Handplane these comer inlays flush with the apron laminate faces and the bottom of the aprons before sawing the remaining rabbets in the top. Miter the corners as you fit the inlay stock around each table top and repeat the process with the edge band stock on the undersides. Glue the inlays and bottom edge banding in place before handplaning them flush to the laminate surfaces.
Make the leg assemblies
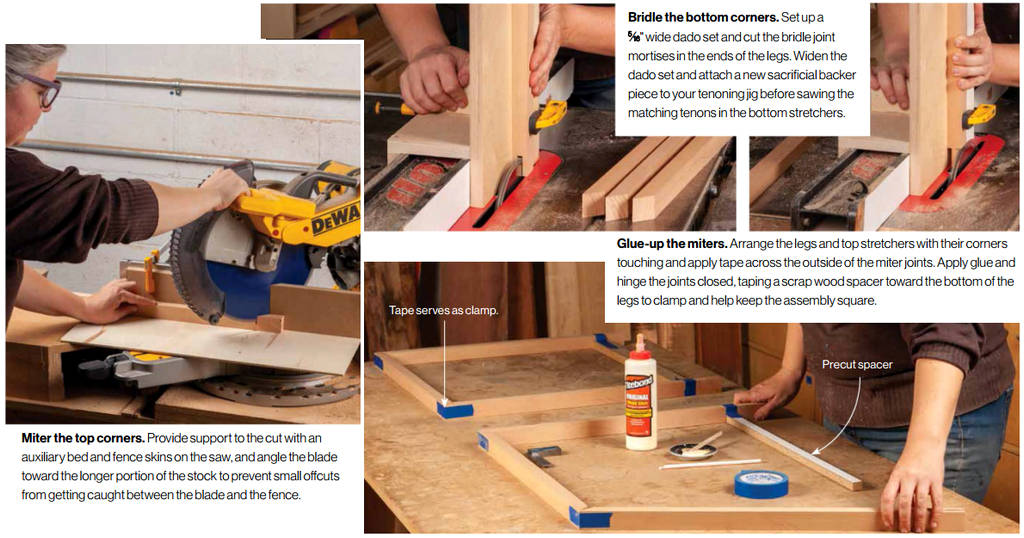
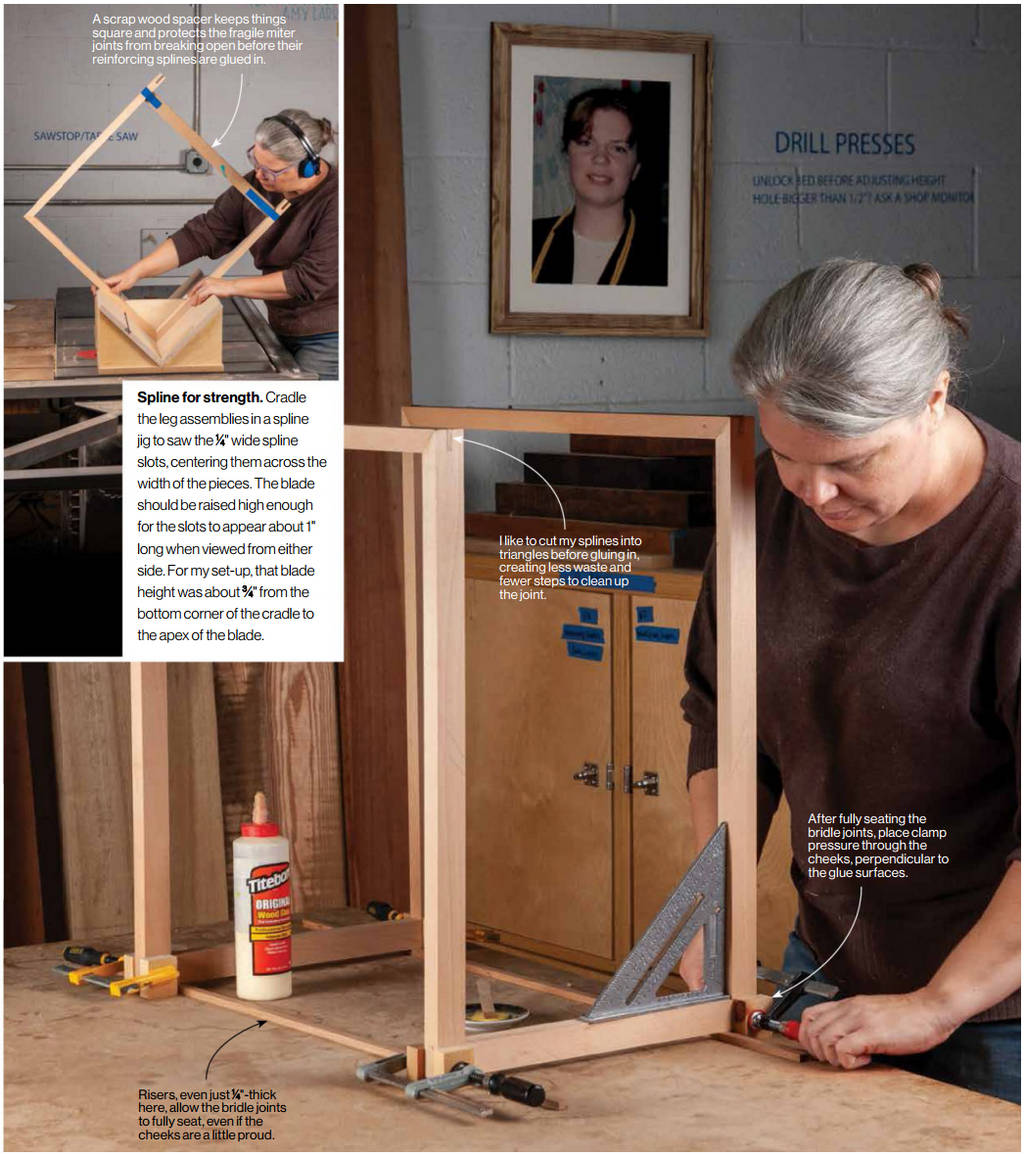
Mill enough 1 x 1¼” stock for all of the leg parts and some ¼” x 1″ stock for the splines. Cut the lower stretchers to length equaling the actual width of your tabletops plus twice the actual width of the legs (about 15%” long). Saw the legs to length, mitering their top ends. Saw miters on both ends of the top stretchers, matching the length to the actual length of each tabletop. Using a tenoning jig, saw the bridle joints at the table saw before gluing up the leg-to-top-stretcher miter joints. With a dado set, saw ¼” wide spline notches in the cured miter joints, and then glue up the bridle joints and miter splines. Handplane the splines flush to their joints.
Threaded insert time
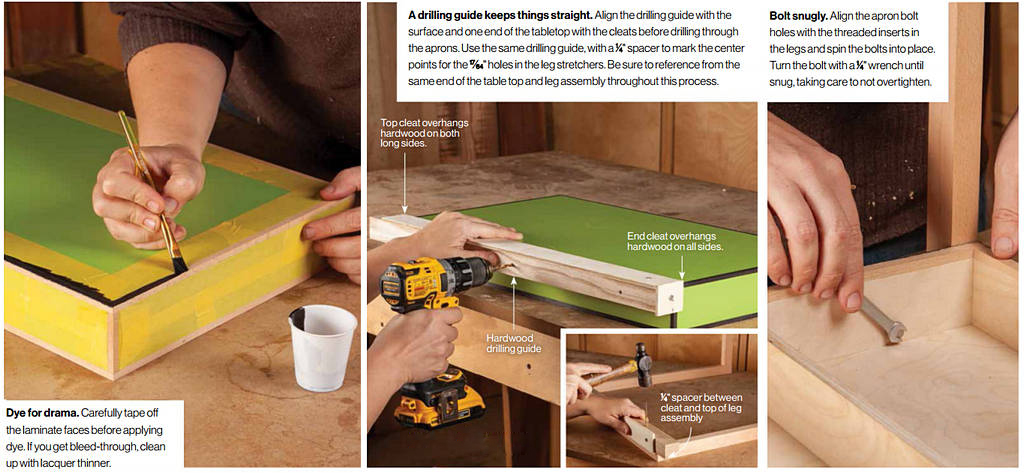
Before drilling for the bolts, tape off the laminate faces and dye the inlays and the show face of the edge banding black. Then, for each table, prepare a piece of hardwood 1½” x 1½” x table length. Lay out the apron hole locations on these sticks along the centerline of each stick: one hole in the center, one hole 3″ from each end. Drill 11/64″ holes at your layout marks. Attach cleats to one end and one side of each drilling guide. Use the drilling guides to locate and drill holes in the aprons as shown. Add ¼” spacers to the same drilling guides before marking the centers of the 17/64″ holes in the upper leg stretchers. Drill the stretcher holes before screwing in the threaded inserts (see Tips & Tricks for a fool-proof trick for keeping your inserts straight). Sand the leg assemblies and finish all the wood with clear finish. Bolt the tabletops to their leg assemblies and nest away!