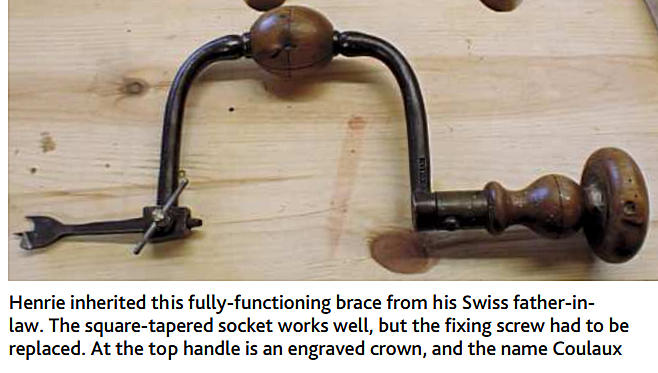
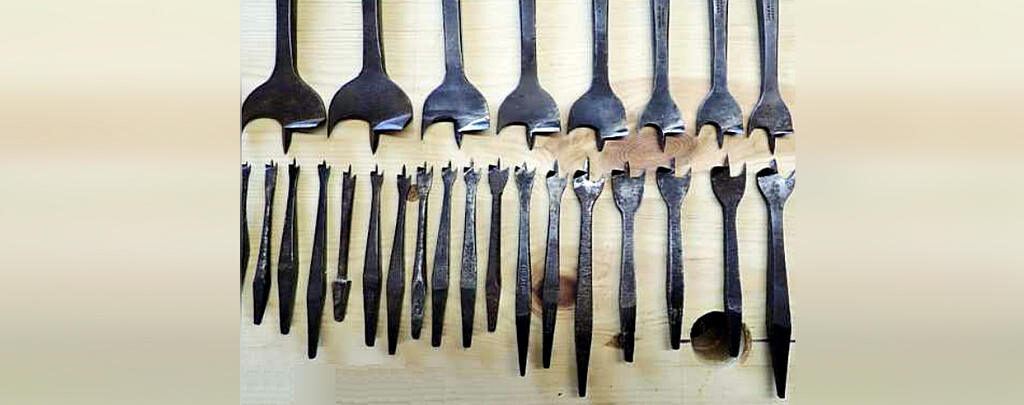
For a while now, I have been fascinated by those brace drilling bits which look a bit like flat bits which you can use in your power drill. Flat bits are handy if you need to make holes quickly. They are relatively cheap too. No, the bits I am thinking about are in my best guess from before the Industrial Revolution. My hunch is that they are at least partly handmade. I inherited a couple from my Swiss father-in-law, some years ago. They looked old and archaic. Still, when I studied their shape it was obvious how they were supposed to work. At the time I never thought I would have time or interest to use them for real. This changed when I started my small retirement workshop with the idea to concentrate on hand-tools. Recently I could buy a good handful of those ‘flat’ bits, very cheaply from eBay. Now I have a nice collection.
When I wanted to find out more, I found it difficult to unearth much information. The Internet is quiet about them. And not even the blogs of Paul Sellers, whom I greatly admire, taught me anything about these particular bits. (Incidentally, Paul’s blog says some very useful things about the more common spiral-shaped auger bits for use in a brace.) All I could find out is that some people call them ‘batwing centre-point brace bits’. I hope that someone knows a proper name for them.

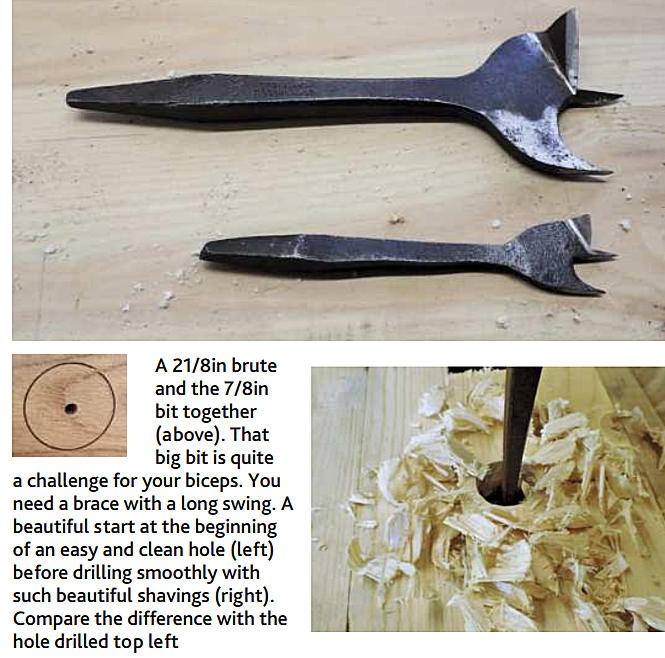
When we study the bit in detail, we can see several functions in one simple piece of steel. The centre point enters the wood first. This defines the exact location for the hole. Then there is the pointy bit on the side with the curved ‘batwing’, which is the spur. This has the task of severing the wood fibres on the perimeter of the hole. The cutting edge enters the wood last, and lifts the waste out of the hole. The width of the cutting blade tends to be a bit less than the spur is away from the centre. This also helps prevent accidental breaking away of wood fibres close to the edge of the hole, as is the case with the spur. All in all, this is another beautiful example of ‘form follows function’.
Right, I thought, let’s see how well they work. What that meant, was the beginning of another learning process. The bit I started with was suitably rough-looking, but otherwise in good physical shape. Before fettling, an attempt was made to drill a i/8in hole in a piece of not very hard scrap. The fibres were quite torn, and the sides of the hole were very ragged. And it was hard work to make any progress. There were no proper shavings, just crumbled wood dust.
It was time to bring out my file box. Before I started, I considered that there is only a finite amount of filing possible without changing the shape of the bit too much. And therefore it was important to work tactfully, in order not to remove more metal than necessary. After scrubbing some rust away with a wire brush, a fine flat file was used to clean up the underside of the cutting edge. Take care not to change the angle, so that the cutting edge can bite into the wood like it should. Then the inside of the cutting edge was carefully filed clean. It is important to keep the cutting edge nice and sharp. Lean on the file in such a way that as low as possible an angle is achieved, without changing the existing angle. All these surfaces can be refined later with a fine diamond card.
A sharper centre point
More delicate is the centre point. All these bits, as far as I can see, have centre points with flat surfaces and sharp edges. Now I don’t think this is an accident of the making process. Most likely those sharp edges are there to help sever the wood fibres, so that the point can penetrate more easily. With a small and fine file, like a Swiss needle file or saw file, the point can be cleaned up with really sharp edges between the facets.
The most delicate part to sharpen is the spur. On the one hand the tip has to be really sharp. On the other hand we must make sure that it remains long enough to reach the wood surface before the cutting edge, so that it can score all around, to end up with a beautiful clean-edged hole. This is also likely to reduce friction, and make the work a bit less hard to do. Again, with that same fine needle file clean up the outside of the spur, keeping the angle so that the tip is just slightly furthest away from the centre. In the pictures it is visible how that spur points ever so slightly outwards. The inside can then be done. The cutting point of that spur should touch the wood so that the trailing part is slightly deeper in the wood than the leading edge, and as far away from the centre as possible. In Germany there is a beautiful expression for this kind of delicate work: ‘Fingerspitzen gefuehl’. You make use of the fine sensitivity in your fingertips. Take your time, and all will be well.
Spurred into action
Now, with the sharpened bit in the brace, it can be tried out. Start the hole by very gently sweeping the spur all around the surface. If this is done right we get a beautifully clean circumference. Another benefit of the spur touching the wood the same depth all around, is that the bit should be pretty much square to the wood in all directions.
The cutting edge now produces actual shavings, and it has become much easier to drill a hole. I had expected that the cutting edge drawing itself under the waste would help to pull the bit into the
wood. This was not the case. I suspect that this is because of the pressure needed to push the centre point and spur into the wood fibres. I find that these bits can be of real practical use, as long as the holes needed are not too deep. A more modern spiral auger will produce much straighter holes. Later, I tried a much larger bit of 21/8in diameter. As expected, this was very hard work. I realise I must have mislaid, somewhere along the way, my youthful brawn.
But then a hole this size is not easy to do by hand with whatever type of bit. Maybe I should look for a brace with longer swing for more leverage. Or it should be used with one of those breast drills as described in Woodworking in Estonia, recently translated and published by the Lost Art Press. I hardly ever need a hole that size, so the Estonian breast drill will have to wait.

