Mark Palma shows how to add vibrancy and colour to your work.
Woodturning, like everything else, goes through cycles and trends. Adding an acrylic or epoxy accent or element to a turning may be something you have considered or tried (hopefully successfully). A common problem with adding a cast element to wood is that you experience unpredictable results. Sometimes everything works well, and next time either the resin doesn’t cure, it’s cloudy or it has bubbles that detract from the end result. Let’s look at some suggestions and strategies to help you get safe and predictable results with cast elements in your turning.

Making a small project
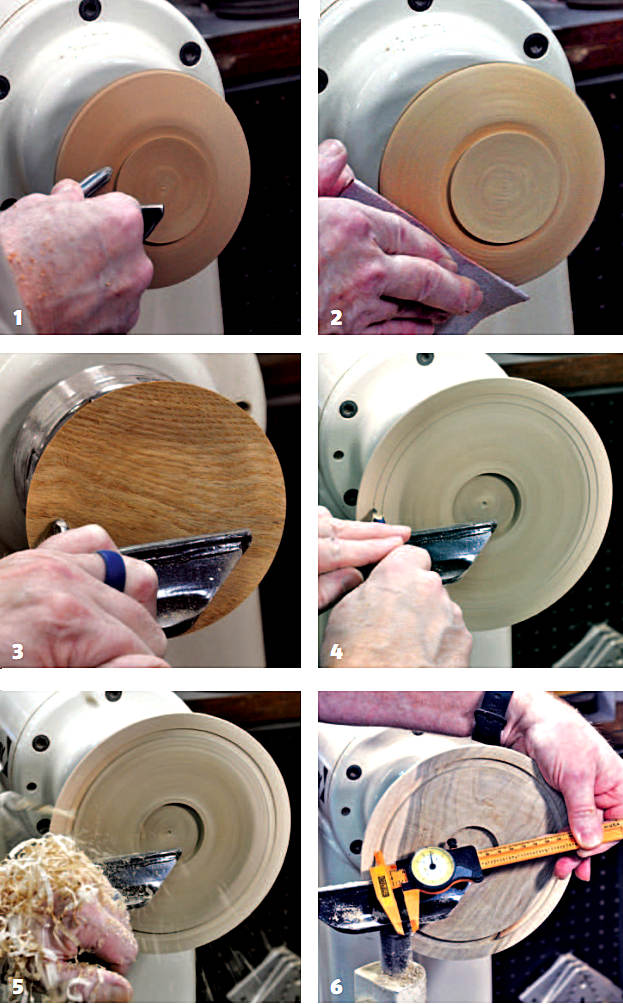
1 A good first casting project is a cast rim element into timber. We are using a small scrap of wood and turning a small bowl (or plate). Turn the outside and create a gripping point for your chuck. Sand the outside of the piece so that if it turns out you can finish it and have a nice little piece.

2 Sand the bottom as you would any turning.
3 Reverse the piece, holding it in the chuck. Make a cut to true up the face of the work.
4 Take a pencil and mark out your proposed accent area. Stop the lathe and look critically at your proportions. Cast rim elements seem to like a band of wood on both sides of the element that frame it with some symmetry. You can play around with wider or narrower bands of wood or casting material to get the look you like.
5 Once you have what seems pleasing to your eye, use a sharp parting tool to cut the groove for the casting material. Note the ribbons coming off the tool. Strive for a straight-sided channel with a flat bottom.
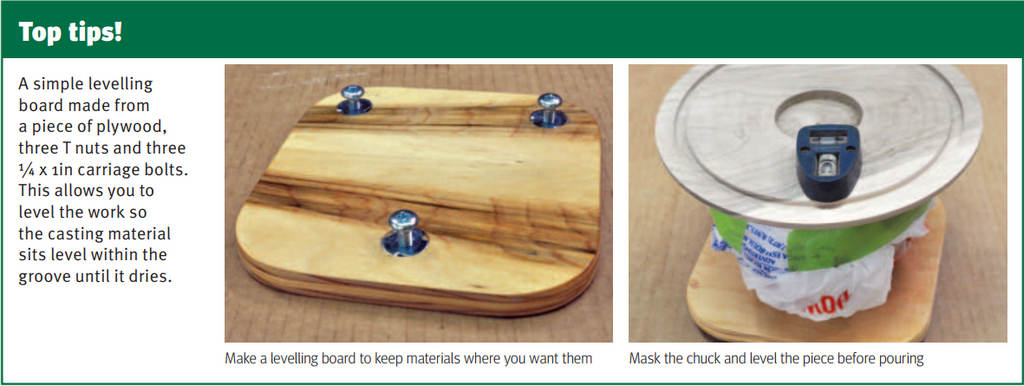
6 Measure the channel to see if the depth is as desired. In this sample it is square (1/4 in deep and 1/4 in wide). Remove the piece from the lathe with the chuck attached. Mask off the chuck if you want to avoid spilling casting material on it. Painting the channel with acrylics (black works well) seems to enhance the vibrancy and perceived depth of the casting material. Again, this is where making a sample board can allow you to see how various background colours impact the way the same mix in looks within the wood. This step is worth the time. Let the paint dry for 30 minutes.

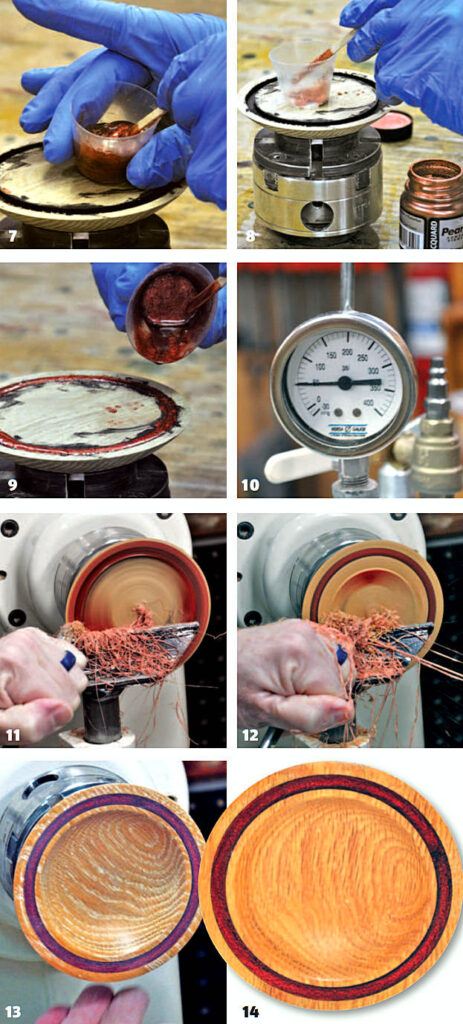
7 Put on your PPE and mix the casting material carefully according to the instructions.
8 Add some copper powder into the mixture.

9 Pour the mixture into the groove to completely fill it.
10 The casting material used benefits from insertion into a pressure pot –
a sealed chamber that can withstand pressurisation (the pot used recommends 50psi and has a pressure relief valve that opens if you over pressurise the pot to TOOpsi). Use a pot designed for this purpose, read and respect the instructions, and test the relief valve (they have a manual relief feature) before use. The piece was removed after an overnight stay in the pressure pot. As a safety note, avoid the temptation to wave the flame of a torch over casting material to pop the bubbles in the mix. It does work with some casting materials, however it is fraught with danger within a wood shop. A pressure pot is a far better option.
11 Since the piece was still mounted on the chuck it was easy to mount on the lathe and it still was in round. Using a very sharp Vein bowl gouge (measured by the overall bar diameter), take a light cut to even out the rim with the casting insert. Note the long ribbons of casting material indicating a clean cut.
12 Next the piece was hollowed as you normally would do when creating a small plate or bowl.
13 Sanding followed through to 600 grit.
14 The piece was finished with one coat of Danish oil.
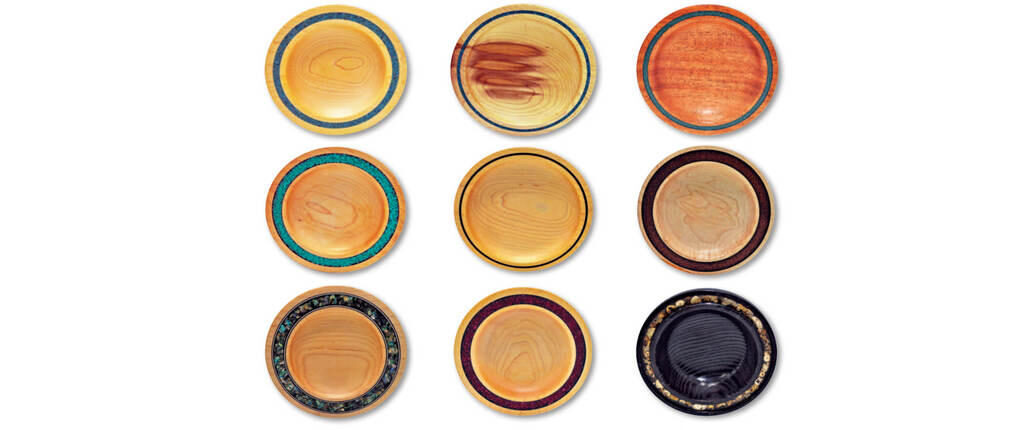
Using the suggestions in this article you can achieve success with casting materials. If you like the effect then you can move on to larger casting projects.
Pressure pots for casting
Resin casting pressure pots are designed to remove air bubbles from resin as it cures. Ifyou thinkthis is the way forward for you then do some research first. There are many websites dedicated to resin casting and information is readily available. Rememberthat you will also require a compressor of a specification appropriate to the pressure pot.

