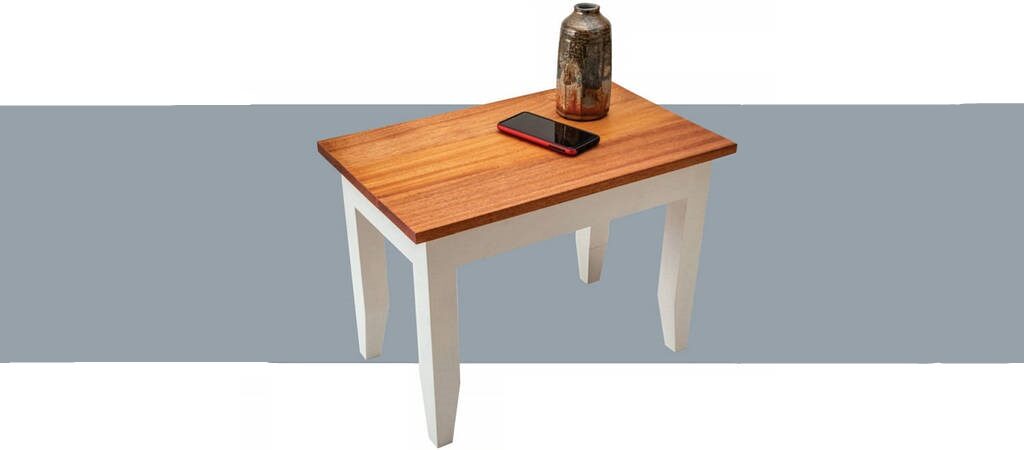
Using techniques from our last Woodworking Basics article, we take the next step up to a laminated tabletop.
 This is the second installment of our Wood-working Basics article series. In the April issue step stool project, we covered, in part, cutting the ends of prepared stock square and cutting legs and aprons to length. Those same techniques will be used in this small table project. If you missed that issue or want to refresh your memory, you can find a video and downloadable article PDF covering the previous project at woodworkersjournal.com. This time around, we will assume you have those basics well in hand.

Solid Wood Tabletop
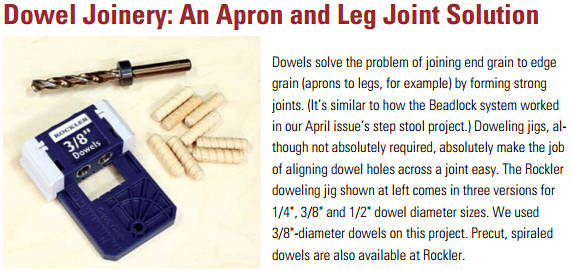
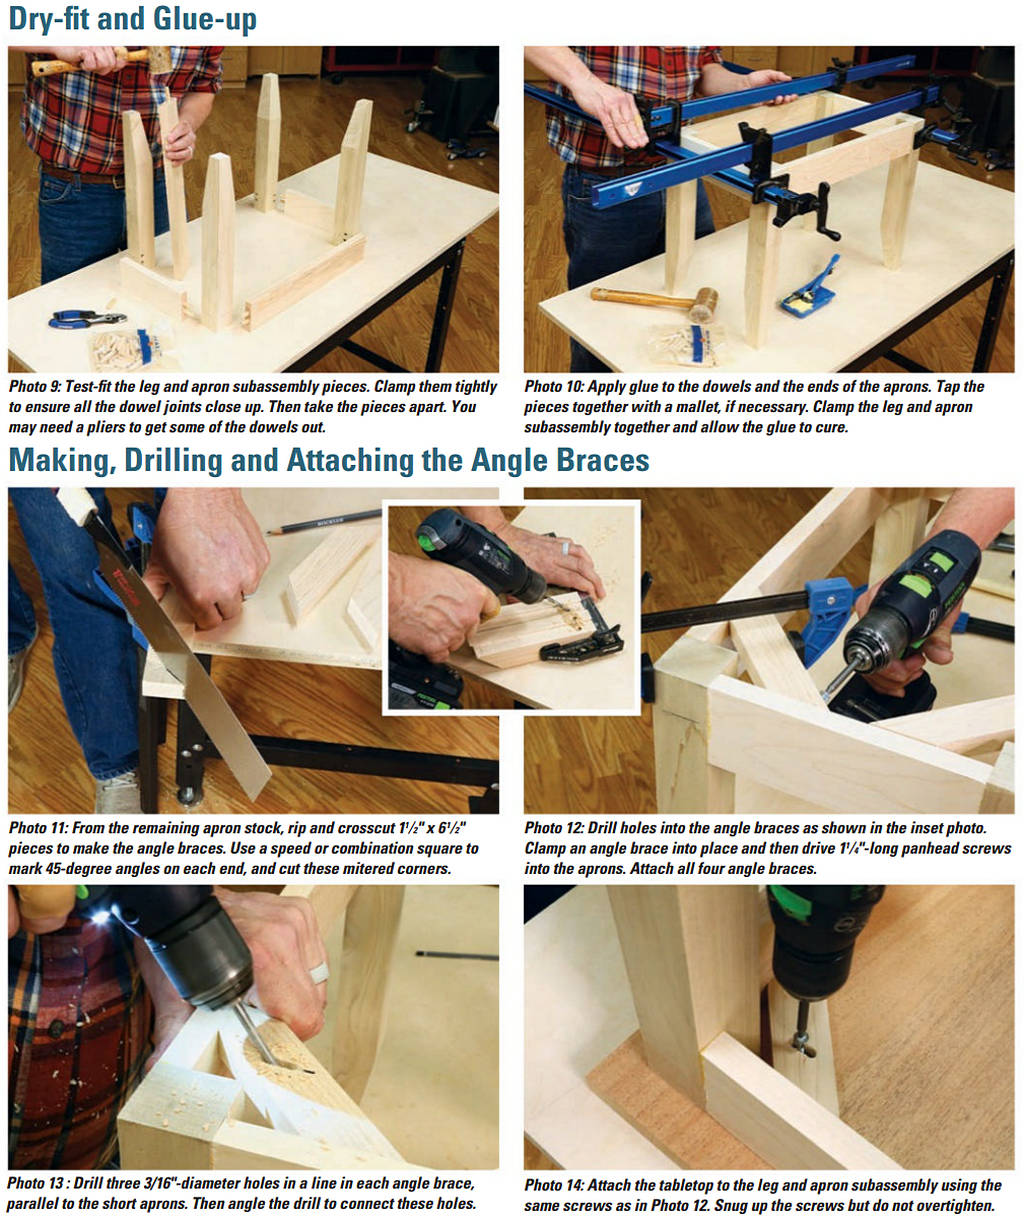
 This small table has very similar parts to the step stool — legs, aprons and top. Again, we will avoid using power tools to keep things simple. The biggest difference in this project is that the tabletop is not made of plywood but pieces of solid wood instead (beautiful mahogany in this case). This change adds beauty but introduces several woodworking problems to solve. First, solid wood expands and contracts widthwise with seasonal humidity changes. For that reason, if we attached the tabletop to the legs and aprons with glue blocks as we did with the step stool project, that expansion could break the glue joints between the legs and aprons, or its contraction could cause a crack to form in the tabletop. We solve this problem by attaching the tabletop with screws driven through elongated holes in the angle braces. These slotted holes, oriented parallel to the tabletop’s width, will allow the mahogany to “move” through the seasons as needed.
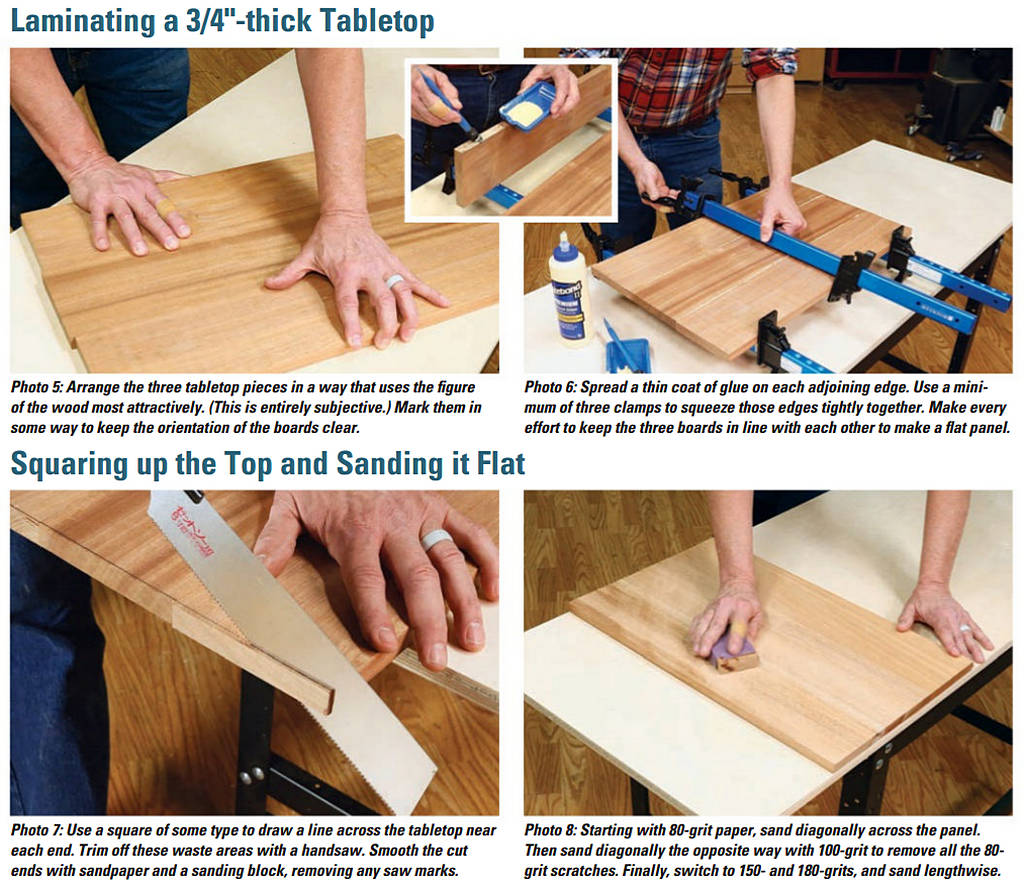
 There is a second woodworking problem you may have to address regarding the tabletop. It’s made from three pieces of solid lumber that we sourced from rockler.com. They are pre-dimensioned at 3/4″ x 5″ x 24″. When you put them side by side, their edges may align perfectly well for a glue-up. If so, you are golden. (We tried many of these boards to see how straight they were, and they aligned well.) But if your boards show a gap, you need to straighten their edges somehow. We tested this as well and found that trimming just a tiny bit off the edges of the boards using a table saw fixed the problem. You can also solve it with a sanding block and 80-grit sandpaper to remove the high spots on the edge of a board. The video of making this project will demonstrate this edge-flattening technique.
A third detail to solve regarding the solid wood top is flattening it. When you glue the three boards together, there will likely be tiny misalignments between the edges. Solve this by sanding the panel flat. Start with 80-grit paper and sand diagonally across the panel using a sanding block. Sand until the panel is flat. Then shift to 100-grit and sand diagonally in the opposite direction to remove the 80-grit sanding marks. Now change to 150- and then 180-grit sandpaper and sand longways, with the grain. (Power sanders would speed this up!) Of course you need to sand both faces. Finishing the end table is up to you.
Working with this solid top has advanced your woodworking skills considerably!

