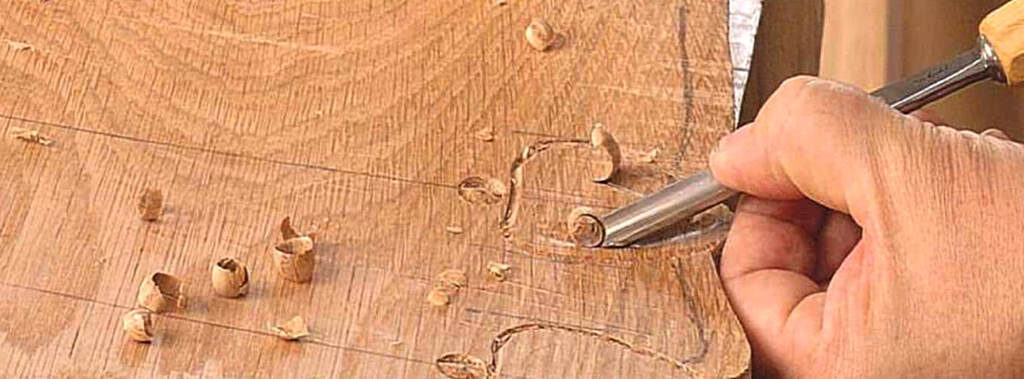
In the next part of this series, John Bullar looks at how chisels and gouges are used by furniture makers, before going on to discuss a number of techniques and the types available.
Most people are familiar with the basic chisel, which is used for joinery (photo 1), but the wide range of shapes and sizes found in a cabinetmaker’s workshop might surprise them. Here, we’ll look at the ways in which furniture makers use chisels, as well as how to choose suitable tools for furniture making.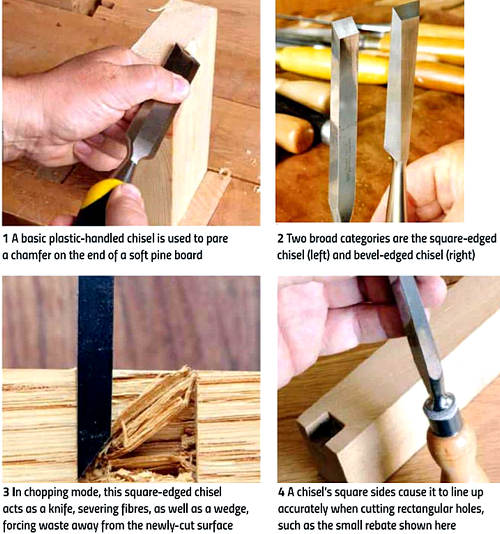
The second part of this article looks at gouges. Despite their crude-sounding name, these are fine, specialised chisels with a cutting edge that curves from side to side. Over the years, gouges have been developed in a variety of patterns for carving work. Carving has always been a notable feature of top-end furniture making and, while it might sound like a specialist art, even the simplest carving can greatly add to the individuality of any maker’s work.
A safety note on using chisels and gouges: always keep the wood firmly clamped, with both hands behind the cutting edge.
CHISELS
Square or bevelled
While all chisels have a bevel on the end to form the cutting edge, the sides may either be at right angles as in square-edged chisels, or sloping as in bevel-edged versions (photo 2).
Chopping or paring
In the main, chisel action is applied in one of two ways: either chopping or paring. Chopping involves applying impact to the chisel by tapping the handle with a mallet; paring applies a firm, slow hand pressure to the handle, with the other hand guiding the shaft near the cutting edge.
Both chopping and paring can be carried out horizontally with the chisel handle gripped like a knife, or vertically with the handle held like a dagger. Basic skills of horizontal and vertical paring require practice, which is best done on scrap with the wood firmly gripped – accidental overshoot is more likely to occur when paring as opposed to chopping.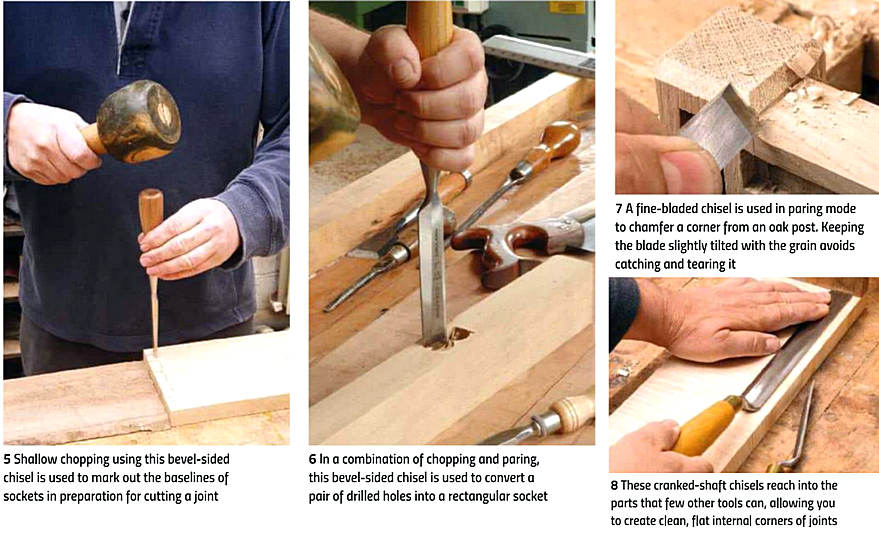
Chopping & paring
Chopping with a mallet and chisel is the traditional method for cutting joints. A succession of shallow chops are made along the length of the socket to remove a layer of chippings (photo 3). Chopping a socket back against a line can be judged by eye, looking sideways-on at the chisel, ensuring its kept vertical.
Chopping away too much waste in one go will force the chisel backwards beyond the line, thus making the socket too long. The solution is to chop away the bulk in front of the final line, then pare back against it. We’ll revisit this later in the series when looking at joints.
Firmer chisels have quite shallow, square sides while mortise chisels have deep, square sides. Mortise chisel blades are thicker than their width. The purpose of this is to avoid bending caused by continuous pounding, which exerts a larger force on the sharpened side and leaves the top unsupported; also, to locate – or ‘register’ – the blade squarely in the mortise slot. For this reason, deeper chisels are often referred to as registered mortise chisels.
Chisels were traditionally the only tools used for cutting a socket. Nowadays, however, they’re commonly used to square up the edges of a socket after machining using a router or drill. A mallet can exert a strong force on the chisel but is often used to deliver light, well-regulated taps. Wooden mallets are best used when driving wooden handled chisels, to avoid splitting them.
When paring across a flat surface, the chisel handle mustn’t interfere with the plane of the back. Cranked paring chisels keep the handle and fingers well above the plane of the blade’s underside (photo 8); this is ideal for cleaning across flat faces into corners or for clearing the base of a housing.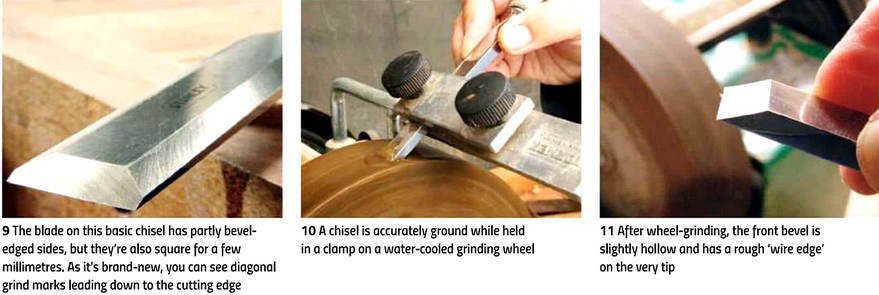
Chisels for paring
Any chisel can be used for paring provided it’s sharp enough. A specialised paring chisel is thin, manoeuvrable and light in weight, but can’t take heavy pounding from a mallet. The flat back is used to locate the cutting edge. If it’s not flat, the result will either be a hollow surface or no cut at all.
It may be come as a surprise, then, that long-handled chisels provide better positioning accuracy than short ones. This is because the guiding hand pivots the chisel near its edge, while leverage from the driving hand allows for control and fine movement.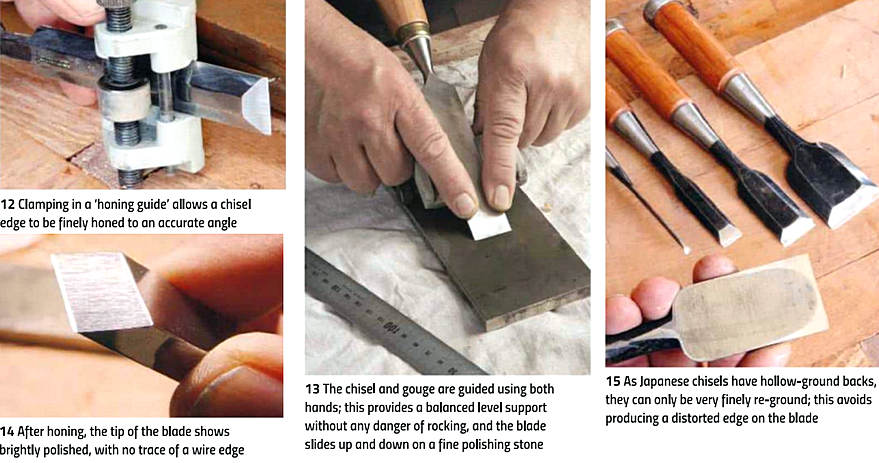
New chisels
A basic plastic-handled chisel is sufficient for occasional use but furniture makers generally prefer wooden ones, which are lighter in weight and don’t feel sweaty in the hand. When buying a new chisel, it may have a protective coating, which needs to be peeled off the cutting edge. The angle at which it’s ground exaggerates any unevenness on the back or bevel, thus resulting in a jagged cutting edge (photo 9). To cut smoothly and efficiently, both the back and bevelled front must have polished surfaces, which will ensure the cutting edge is straight.
While some chisels sold for furniture making arrive with a well prepared cutting edge, many basic versions have coarse grinding marks left by the manufacturer.
Sharp chisels
A chisel edge works as a knife and wedge, severing fibres then driving the chip apart from the solid wood. Sharpness is essential – the less force required, the less damage to surrounding wood. Sharp chisels are safer because there’s no need to force them, so they therefore afford the user greater control.
Furniture makers normally hollow-grind the bevelled edge against a water-cooled wheel (photo 10), then hone the tip on a fine, flat stone (photo 12). Bevels are ground to 25° or so for paring, while mortise chisels require 35° or more for heavy chopping. Larger angles are also used for chopping denser hardwoods.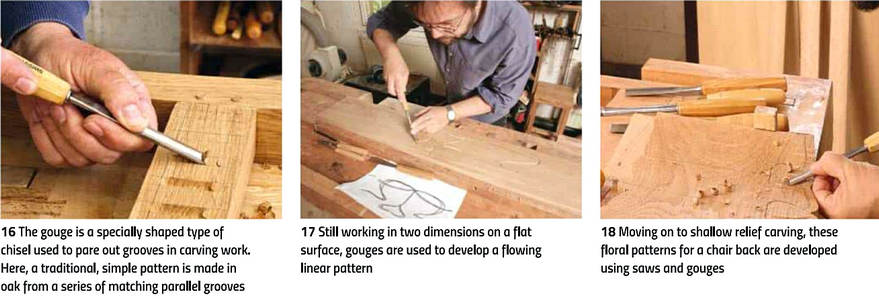
Japanese chisels
As Japanese chisels have hollow-ground backs, they can only be very finely re-ground; this avoids producing a distorted edge on the blade (photo 15). The main feature of Japanese chisels is the fact the blades are made from a lamination of hard steel, which is faced onto a shaft of soft iron or mild steel. In manufacture, the two red-hot metals are pressure-welded together. The chisel’s hard underside holds a fine edge while the soft upper reduces sharpening time while acting as a shock absorber to improve edge life.
GOUGES
Gouges for carving
The gouge is a specially shaped type of chisel, which is used to pare out grooves in carving work (photo 16). Most gouges have the bevel outside their curve and are described as ‘out-cannel’.
As well as for decoration, basic carving skills afford a furniture maker greater control over the detailed shape of their project. Many furniture makers produce very good work using only straight edges and flat surfaces, but those who venture into curved work will require some carving ability, if only to tidy up joints and corners.
The simplest form is chip carving where a series of shallow wood chips are removed using a gouge or knife, chopping across the grain to build up a pattern (photo 18). Traditional variations on this can include longer grooves, still cutting across the grain. If the patterns include curves, then some parts of these will need to follow the grain.
This is more awkward as the wood is likely to tear or splinter when a gouge runs along it. If it’s not possible to work the gouge with the grain, however, then the curves must be removed with a series of wide chips across the grain. All this will become clearer if you experiment on scrap wood.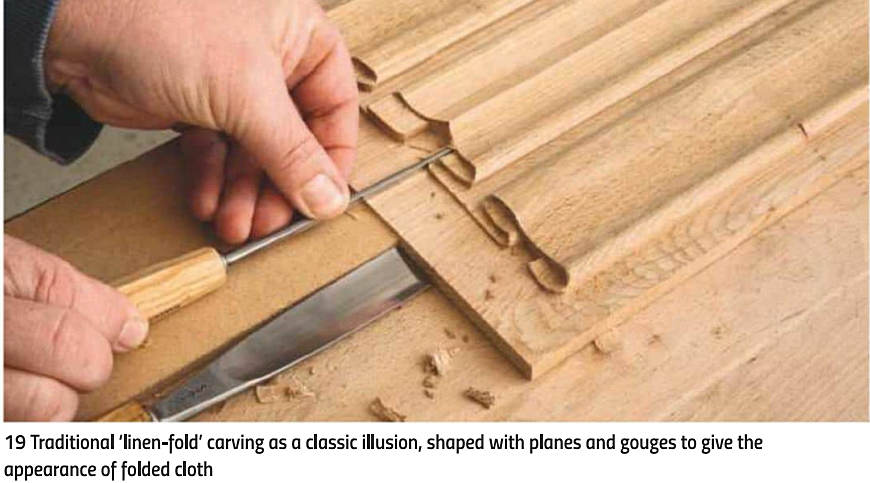
Developing depth
Moving from flat surfaces to three-dimensional or relief carving is often a matter of appearance rather than cutting to any depth. For example, the traditional linen-fold pattern was used on panels to create a shallow edge that fits in a frame (photo 19). A series of shallow grooves, the ends of which are shaped using gouges, creates the illusion of deep folded cloth.
Rails can be carved with simple patterns that, when fitted together, give the illusion of more complex three-dimensional structures (photo 20). While way beyond what we’re discussing here, it’s interesting to discover that some contemporary furniture makers, such as Georgy Mkrtichian, create detailed, magnificent carvings (photos 21, 22 & 23).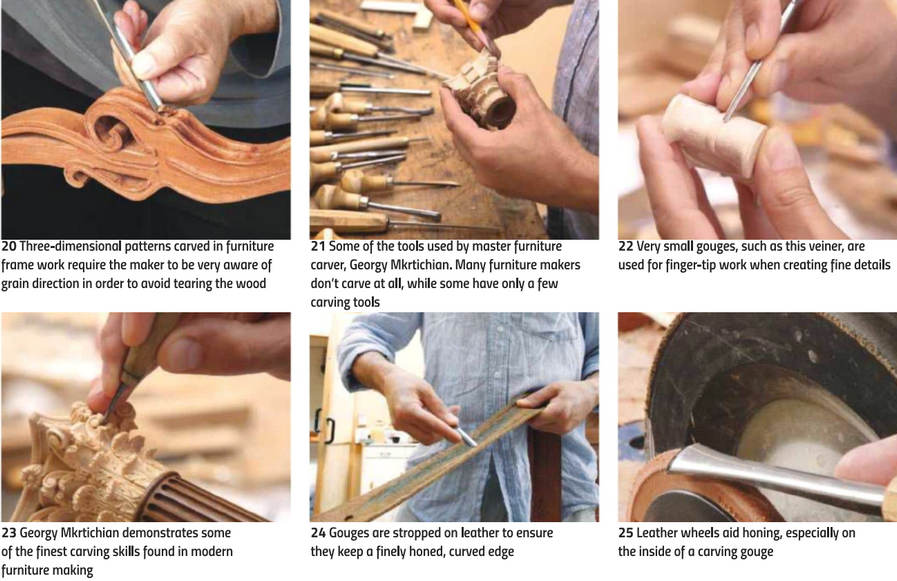
Sharp gouges
Sharpness is even more important when it comes to gouges as opposed to chisels. This is because they frequently need to cut along the grain without splintering. Carving is also invariably on show, unlike the internals of joints, for example. The surfaces used to keep gouges in shape are fine-grained slipstones and the final honing and polishing is completed using leather strops (photos 24 & 25).
Conclusions
Chisels are essential for making joints and even makers who work largely with power tools rely on chisels to clean up ends and edges. Gouges allow furniture makers to move beyond minimal designs and add character to their work.
It’s not always the prettiest, shiniest tools that work best, however. Because the quality of steel used and the way it’s been prepared is invisible judging chisels and gouges simply by inspection alone is a difficult task. The reputation of the manufacturer and experience of other users are therefore important factors here.

