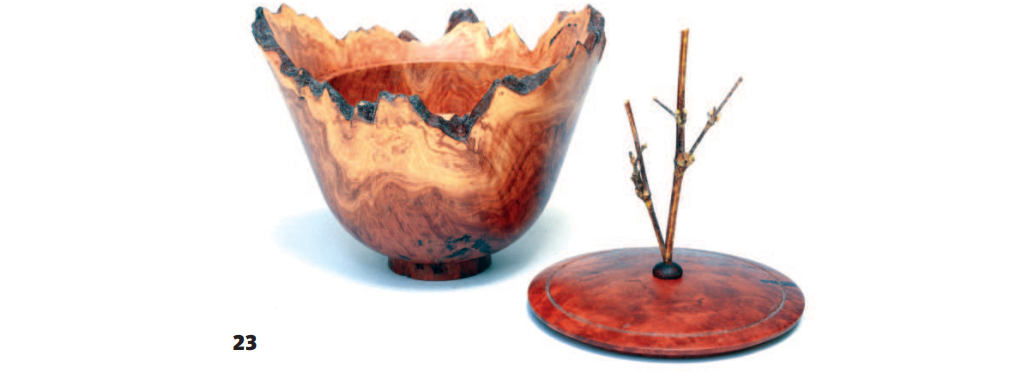
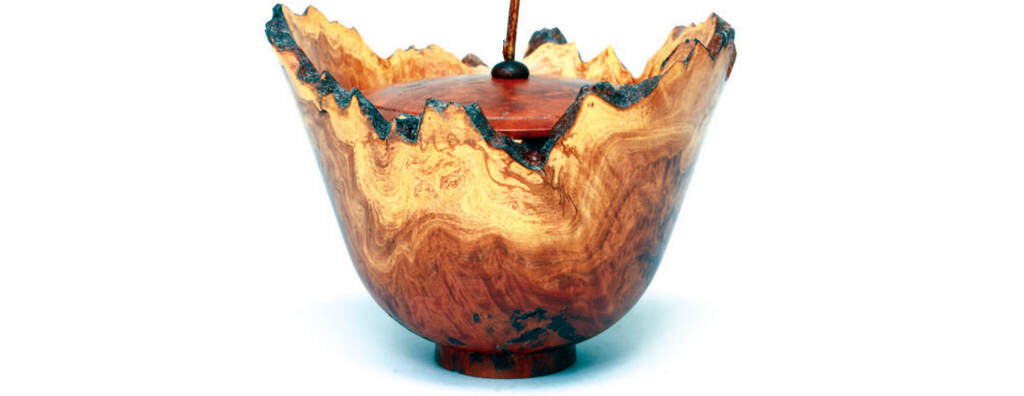
A natural-edged bowl intrigues so many of us as it provides a direct relationship between the tree it was extracted from and the final product. Not only is the bark on show but so is the sapwood, often paler than the true wood, providing a visual connection to what anyone can see when they cut a branch or trunk of a tree in their own garden. Most people struggle to understand how turners can convert a tree into a bowl, but this is where a part of the understanding is laid bare.
To go one small step further, you can create a lidded container or box by turning a rim just below the inner lowest point of the natural edge on which a lid can rest. I’m sure I’m not the first to have thought of this, but here’s my take on the idea.
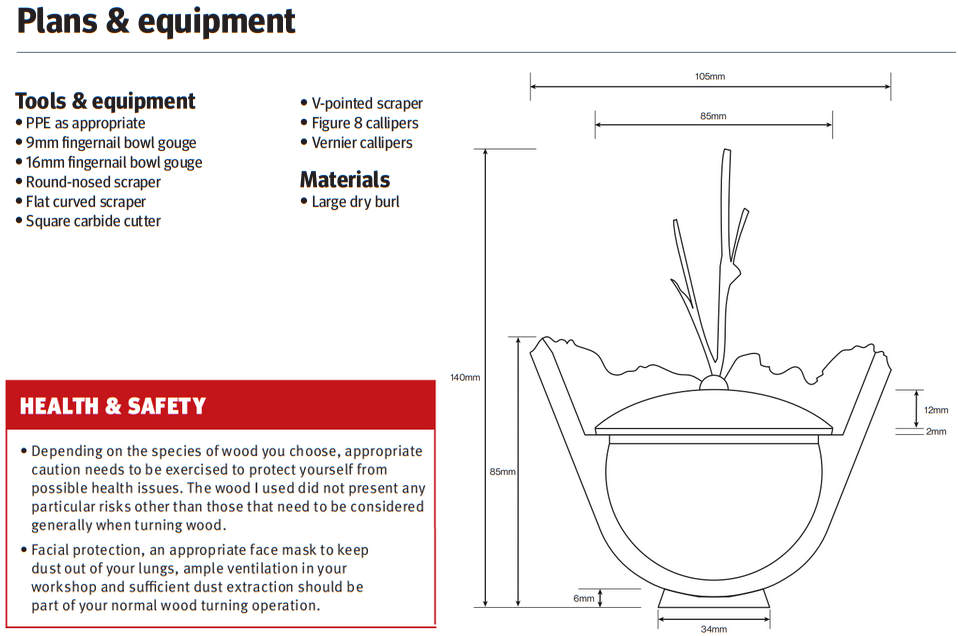
In this project I’ve opted to use part of a large burl cut into a blank with a fairly uniform edge, which will highlight striking grain patterns as they reach from the base of the box to its outer edges. However, you still need to think about appropriate material for the lid and then a finial that suits the form and the colour of material used. Quite a list of things to cross off, so here goes…
The making
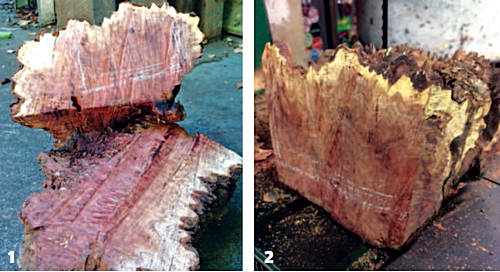
1 I began with a large dry burl, cutting a portion that had a fairly even natural surface with my chainsaw, before moving to my bandsaw.
2 Trimming off sharp edges so it could be mounted on the lathe and turned safely.
3 To ensure a drive spur had solid material to grip into, I drilled a hole, using my drill press and a Forstner-style bit, into the top of the blank. This provided a flat surface and centre point the drive spur could grip into when mounted between centres.

4 In effect, the drive spur and tailstock centre act as a clamp holding the wood in place, thus you can move the tailstock end of the blank around until the top edge of the blank travels along a fairly flat plane perpendicular to the lathe bed.
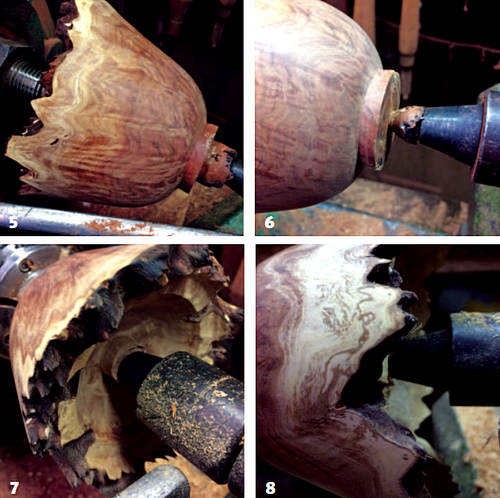
5 Trimming the blank down to solid wood, I was able to shape the outer form and turn a tenon which would allow the form to be reversed.
6 Excess wood was trimmed down as far as possible, and the stub was broken off to allow the form to be mounted in a scroll chuck.
7 Reversed and supported with the tailstock centre. I began to hollow the interior of the container, however…
8 …the lowest point of the natural edge posed a problem. How far should I cut into the burl before a lip could be formed, and would this be too deep and make the lid appear to be buried in the base of the container?
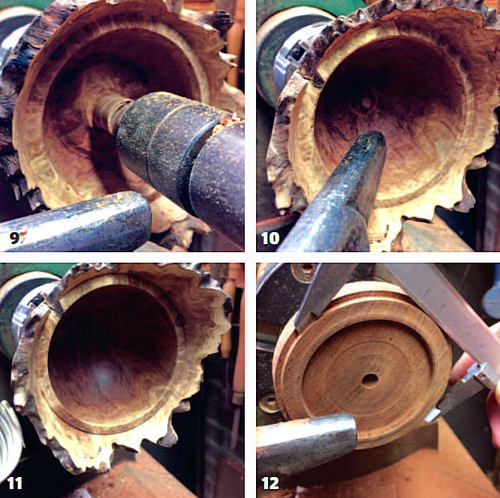
9 Once a decision was made, the rim was formed with a square-ended scraper, removing the bulk of unwanted material while enjoying the added support of the tailstock centre.
10 With the centre stub removed, the interior was opened up with a bowl gouge and a small V-groove cut at the point where the lip and wall of the rim meet. I used a skew laid flat on the toolrest, but you could use a variety of other tools, depending on what you feel most comfortable with. Just be sure you go gently and don’t get a catch.
11 A round-nosed scraper was used to clean up the interior of the form, being particularly careful where the solid bowl becomes intermittent edge. The interior, lip and top edges of the burl were sanded from 120 to 320 grit to complete this part of the project. You may need to sand the natural edges by hand with the lathe switched off.
12 To complete the exterior I needed to turn a jam fit carrier, so scrap wood was fitted to a scroll chuck, turned to size using Vernier callipers to achieve a tight fit. This wood had been used before, hence it had a hole drilled through the centre just in case the fit is too tight and a piece of dowel is needed to pry wood free of the carrier.
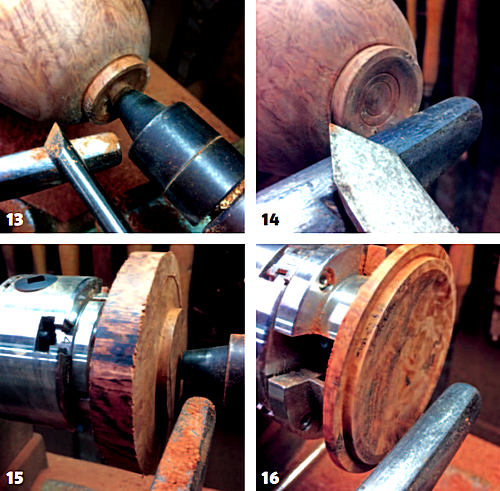
13 Mounted on the carrier and supported with the tailstock, the tenon was trimmed down enough to eliminate scroll chuck compression marks and suit the overall shape and size of the container. A small V-groove was cut at the point of intersection with a round bar skew held flat like a negative rake scraper, allowing me to sand both surfaces without losing definition between the two surfaces.
14 Removing the tailstock, I completed the base with a round-nosed scraper, sanded through to 320 grit and cut two V-grooves with a diamond point scraper.
15 To create a lid, I held a blank of figured red gum between a scroll chuck and tailstock, turning a tenon so the blank could be reversed.
16 Now I was able to turn the underside of the lid, beginning with a tenon that could drop into the inner edge of the lip I’d turned in the container. The outer diameter was also reduced to about the outer diameter of the same lip so the lid could sit easily inside the opening.
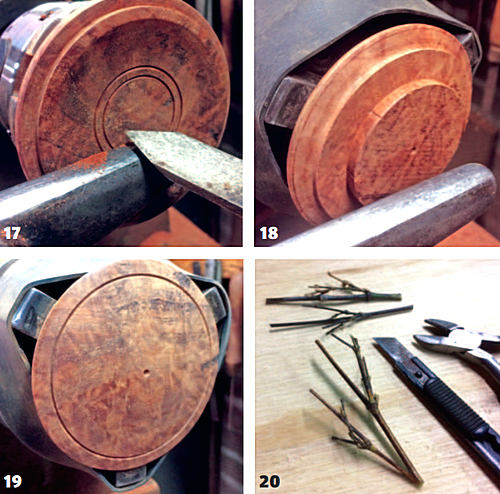
17 Final shaping of the underside of the lid with a scraper enabled sanding, again through to 320 grit, and the cutting of a pair of V-grooves to break the form visually and add tactile interest.
18 Reversed on to a three-jaw chuck and gripped gently but firmly by the tenon, I placed a band of motorcycle inner tube around the jaws to prevent them from becoming a safety issue as the chuck spins.
19 Turned to a gently sweeping curve, and leaving about 6mm of material thickness, the top was sanded, a border groove about 5mm in from the outer edge was cut and a centre hole of 3mm diameter drilled in preparation for a finial.
20 Aiming for an organic finial, I selected a few fine sections of black bamboo and, after some selective trimming, glued two pieces together with CA glue, followed by a bit of knife work to trim the base into something roughly cylindrical that would fit into a round hole.
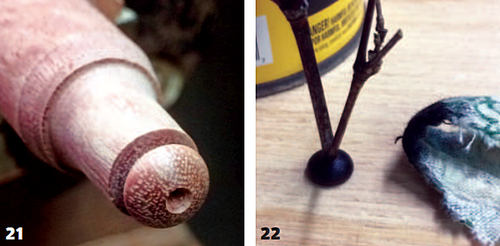
21I like to incorporate an element between the lid and finial that creates a point of separation, so in this case a domed piece of red gum was turned with a tenon to match the hole I’d drilled into the lid.
22 Cut free, the bamboo was glued into place, the dome stained black and a polyurethane finish applied. It was ready to glue into place on the lid. I like to apply a finish to all components prior to assembly, so the lid, container and finial base were all treated with a wipe-on/wipe-off application of polyurethane and, once dry, assembled.
Conclusion
23 The great thing about working with natural-edged material is that you will rarely be able to replicate a piece because every piece of wood will provide you with a new challenge while rewarding you with a wonderful result (fingers crossed) and a greater understanding of what ‘works’ and what doesn’t. And that allows you to move on to your next project with the confidence to create an even better piece.
