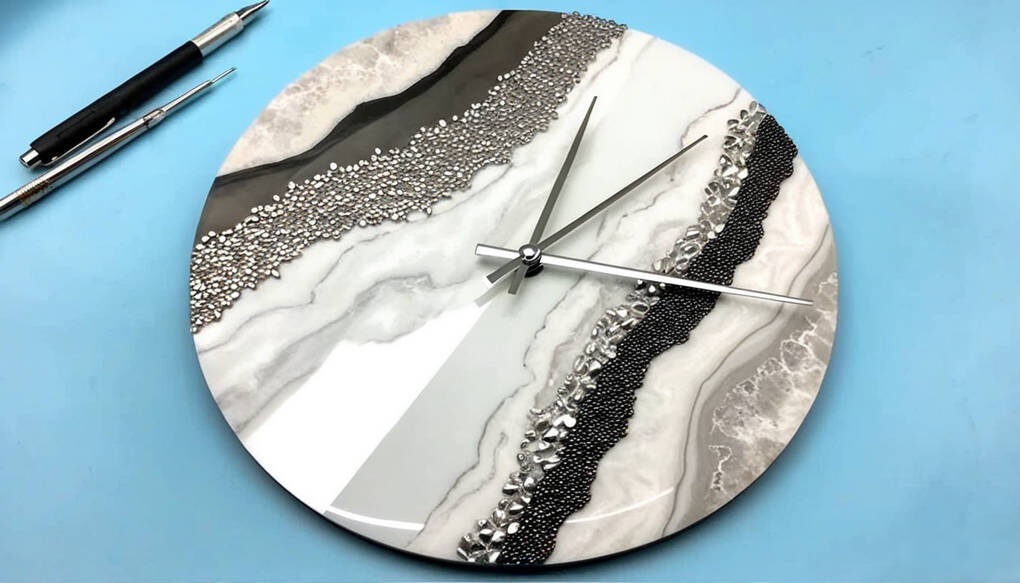
Creating a unique epoxy resin wall clock can be a rewarding project. Not only do you end up with a stylish piece of decor, but the process is also fun and satisfying. In this guide, we’ll walk through each step of making your own epoxy resin clock.
Preparing Your Clock Face
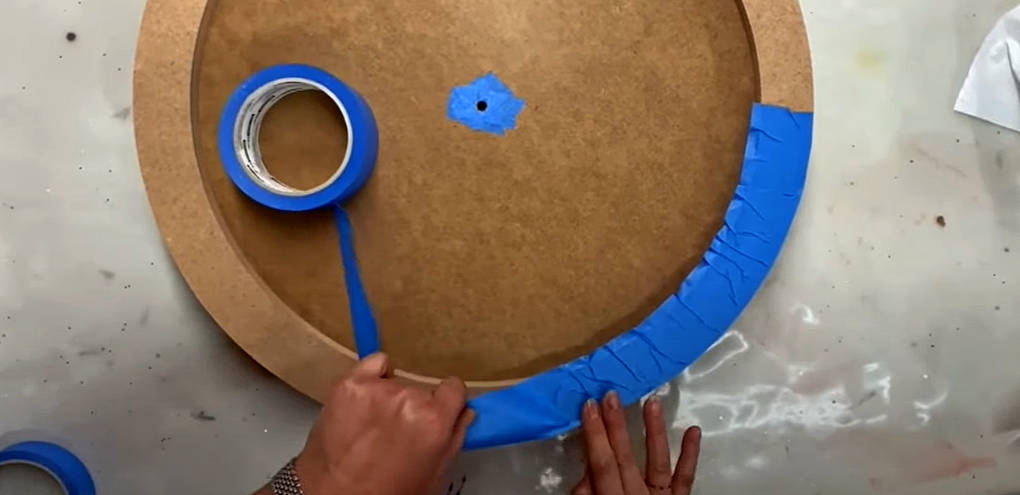
Start by protecting the back of your clock face. Use tape to cover the center hole. This helps you avoid any mess when pouring the resin. While some might choose a more intricate taping method, a simple blue Scotch tape works just as well. It fits snugly around the edge, keeping everything neat and tidy.
Make sure the tape is pressed down firmly. This prevents any resin from seeping through while you work. The goal here is to maintain a clean edge, allowing for a smooth finish.
epoxy-clock
Setting up for Resin Pouring
To support your clock’s mechanism hole, use a plastic straw as a pipe. Wrap it with tape until it fits just right. The trick here is to ensure that it’s completely sealed, so resin doesn’t leak out. In most cases, this method works perfectly, but if you do see a tiny leak, a quick fix with a Dremel tool can help clean it up.
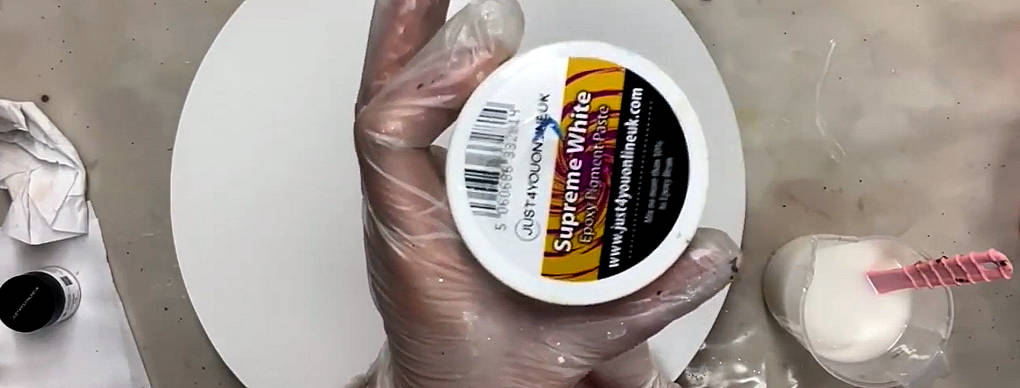
For this project, the premium epoxy resin from Just For You Online UK is a great choice. Its thickness makes it ideal for a clean pour without issues. You’ll also find handy silicone spatulas perfect for mixing—just peel off the cured resin when you’re done.
resin-clock3
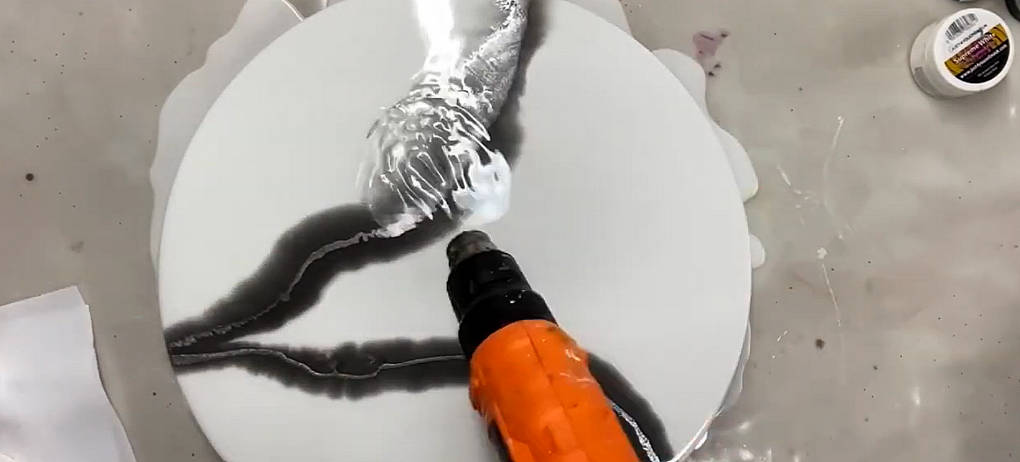
Removing Bubbles and Blending Colors
After pouring the resin, you might notice some bubbles. A heat gun is your best friend for this step. Gently run the heat gun over the surface to pop any bubbles and help spread the resin. This is also a great time to blend colors if you’re using multiple pigments.
Adding the Clock Markers
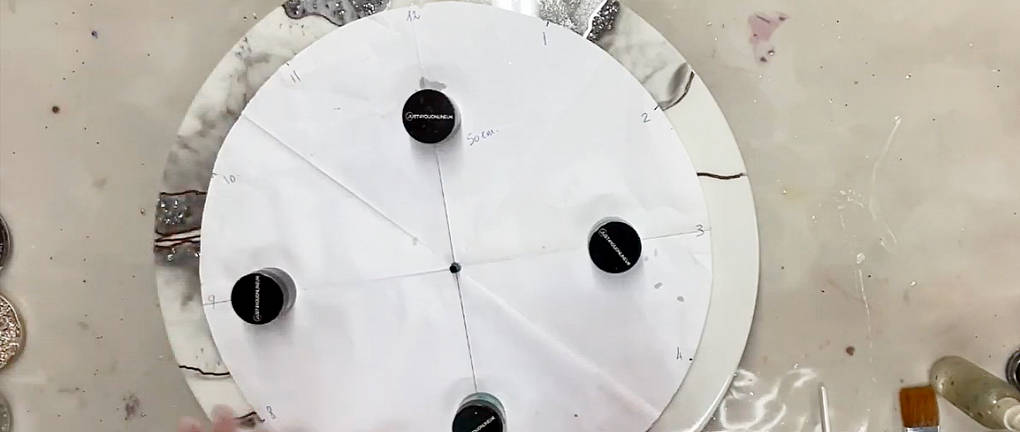
For a classic look, we’ll place markers at 12, 3, 6, and 9 o’clock positions. These walnut divisions can be painted in silver for an elegant touch. To measure the correct placement for each marker, use a compass. Start from the center, measuring the distance from 6 o’clock to the center for your compass length. Rotate and mark the other hours accordingly.
Having a clear, marked circle will make it easy to see where each number belongs. This step might seem complex, but once you get the hang of it, you can reuse this method for future projects.
Finishing Touches
Once the resin has cured, it’s time to take off the tape. This is quite satisfying, as it reveals a clean finish. After removing the tape, gently sand the edges with fine sandpaper (like P500) to smooth any sharp spots, ensuring safety as you handle the clock.
Before attaching the clock mechanism, do any additional sanding or corrections needed. It’s much easier to finalize your clock face before the mechanism is in place.
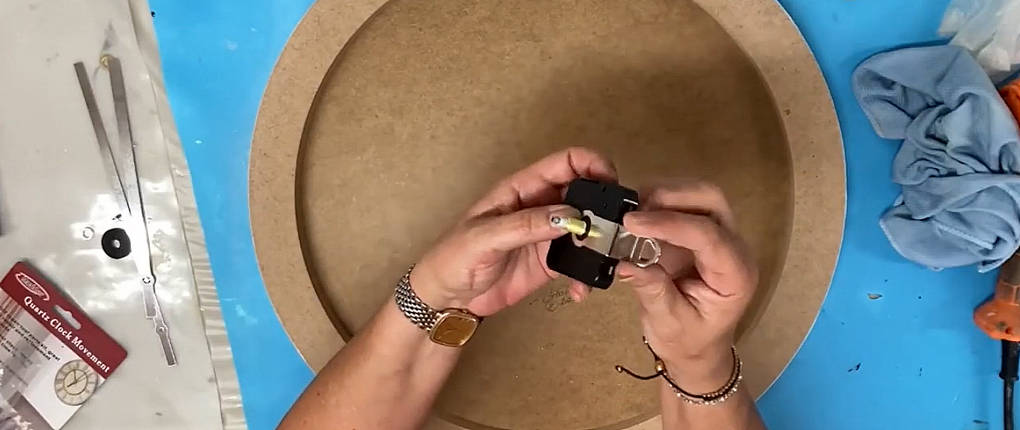
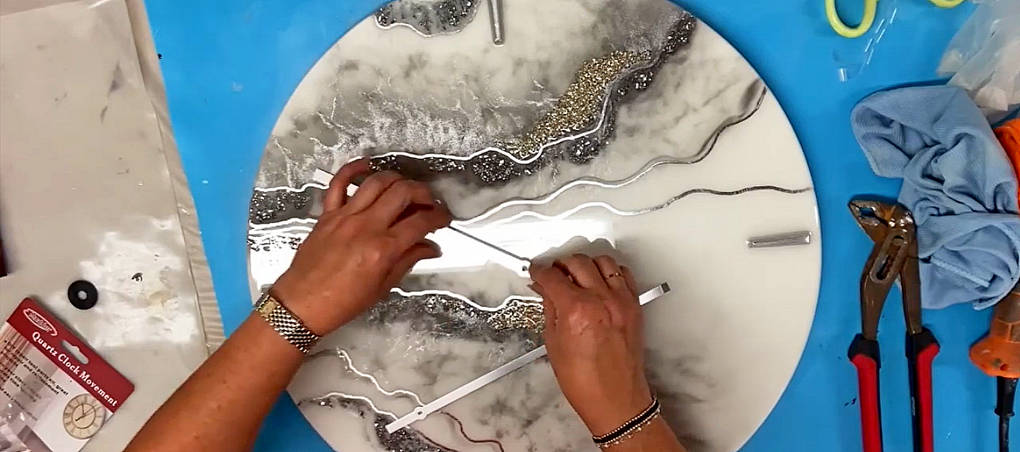
Installing the Clock Mechanism
Now that your clock face is ready, it’s time to install the clock mechanism. Center the mechanism with your 12 o’clock mark, and make any adjustments to ensure it hangs straight. You might want to trim any excess length from the clock hands to keep the design sleek and refined.
Conclusion
Creating your epoxy resin wall clock is not only a fun project, but it also results in a beautiful statement piece for your home. With the right materials and a bit of patience, you can design a clock that’s uniquely yours. Don’t forget to share your creation with friends or family—they’ll surely be impressed!