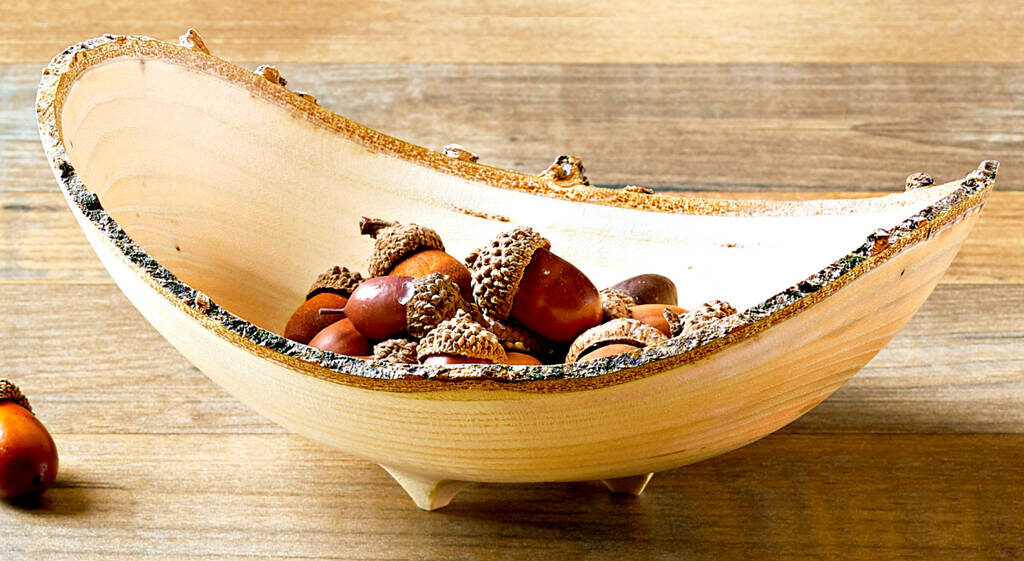
This bowl, as you can plainly see, measures not 36″ but only about 8″ in diameter. However, it does stand on three feet, proving that you can turn a 3-foot bowl on a lathe with 12″ or less of swing. It may be a long way to go for a joke, but you’ll enjoy the turns on the journey, and end up with a seriously good-looking bowl.
Prep a bowl blank
Choose a recently felled log, because green wood turns more easily than dry lumber. You also have a better chance of the bark staying on a bowl turned from a green blank. But there is no guarantee—the bark may come off during turning, or as the bowl dries.
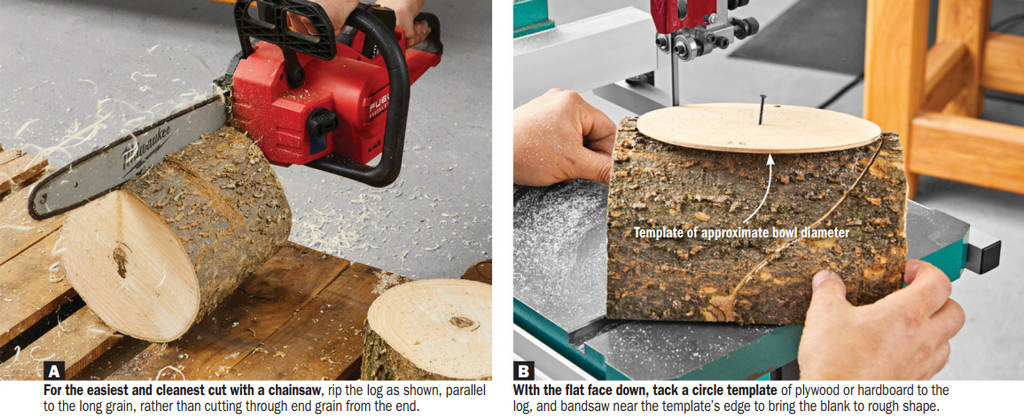
Start with a log at least 3″ longer than its diameter, then cut 1″ from each end to eliminate the drier ends. Split the log through the pith with a chainsaw or bandsaw [Photo A]. Bandsaw round one of the log halves [Photo B].
On the flat face of the blank, center a 3″ faceplate and secure it with #10×1″ sheet metal screws. Mount the faceplate on your lathe’s headstock.
The push and pull of grinds and bevels
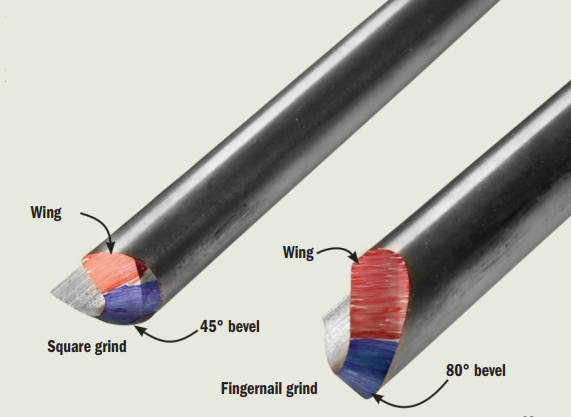
For this turning, I used only the two bowl gouges shown: a 3/8″ gouge with a square grind and a 45° bevel, and a 1/2″ gouge with a fingernail grind and an 80° bevel. Let me explain those terms and why I needed only these two gouges.
Bowl gouges can be sharpened at any angle (the bevel) and with several profiles, often referred to as the grind. The bevel (colored blue in the Photo) sits at the lower tip of the tool, while the wings (colored red) extend from the bevel around the flute along the remainder of the grind.
The bevel angle is measured using the bottom of the flute as 0°. So a 45° bevel slopes back toward the tool handle more than an 80° bevel. The more acute 45° angle cuts more efficiently, creating less tear-out. The steeper 80° bevel allows for rubbing the bevel while reaching deeper into a bowl and moves the tool shaft away from the bowl rim, providing room to maneuver the tool.
When viewed from the side, the profile at the front of a tool with a square grind forms a 90° angle to the bottom of the tool. A fingernail grind has a swept-back profile. Square grinds sharpen easily freehand, while fingernail grinds require a special jig attachment for your grinder to sharpen.
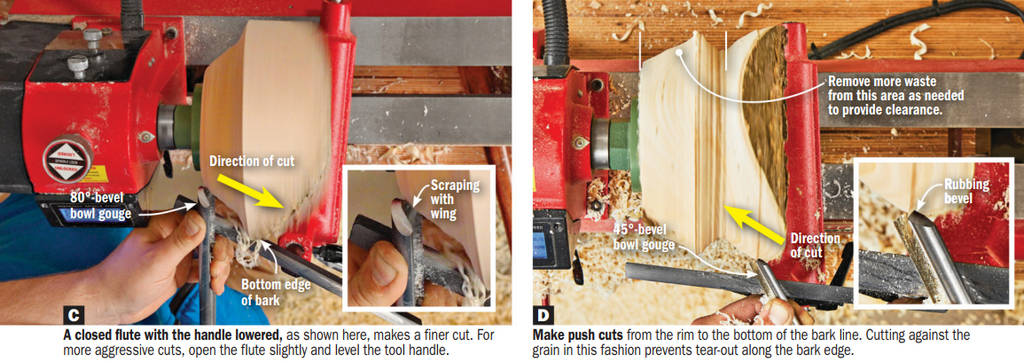
When turning the bowl, you’ll use push cuts and pull cuts. A bowl gouge with any profile can make push cuts, but only fingernail-grind tools can make pull cuts. With a pull cut, you pull the tool toward you with both hands while cutting with the sharpened edge of the wing (a scraping cut) [Photo C inset]. The bevel doesn’t contact the wood. Pull cuts prove easier to control and generally provide a less bumpy surface, but may tear out grain.
During a push cut, rub the bevel on the workpiece while pushing forward with the handle [Photo D inset]. The direction the bevel points guides the tool in that direction. Swing the handle to change direction.
Shape the outside
1. Using the fingernail-grind bowl gouge, begin rounding the bowl exterior with scraping pull cuts from near the faceplate toward the bark. Stop just before reaching the bark as scraping cuts will damage it [Photo C].
2. Make push cuts with the bevel rubbing, from the bowl rim (uppermost portion of the bark) to just below the bottom of the bark [Photo D]. Keep the flute open about 45° while cutting right to left. If you need additional room to work, remove more waste from the faceplate to the bark edge with pull cuts.
3. Alternate between pull cuts and push cuts to shape the outside of the bowl. Leave at least 1″ of wood at the base of the bowl beyond the bottom curve to allow for shaping the feet later.
Take it inside
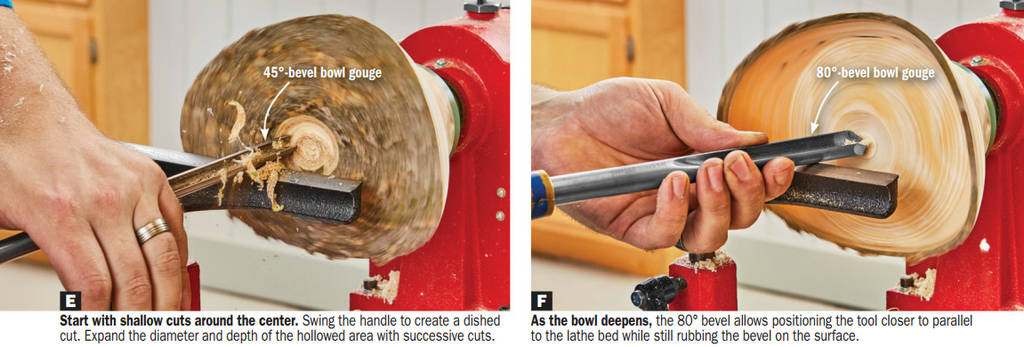
When hollowing the interior, rub the bevel on all cuts, working toward the center.
1. Using the 45°-bevel bowl gouge, begin hollowing from the center [Photo E]. As you hollow deeper, switch to the 80°-bevel goug to prevent the tool shaft from contacting the rim [Photo F]. Measuring with outside calipers, work to a wall thickness of 3/16″.
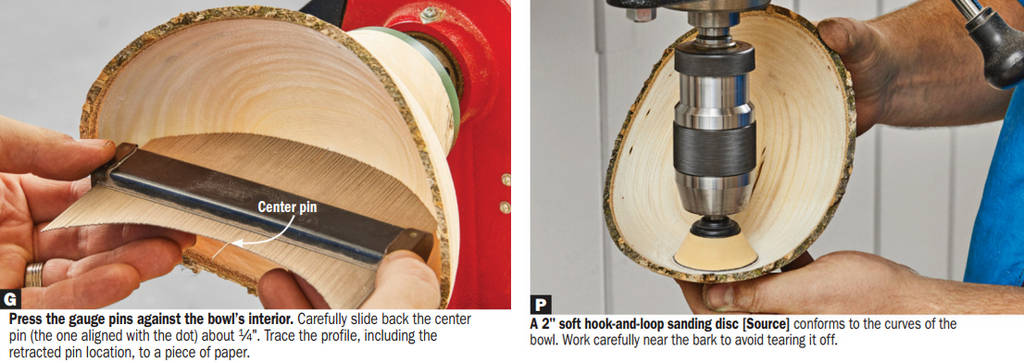
2. Mark a small dot at the bottom center of the bowl interior. Use a profile gauge to transfer the interior profile to a piece of paper [Photo G].
Make an appeal to the base
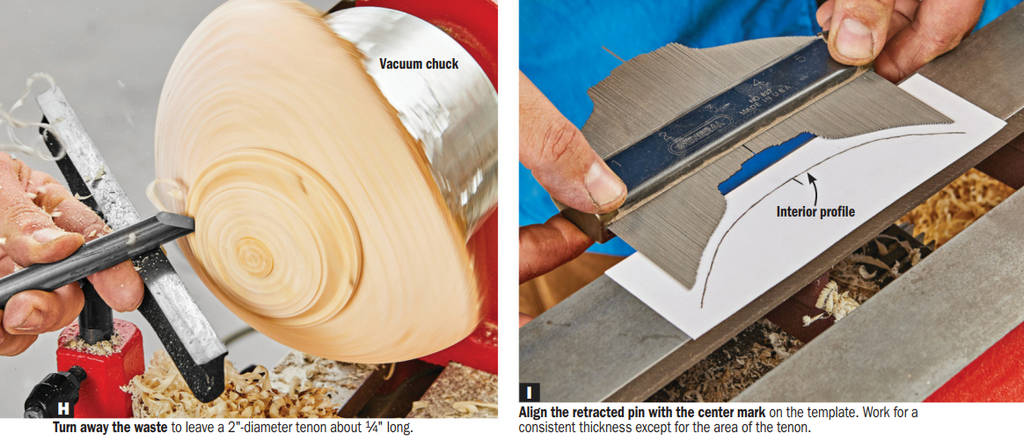
1. Secure the bowl blank to a vacuum chuck, centered. Use the tailstock to help align the blank and for support as you turn, until it gets in the way.
2. Make pull cuts from the center out or, with the tailstock removed, bevel-rubbing cuts in the same direction, to leave a tenon from which the feet will be shaped [Photo H].
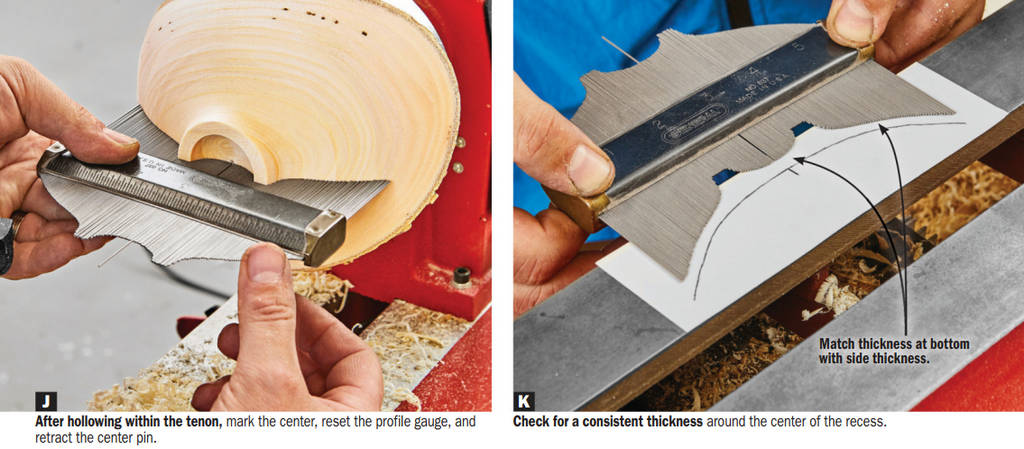
3. With a pencil, mark the center of the against the bowl exterior, and as before, retract the center pin. Compare the profile gauge to the paper template of the bowl interior [Photo I]. Shape the exterior until the thicknesses match and become parallel on either side of the tenon. Then, hollow the tenon to leave a 3/16″-wide rim from which the feet will be carved. Again, use the profile gauge to check your progress when hollowing [Photos J, K].
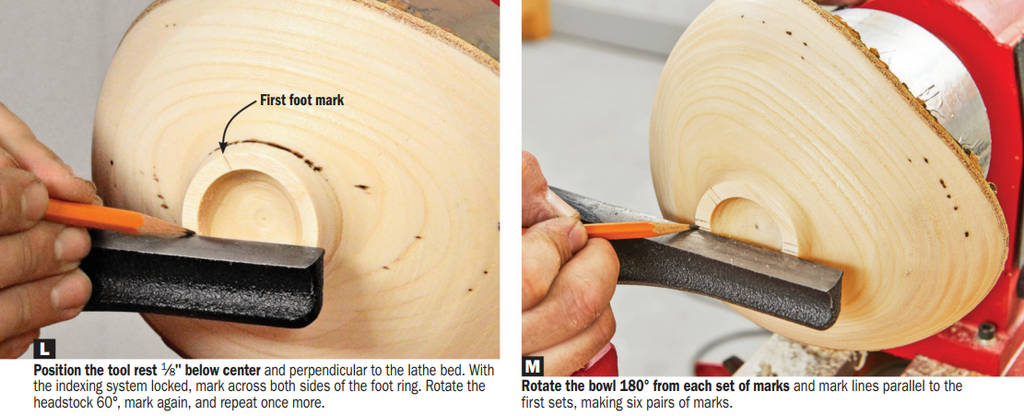
4. Use the lathe indexing system to lay out the feet [Photos L, M]. Mark between the first, third, and fifth pairs of marks to indicate the feet. Set the bowl aside for a week to dry.
Plant your feet
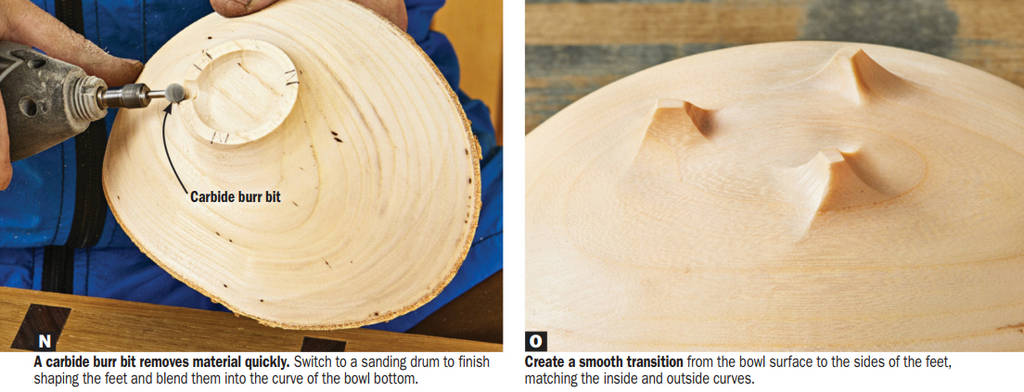
1. Use a rotary tool with a carbide burr and a sanding drum to remove the waste areas between the marked feet [Photos N, 0]. Sand the bowl surfaces at the drill press [Photo P]; then finish-sand the inside and outside to 220 grit by hand.
2. Apply a finish. We sprayed on three coats of aerosol lacquer. After you put your creation on display, ask your friends if they can find your three-foot bowl.
