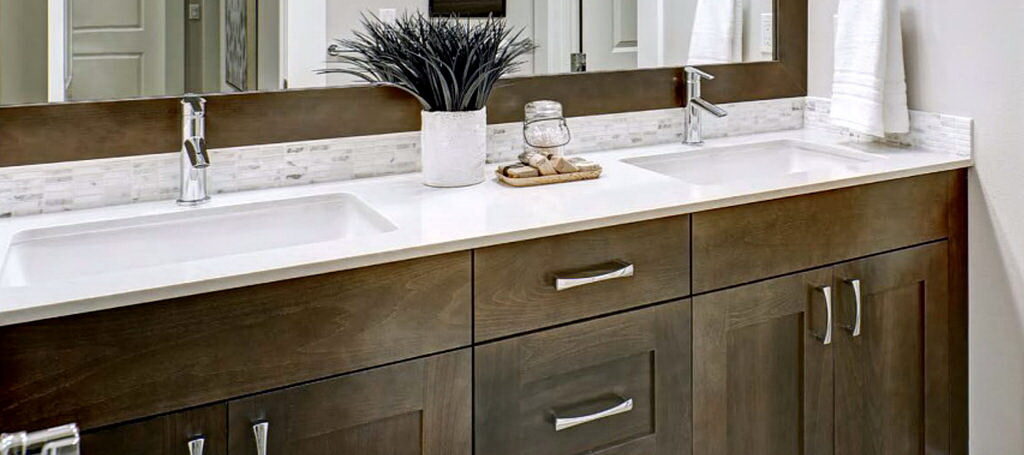
Vanities don’t have to be overly complex. This continuous-grain floating vanity can be sized to fit your space, no matter how small it is.
Planning is probably the most critical stage of a project like this. A table can just be plunked down and used. A jewelry box that’s slightly over- or under-sized will probably work out just fine. A vanity, on the other hand, is something that needs to be sized accurately and have the right details so that it can be installed so it functions well for years to come.
It needs to fit in the space. Whether that means it needs to fit through doors or be sized correctly to fit between trim and walls, both need to be considered. It also needs to be designed in a way that it can be scribed to the walls, many of which are either not square to each other or are wavy. Plumbing needs to be considered when positioning shelves and gables. Even the taps need to have somewhat specific clearances. Last but not least, the vessel sink you’ve chosen needs to be considered.
It’s always recommended to get all your hardware before starting a woodworking or home renovation project, but that’s even more true when building a vanity. A tap and sink are both mandatory to have on hand, or at the very least know what products you’re going to buy so you can study their technical drawings.
Dimensions
The width of your vanity is going to be very specific to your bathroom situation. My vanity is 23″ wide. The depth is a bit more standard, but still has a lot to do with the sink you select and how much room you have in your bathroom. I made my vanity 17” deep. The height is also highly variable and depends on how tall you are, how high your vessel sink is and personal preference. Because my vessel sink is 6″ high and everyone in the household is on the shorter side, I made my vanity 24″ tall. These dimensions also allowed me to get the four parts from one length of an 8′ long sheet of plywood.
If you’re unsure how high to make your floating vanity I would suggest mocking up some sort of surface in your bathroom at the approximate height you’re considering and putting the vessel sink right on top of it to stand in front of and pretend to use. Maybe even compare it to other sinks you use to give you some context. There are no hard rules for vanity and vessel sink heights so use whatever feels comfortable for you and the people in your household.
Materials
Particleboard is a no-no for bathroom applications, as even the smallest amount of errant water can cause it to fall apart. Solid wood is an option, but I find plywood is more stable and easier to work with. It does mean you have to purchase an entire sheet, though. Solid edging will go a long way in protecting corners and edges from getting damaged.
Mating with the walls
Once in a while walls are straight and square with each other, but that’s certainly not the rule. Like installing quarter round moulding where baseboards meet the floor, you could use a small moulding to cover up any undulating gaps, but I find that unattractive. It also provides more nooks and crannies for dust and dirt to get caught in.
I designed the vanity so the top would have a 1/4″ scribe where the top met the side wall, as the walls didn’t meet at 90°, nor was the side wall straight. I could have also done something similar to the joint between the back of the top and the wall, but it was straight enough that a small amount of dark brown caulking would easily fill any tiny gaps. Once everything was installed it turned out that no caulking was needed, thankfully.
This meant there would be a 1/4″ gap between the outer face of the non-visible gable and the side wall, yet the top would extend all the way to the wall. Rather than shaping a 3/4″ wide piece of plywood to fit the curves of the wall, I reduced the scribe to finish at 1/4″ thick.
A full-sized drawing always helps me get the details right in my head before I start cutting into the material.
Start cutting
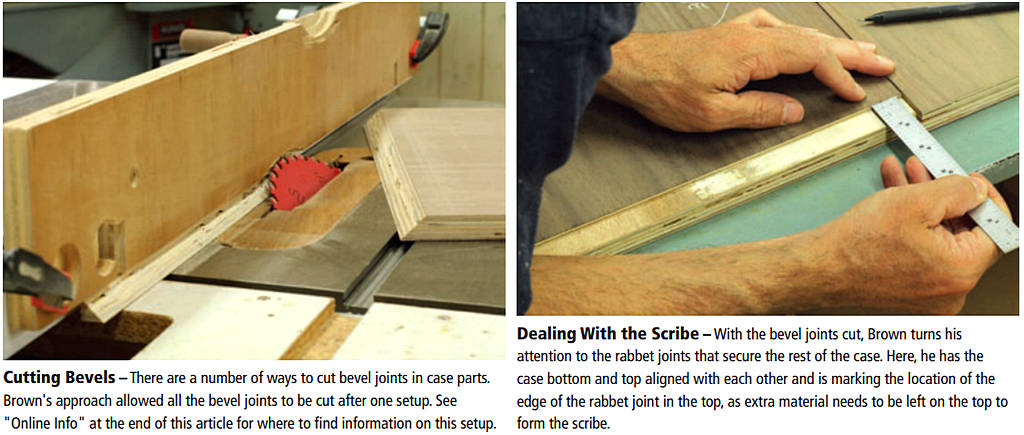
Plan the cuts so you can keep the grain continuous when it wraps around visible beveled corners. For my vanity there was only one of these corners, though if your vanity didn’t abut a wall on one of its sides you would have two joints to consider. I was able to get all four case parts from one length of a sheet.
Next, some planning so you can cut the gables, top and bottom to length. This is where you have to determine what joints to use at each corner. Bevel joints will include the nice visual of continuous grain. Rabbet joints are great for joints that aren’t visible. There are other options, too. I used bevel joints at the upper left and lower left corners, though I could have gotten away with a rabbet in the lower left corner. Rabbet joints were used at the other two corners.
I always cut bevel joints with one setup on the table saw. First, cut the joints to be beveled square. This means a part with a bevel joint on both ends will get cut to finished length, while a part with a bevel joint on only one end will get squared up on that end, but the other end will be a bit long. Next, set up the table saw to make the bevel cuts. Finally, make all your bevel cuts. Check out the link at the end of this article to read about how to set up the saw to make these cuts.
Remember the scribe
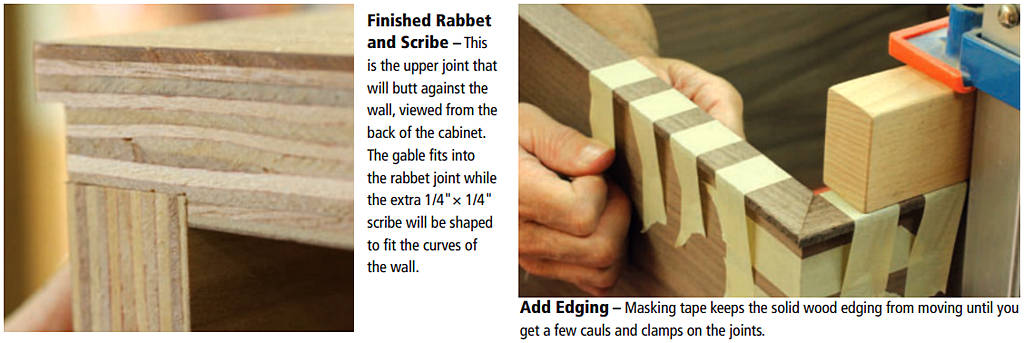
The upper joint that would go against the wall was unique, as it needed to accept the 3/4″ thick gable, but leave the outer face of the gable 1/4″ away from the wall. I cut a 1/4″ deep rabbet 1″ wide, then added a 1/2″ deep rabbet 1/4″ wide. The first rabbet would accept the gable, while the second rabbet would leave a 1/4″ thick by 1/4″ wide bit of material that would allow me to scribe the cabinet to the side wall of the bathroom.
Machine any other rabbet joints at this time and cut the rest of the parts to finished length.
Do you want a back?
I didn’t add a full back, as that would take up a bit of extra room in an otherwise small vanity and it would add material cost to this small project. I also didn’t think a back for added strength and rigidity was necessary. However, I wanted to add a hanging strip to the upper section of the vanity, as this would add some rigidity to the case and give me something solid for securing the vanity to the wall. I’d eventually use a few L-brackets under the bottom to further secure the vanity to the wall.
I machined 1/4″ deep x 3/4″ wide stopped rabbets in the upper 5″ or so of the gables and a full-length rabbet of the same width and depth in the underside of the top.
 Assembly time
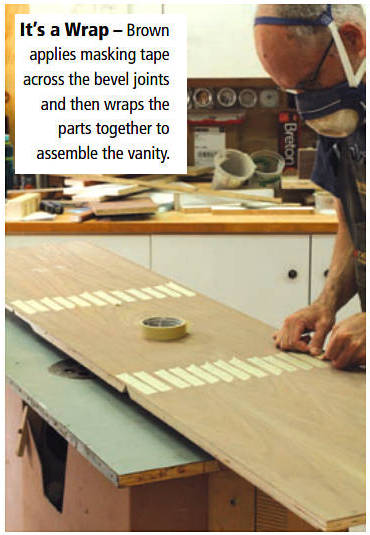
A dry assembly is next. Sand the inside faces of the parts. Apply ample masking tape across any beveled corners. Wrap the bevel joints together and insert the other pieces. Measure the opening for the hanging rail, then cut and test fit it. Disassemble everything, add glue to the bevel joints, wrap the parts together for the last time and add glue as well to the final few parts. Add the hanging strip, clamp the case and check for square before letting the glue cure.
Solid wood edging
I machined four strips of solid wood to cover the front edges of the case. Three were ripped 7/8″ wide, while the strip that was going to butt up against the wall needed to be 1/4″ wider to account for the additional 1/4″ gap between the case and the wall.
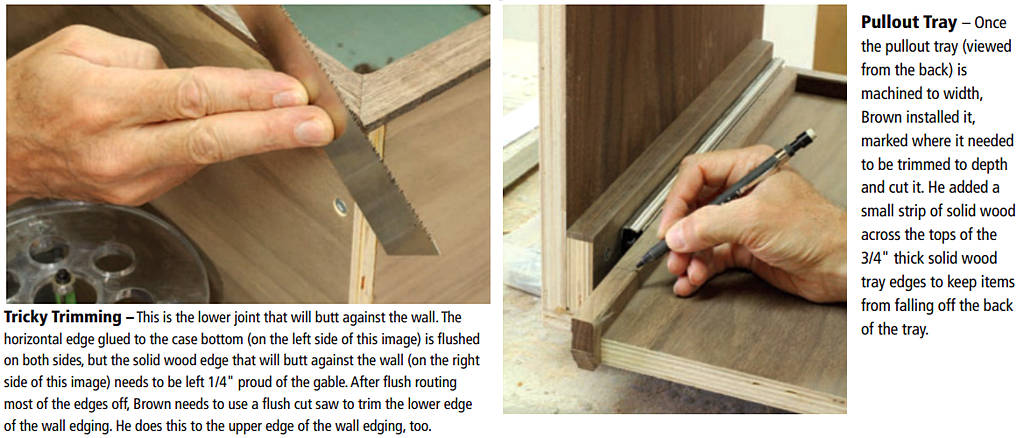
One-by-one, I mitred their ends, then glued and taped them in place before adding a few clamps to each strip. The joints near the wall were slightly different, as the upper horizontal strip ended 1/4″ before the scribe did, yet the lower horizontal strip ended at the edge of the cabinet. The strip against the wall was cut and installed so it overhung the wall gable by just over 1/4″. A block plane would fine tune this strip during the installation process.
When the parts were dry I used a router and flush trim bit to flush all the edges except the one that would butt up against the wall. A belt sander and hand sanding block further smoothed the joints and sanded the solid wood edging.
Shelves and trays
What you do with the interior of your vanity is up to you. I opted for a shelf near the middle and a pullout tray at the bottom. Because this vanity is fairly small I thought the pullout tray would allow me to more easily access the contents. The middle shelf was going to be disrupted by the water pipes within the vanity, so I decided to leave cutting it to size until after installation.
The pullout tray could be made now, though. Because the doors would sit just inside the gables when hung I needed to make a few drawer strips to bring the tray and slides away from the doors. These are just 3/4″ thick plywood with a solid edge on their top edges. They got screwed to the gables and then I made a simple tray to go between them, using standard full extension slides to fix it in place.
Finish line
Being a vanity, water was going to be a major consideration when it came to choosing a finish. I selected a polyurethane, as water would have little to no effect on it. And because this was a small project, using an aerosol spray can was a good option. I chose Varathane Professional oil-based polyurethane. I sprayed on a few coats, sanding between coats.
Installation time
I brought the vanity into the bathroom and marked and cut the holes for the water supply and drainage. With the help of a few supports, I positioned the vanity in place, checked for square and marked a pencil line across the top scribe and the solid wood edge that butted against the wall. A belt sander, block plane and sanding block took care of the waste. A few more back-and-forths to get a good fit and it was time to install the unit.
I put fillers in between the wall gable and the wall about the same thickness as the scribe in that area. This was so the screws didn’t flex the vanity or wall. A few screws through the hanging strip and wall gable, all into studs, secured the vanity in place. For added strength I added L-brackets to the underside of the vanity. Although the fit between the scribes and the wall wasn’t perfect, it was very close. Though technically recommended, I thought a bit of caulking that may keep a drop or two of water out of any tiny gaps now and then would also be an eyesore. I opted to leave it as-is. This will be a judgment call on your part.
At this point it was time to cut the shelf to size, apply a finish to it and install it with L-brackets and screws.
Doors
I opted to make the doors after installing the vanity, as I thought there was a chance the cabinet could be installed even slightly out of square, causing the doors to be misaligned. Plywood slab doors would be perfectly in keeping with the design of this vanity, but I chose solid wood doors and added some flair to them.
In short, I made a solid wood slab the exact size of the opening, drew some curves on the slab, cut the curves, shaped some of the parts with power carving equipment, painted some of the edges with blue milk paint then reassembled the panels to form two doors.
The plumber eventually drilled a relatively small hole for the drain to fit through, installed the sink, water supply and drain, and it was ready for action.

