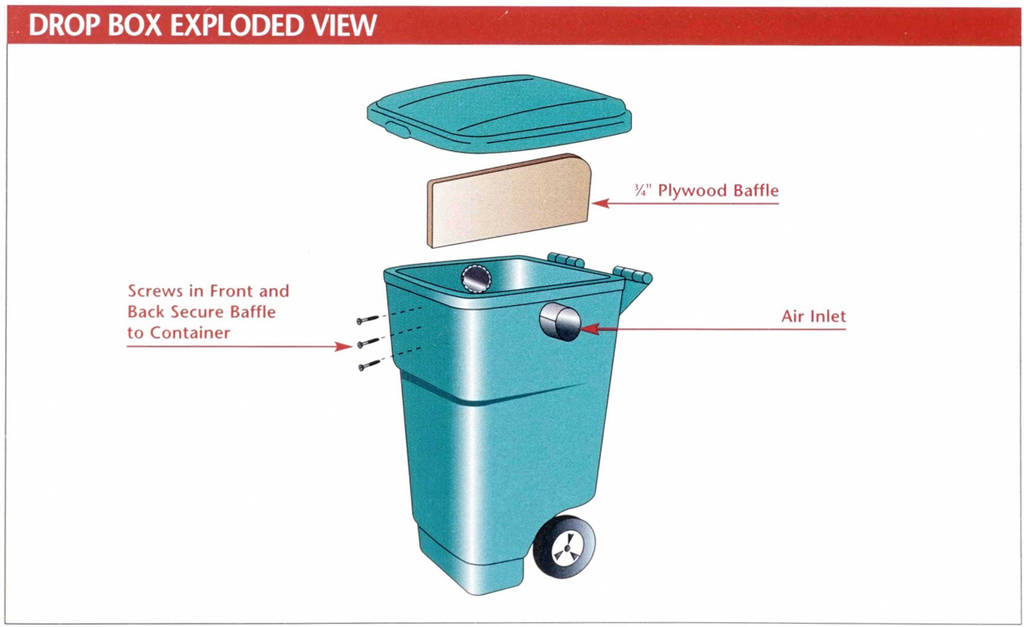
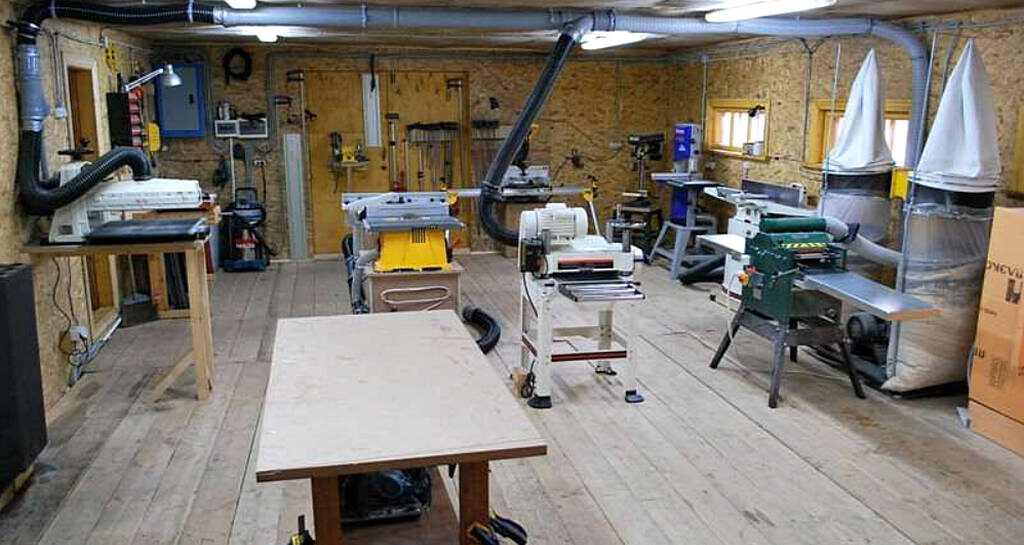
A drop box is the simplest form of pre-separator you can make for your single-stage dust collector to convert it into a two-stage collection system. Typically, a rectangular box is made of plywood and is placed on some type of container, like a 55-gallon drum or a metal trash can.
As chips and dust enter the box through an inlet port, they strike a baffle inside the box. Heavy chips that lose their momentum fall into the container, while lighter chips and dust travel under the baffle and through the outlet port to the dust collector.
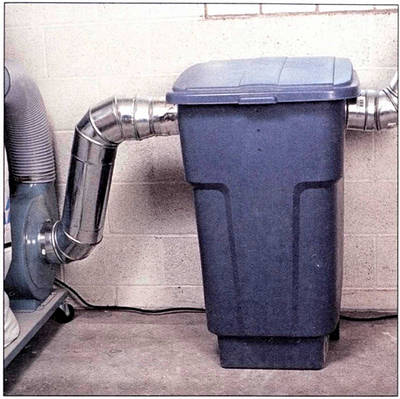 With this in mind, you’re probably wondering why there’s a trash can hooked up directly to the dust collector in the photo at left.
Well…it’s a drop box, albeit unconventional in design. Here’s how it came to be. I built a standard drop box years ago and used it for a while, but I was unhappy with it. It was cumbersome to wrestle the container out from underneath and empty it. I started thinking about ways to get around this. If only I could disconnect the container and wheel it out for trash pickup day.
The solution presented itself to me when I came across this beefy wheeled container, made by Rubbermaid, in a home center. Why not, I thought? Cut a couple of holes for dust ports, add a simple baffle, and voila—a drop box that works well and empties easily.
Warning: Don’t use this drop box with dust collectors with motors larger than 1 1/2 hp, and do not build this with a lightergauge plastic container. Thin-gauge plastic will collapse under pressure—believe me, I went through a number of trash cans before I discovered one that would hold up in use.
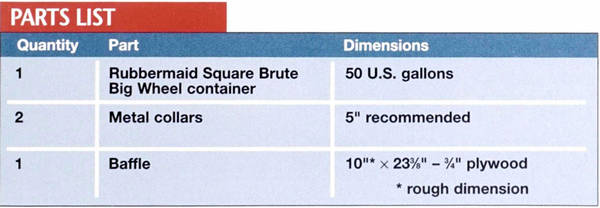 One of the advantages that this pre-separator offers over the plastic lids that fit over trash cans is that you can size the inlet and outlet to better work with your system. Most commercially available pre-separators have 4″ ports. With this drop box, you can use 5″ or even 6″ ports to match your system (5″ ports work well with most 1 1/2-hp single-stage collectors).
Note: All pre-separators exact a price from the system in terms of performance. In most cases, this is 2″ to 3″ of static pressure loss. You can minimize this by using rigid pipe and connecting it to the system in as straight-through a manner as possible.
Assemble The biggest challenge to making this drop box is cutting the holes for the inlet and outlet. The simplest way to do this is to trace the outline of the collar onto the side of the container, drill a starter hole, and cut out the circle with a saber saw. If you find that clearance is a problem because of the lip of the container, just cut the hole out from inside the container.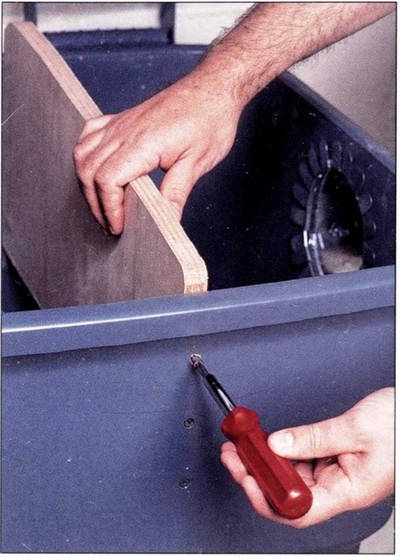
When the holes are complete, insert a metal collar in each hole, bend back the tabs, and seal around the edges of the holes with silicone caulk.
The next step is to cut and fit the baffle and install it. Use a compass to scribe the curved shape of the inside of the lid onto the top edge of the baffle; then cut it to shape with a band saw or saber saw.
Slide the baffle in place so that it’s centered on the width of the container and protrudes up far enough so it just barely touches the lid when it’s closed. Hold it in place, drill pilot holes, and drive in screws (see the photo at right).
How it works As you can see from the diagram at right, chips and sawdust enter the drop box via the inlet port. The high-velocity stream strikes the plywood baffle; heavy chips, robbed of their momentum, fall down into the container. Lighter chips and dust slip under the baffle and are pulled out the outlet port by the dust collector.
It’s important to realize that the drop box loses efficiency as the container fills up, so it’s important to check the chip level often, and always before starting a heavy job like running boards through a planer. Fortunately, this is as easy as lifting the lid.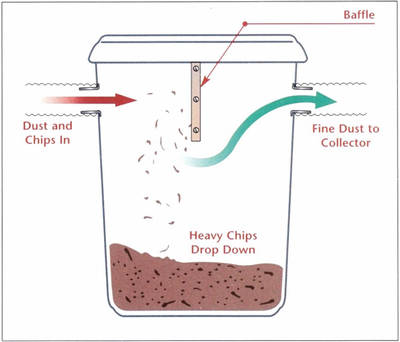
Attach Hook up the drop box to your dust collector and main line with rigid pipe and hose clamps, as shown in the photo above. Although this may seem an inconvenience to have to remove these when emptying the container, it takes only a few seconds, and the seal you’ll achieve with the hose clamps will be worth the little extra time. The vacuum force of the dust collector’s blower motor will pull the lid down tight when it’s in use. However, if you do detect air leaking anywhere around the lip, apply a strip of self-adhesive foam rubber weatherstripping to the top edge of the lip.
To empty the container, loosen the hose clamps, slide out the inlet and outlet pipes, and wheel the container away. Note: Check with your local garbage removal service to make sure they’ll take bulk chips. Some municipalities require that all rubbish be contained in plastic trash bags. If this is the case, simply empty the container into trash bags and set them out for removal.
Safety Note: Since dust and chips are moving rapidly through a large plastic container, take the time to ground the container, to reduce the risk of sparks caused by static electricity. Running bare copper wire through the interior of the container and connecting this to your metal ductwork will do the job (see page 67 for more on grounding).
