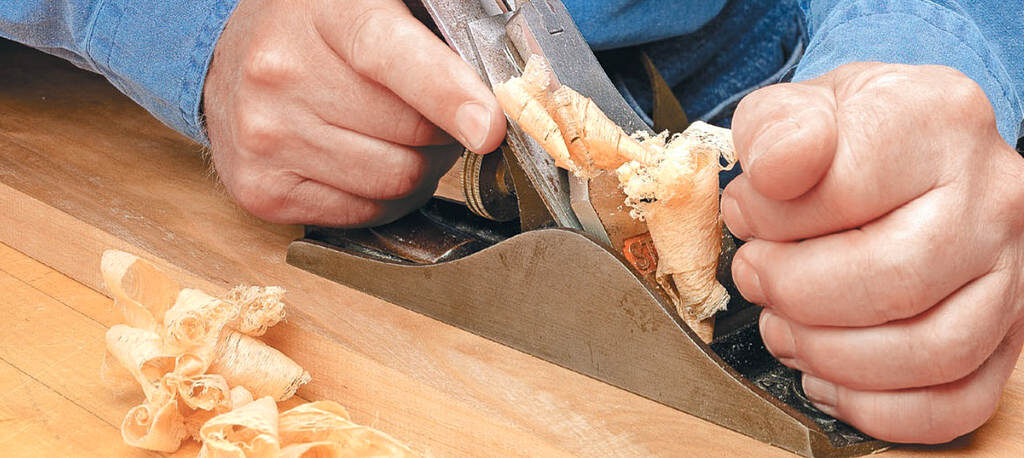
While I always look forward to the completion of a project, there are certain milestones along the way that can bring almost as much satisfaction. One of those is creating a smooth, flat solid-wood panel. Whether it’s a tabletop or case piece, the top often becomes a focal point. So you want it to look its best.
From a woodworking point of view, the attention often seems to centre around sanding and finishing. The reality is that to end up with a flat, smooth panel, the process begins way before that step.
I’ve found it helpful to divide the process into three stages: preparing, flattening and smoothing. For each stage, there are a range of tools to consider that will help achieve the goals you’re after. So on the next few pages, I’ll take a tour through the workshop to help you select the best tool for each step of the journey.
PREPARING THE PANEL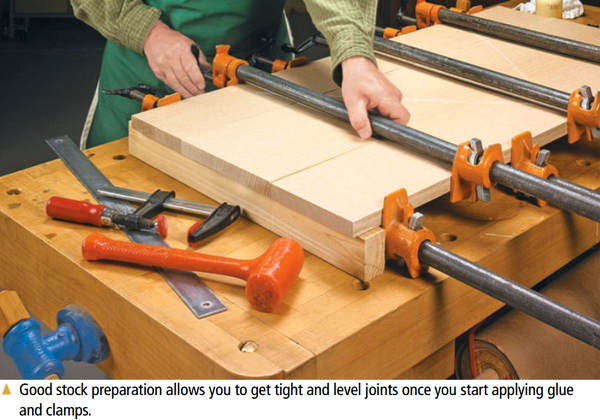
The starting point of a flat panel is at the timber yard and requires few tools beyond your eyes. Of course, the boards should look good to you, but you need to look at their condition.
Sight down the face and edge of each board looking for cupping, bowing or twist. These can play havoc with your ability to create a flat panel. Being a natural product, finding perfectly flat and straight material isn’t always possible. So try to find the boards with the fewest defects but still suit your needs.
STRAIGHT, FLAT & SQUARE. Back in your workshop, it’s time to talk tools. For the individual boards to become a single panel, the faces need to be flattened and the edges need to be square.
How you go about this depends on the tools you have and the amount of physical effort you want to devote. The standard approach in the era of power tools is to use a jointer to flatten one face and straighten one edge. A thickness planer brings boards to a consistent thickness with parallel faces. Finally, the table saw steps in to rip the board to width and parallel to the jointed edge.
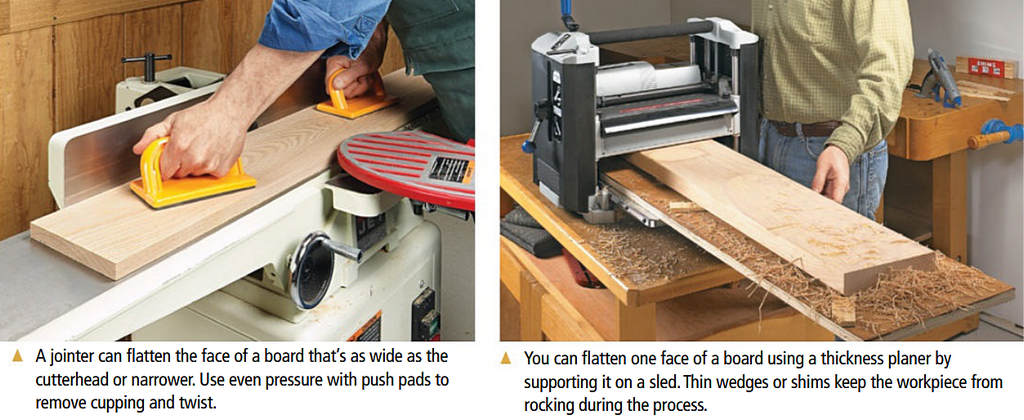
FACES. The lower left photo shows flattening the face of a board with a jointer. The key is having a jointer that’s wide enough to match the boards you get. However, wide jointers are pricey and take up more space than smaller models.
Another route to take is to use a thickness planer for flattening. You can see this in the lower right photo. The workpiece rides on a sled. Shims provide support for gaps caused by twist.
This is the approach I take in my home workshop. I don’t have room for a jointer. So, I try to get as much as I can from other tools.
EDGES. When it comes to edges, the jointer is (once again) the place to start. And for sheer efficiency, it’s tough to beat. Running a workpiece with the flat face against the fence while moving it across the cutterhead, you can quickly create a straight, square edge. Before power jointers, woodworkers used hand planes to do the same task.
THICKNESS. While hand planes can be used to bring boards to final thickness, it’s physically demanding work. That’s just one reason I consider a thickness planer an essential tool for furniture making.
GLUE-UP. No matter which tools you use, straight edges and flat consistent boards simplify the gluing process. As we’ll see, this investment saves a lot of time and effort down the road.
FLATTENING
Once the glue is dry and the clamps come off, the goal line seems much closer. But rushing here can ironically lead to slower progress and frustration.
It’s at this point you need to clearly differentiate the flattening stage from the smoothing stage. Then choose the correct tools to meet the need.
The first thing to do is evaluate the panel from a big picture perspective. This will check for overall flatness. Before going any further though, grab a scraper and remove any excess glue, which can interfere with your observations.
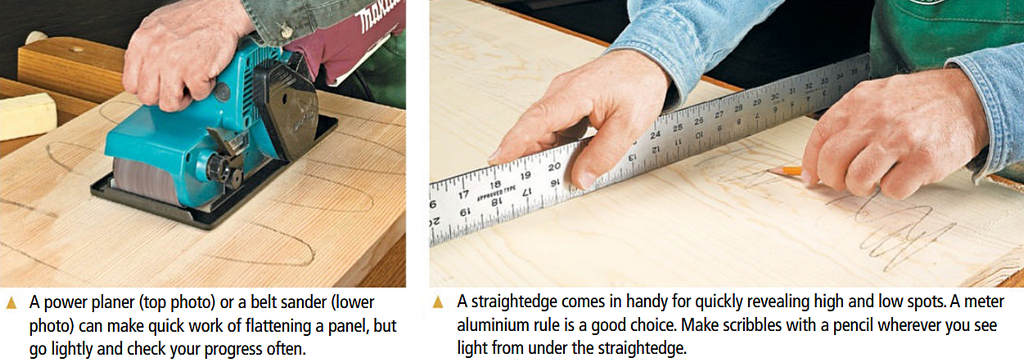
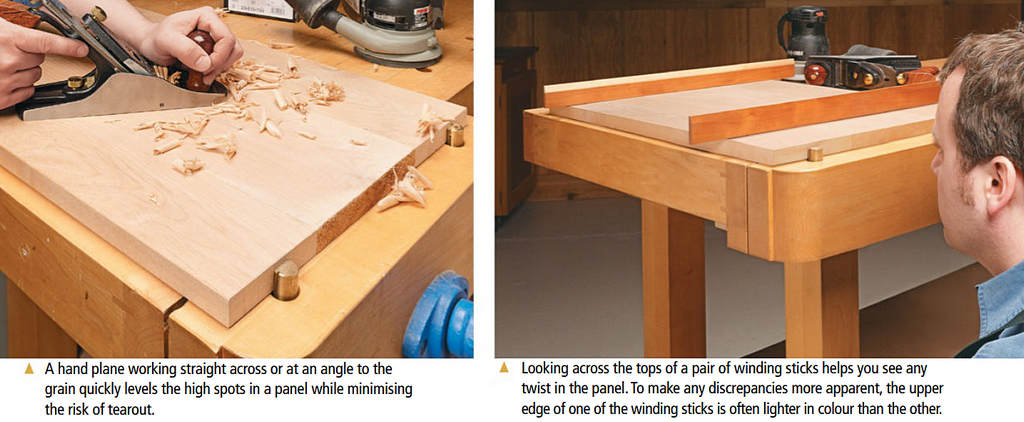
VISUAL AIDS. I like to use a straightedge to determine if a panel is flat across its width and length. Gaps between the straightedge and panel reveal cup (width) and bow (length). You can see this in the lower right photo. Mark low spots with pencil scribbles.
There’s one other test to perform—check for twist. For this, you use a pair of straightedges called winding sticks. One stick goes on each end of the panel, as shown in the upper right photo. Sight across the tops of the sticks. Ideally, they will be parallel. Any tapering shows that the panel is twisted. This combined diagnosis helps determine the next course of action.
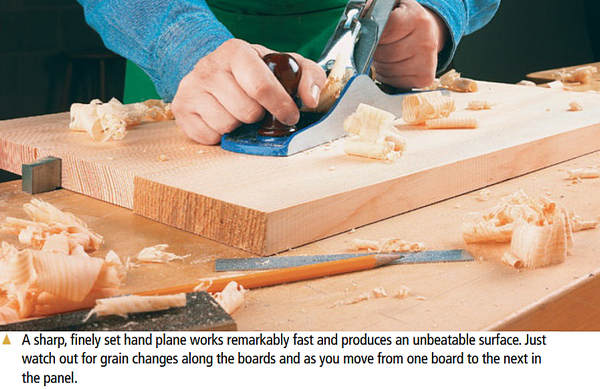 COARSE CORRECTION. Your task is to bring the high spots of the panel down to the level of the lower spots. This can involve removing a surprising amount of wood. So the tools you select should be capable of making quick, coarse cuts.
The three tools on this page are all good options for this work. I have an affinity for hand tools, so I often use a hand plane. If you work across the grain or at an angle, you can take relatively heavy cuts.
In the power tool category, a belt sander or power planer are solid options. The key with these two tools is to keep them moving. Lingering in one area can create dips (and more work). I find it easiest to work with the cupped face up. Shim the edges, if necessary, to prevent rocking.
The pencil lines you made earlier serve as a gauge to guide your work. Once the lines are gone, grab the straightedge and winding sticks to see if any further flattening is necessary. When you’re satisfied, flip the panel over and repeat the steps on the opposite face.
SMOOTHING
Tools that remove wood quickly often leave rough surfaces. So once a panel is flat, you can concentrate your efforts on one last remaining stage — smoothing.
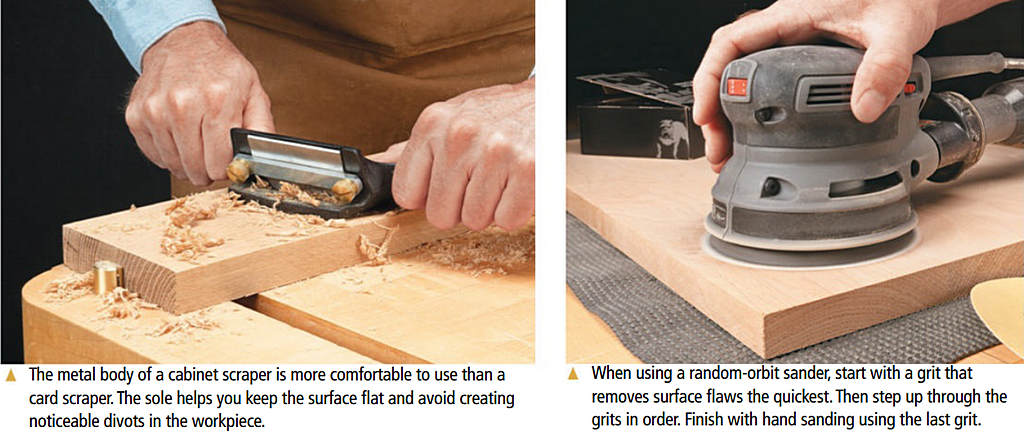 Here your gaze zooms in to the smaller imperfections of the surface. Your eyes and your fingers are the best tools for evaluation.
HAND PLANE. The classic picture of woodworking usually conjures the image of a sharp plane creating gossamer shavings and a glass-like surface, as shown in the upper right photo. However, as you move from board to board in a wide panel, the grain direction can change dramatically. The ugly tearout that results brings your enjoyment to a screeching halt.
CABINET SCRAPER. If you want to stick with hand tools, a cabinet scraper also produces shavings. It works with a high cutting angle that prevents tearout. Although the surface is rougher than what you get with a plane.
SANDING. A third option to consider is a 125 mm random-orbit sander. What’s important here is choosing the right grit of disc. Starting with 80- or 100-grit quickly removes the marks left by the flattening step. From there, you can quickly work through the grits. I usually stop at 180- or 220-grit.
Finally, no matter what tool I’ve used to this point, I hand sand with a sanding block wrapped with 220-grit paper to even out the look of the surface and soften the edges. Then it’s ready for finish.
Taking a large solid-wood panel from glue-up to final smooth finish is a challenge. But knowing and understanding the options also provides the freedom to find a path that works right for your project and satisfaction in the time you spend in your workshop.

