An uncommon way to maximize your table area.
BY STEVE LATTA
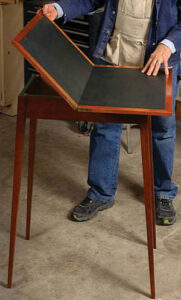 During the Federal period, some card tables and even dining tables had a unique design that allowed the top to pivot 90° and then fold open, doubling its surface area. Building a table this way eliminated the need for fly rails or other elaborate support mechanisms. The design is pure simplicity, and I thought it appropriate for a certificate table that I made for my Quaker meeting. In the Quaker faith, the wedding couple signs their names to a marriage certificate that states their commitment to each other. All members in attendance sign the certificate as well in support of the union. I made a second version of the table for my home, and it has proven to be one of the most versatile pieces I live with. Near the front door, in the smaller position, it serves as an entryway table, holding keys and mail. Opened larger, it offers drinks and hors d’oeuvres. I can easily see changing the dimensions to make coffee tables or end tables with the same technique.
The base and top are basic in design
The base for the table is nothing more than four splayed legs connected to tenoned aprons. When closed, the top measures 15 in. by 24 in., has a 1-in. overhang on all sides, and displays a veneered surface. When rotated and opened, the top doubles in size to 24 in. by 30 in., overhanging the sides by 5½ in. and the ends by 4 in., and is covered in leather, providing a great surface for signing the certificate.
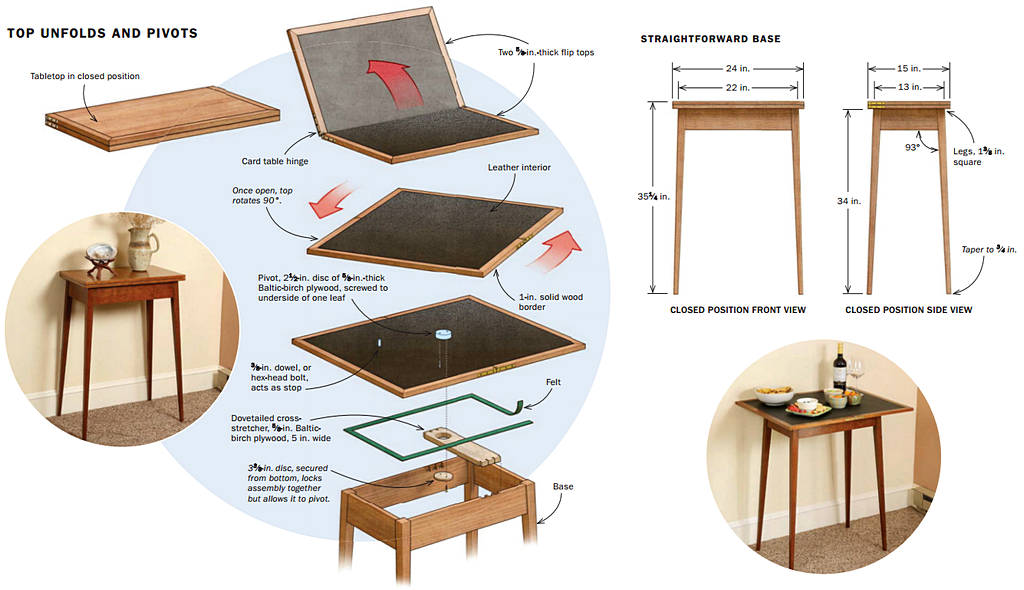
The folding top is made of two plywood leaves. I veneer one side of each leaf, and then, in a separate step, I glue a single piece of leather across the other side of both leaves. Then I frame the top with solid lipping and attach it to the base of the table.
Add a frame and hinges
Once the two leaves are surfaced, you can apply the edging. The three exposed sides of each leaf get covered with a 1-in. strip of cherry mitered at the outer corners. Adding biscuits along the joint helps with alignment and slippage. The edging can be flushed on the veneered side of the leaf but I do my best to avoid taking that risk with the leather, since there is no easy touch-up to a gouge in the leather surface.
So the joint between the leather and the border must be dead-on after the glue-up.

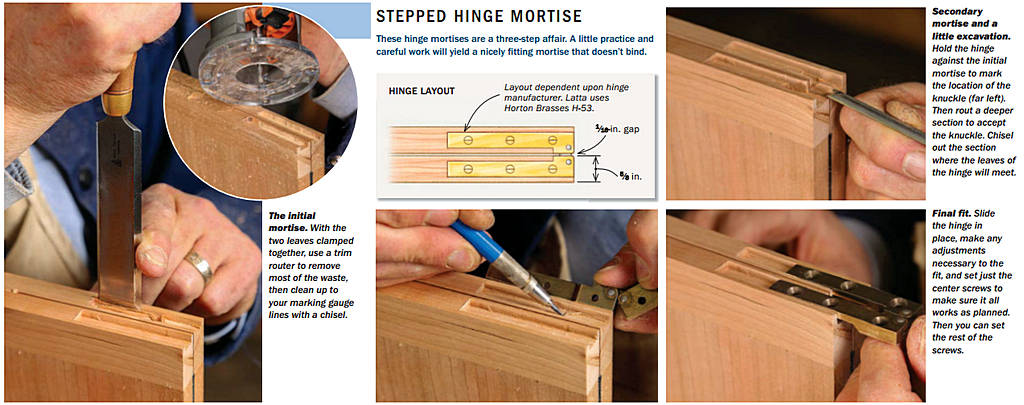
With the edging mounted and flushed, install the card-table hinges. Mounting the hinges takes a little practice and I always recommend doing a mock-up first to work out the nuances. These hinges are basically two L-shaped leaves joined with a steel link. Position the hinge so the end of the L that joins the link is just slightly proud of the table surface; this will allow for the top to fold without the edges binding. If the hinge is mounted too far from the face, the edges will rub and, if extreme, tear the leaves from their mounting. I also set the hinges so the rear edge of the knuckle extends past the rear edge of the tabletop a hair, noticeable if you run your finger along the back edge. Once again, this allows the top to fold without binding.
With layout for the first hinge complete, use a trim router set to the hinge leaf depth to rough out the main recess. Then cut to your layout lines with a chisel. Reset the router to the knuckle depth, and rout that section. Drive just the center screws and make sure the hinge works properly. If it does, set all the screws making sure it still works. If all is good and the heavens have aligned, repeat the process with the second hinge.
Finding and mounting the pivot
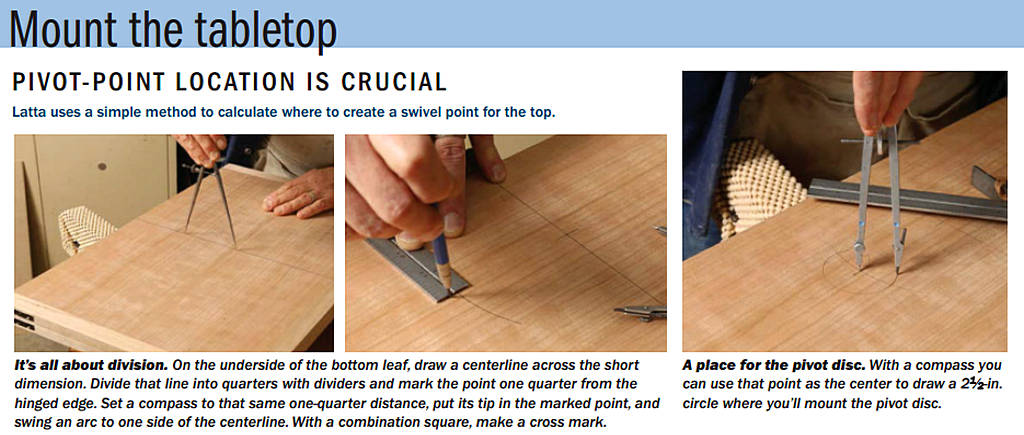
I spent many an hour trying to find the magic formula for calculating the tabletop’s pivot point. I never knew the direct method of finding it, but I always got there. Well, with writing this article as an incentive, I dug a little deeper and realized the answer was always in plain sight. I was just twisting the simple into something complicated.
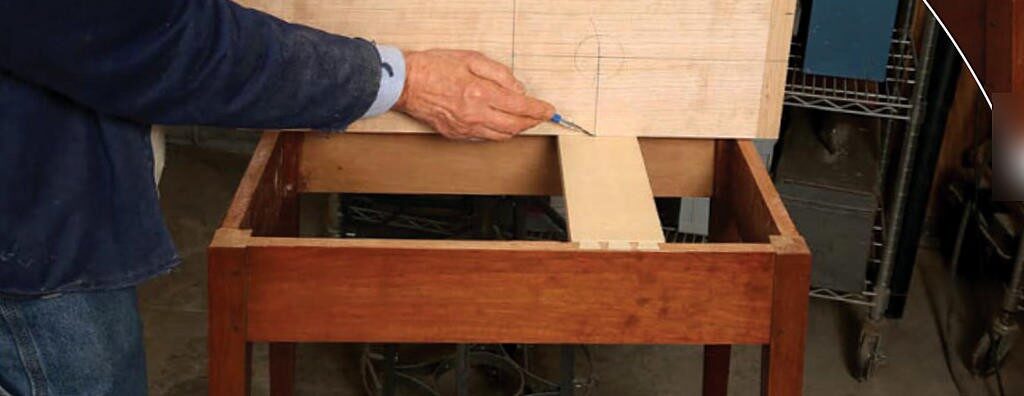
On the underside of the bottom leaf, draw a centerline across the short dimension. Divide that line into quarters with a pair of dividers. The rotation point will be one quarter of the way from the leafs folding edge to its outer edge. And that same distance—one step of the dividers— away from the centerline. Bingo! That is it. I’ll leave it to the mathematicians and engineers to figure out the why, but it works every time!
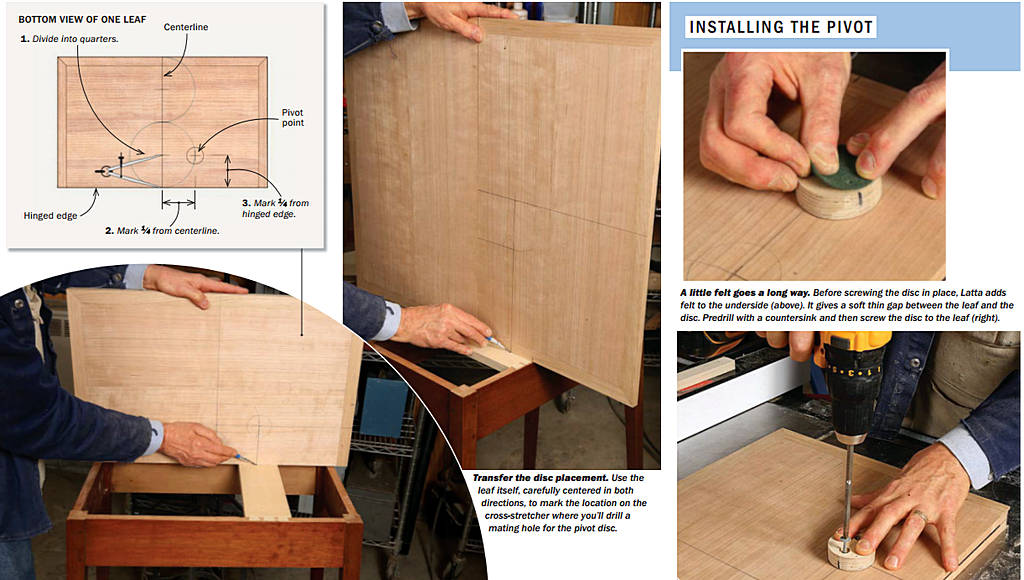
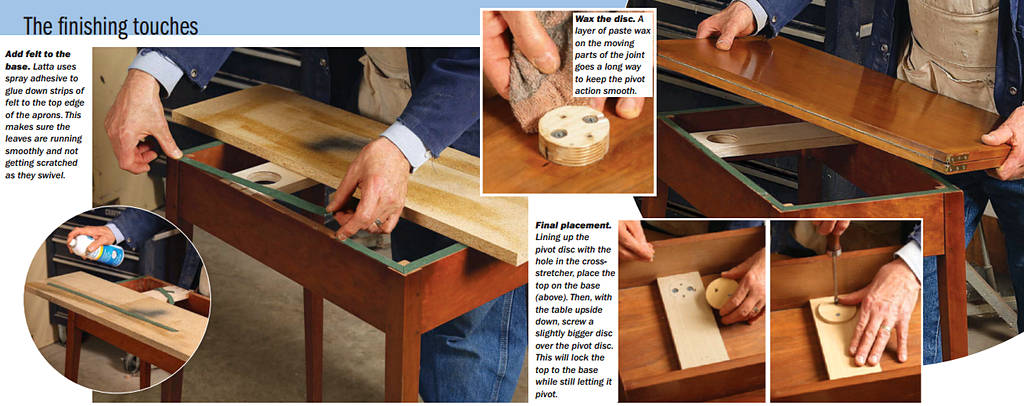
Next, on the bottom of the pivoting leaf, attach a 2½-in. disc of ⅝-in.-thick Baltic-birch plywood centered on the pivot point. Dovetail a 5-in.-wide cross-stretcher of the same ⅝-in. Baltic-birch between the aprons of the base, making sure the disc will fall well within its borders. Bore a 2½-in. hole in the cross stretcher to receive the disc. Once the pieces are fit together, a 3⅜-in. disc will be secured from the bottom, locking the assembly together but allowing it to pivot.
Before that magical moment, however, I adhere strips of blended wool felt to the top of the aprons and legs to make the pivot motion work easily and prevent scratching. My local fabric store offers a 35% wool, 65% rayon that is stronger and more durable than the standard craft felt at the hobby store.

Mount the top to the cross rail and make sure it pivots easily. The larger disc screws into the pivot disc and a little trial-and-error is required here to get the proper level of resistance. If the top is hard to turn, take a manila folder and cut several 2⅜-in. discs to serve as shims. Veneer also works but often splits when you are trying to secure it. Add shims until the top rotates smoothly but takes some effort to move—not just sliding at the slightest touch. Then you should be good to go.
To limit the top’s rotation, add a hex-head bolt, or a dowel, as a stop. Open the top and make sure the overhang is even all the way around. Mount the stop to the bottom of the pivoting leaf right up against the cross stretcher. When the top is dosed and pivoted back, the stop will contact the long apron. See the drawing to help determine the stop’s specific location.
