Geode resin art combines creativity and craftsmanship, offering endless possibilities for stunning, nature-inspired designs. Whether you’re a seasoned artist or a beginner exploring resin techniques, this guide will walk you through the process, ensuring a seamless journey from preparation to completion. With the right materials, safety precautions, and a step-by-step approach, you’ll be able to create dazzling resin geodes that capture the beauty and elegance of natural stone formations.
Creating a Resin Geode: A Step-by-Step Guide
This guide provides detailed instructions on how to craft your own stunning resin geodes art.
Step 1: Preparing the Wood Panel
Begin by painting the wood panel white. After it dries, apply painter’s tape to the back to catch resin drips and ensure a clean finish. Position the panel on stands, elevating it above your work surface. Use a level to guarantee the panel is perfectly horizontal. This is crucial; an uneven surface will cause the resin to run during curing, distorting the resin geode pattern.

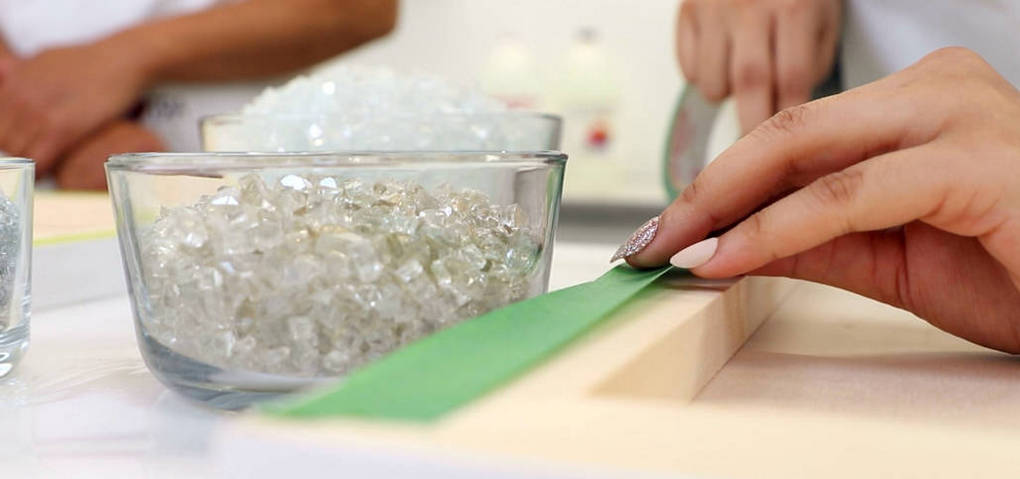
Step 2: Designing the Geode Layout
Wearing gloves, arrange your crystals to create the geode design. Start with the largest crystals, using them generously as they form the foundation of your piece. Take your time experimenting with different layouts until you achieve a satisfying composition.
- Tip: Consider a symmetrical or abstract pattern. For inspiration, consult reference photos of natural geode formations to guide your pattern and color choices.
Next, use gold-toned fire glass to outline the crystal arrangement.
- Tip: Combining various crystal sizes and tones adds texture and depth.
Use a paintbrush to refine the design, adjusting the position of crystals and adding more as needed. Remember, crystals vary in shape and size; feel free to replace any pieces you don’t like.
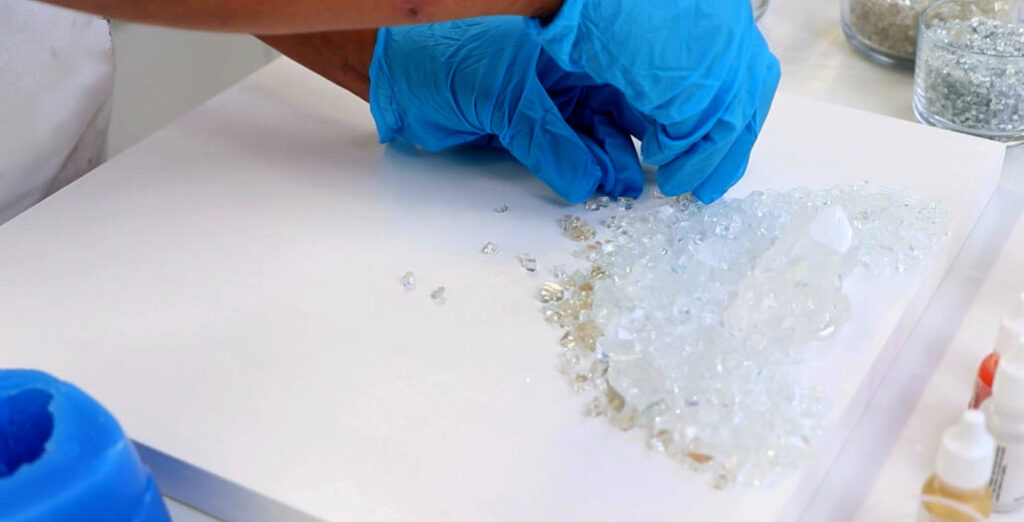
- Expert Insight: Geode art is inherently unique. No two geodes are identical in nature, and this principle applies to your artwork. Embrace imperfections and allow your creativity to guide you.
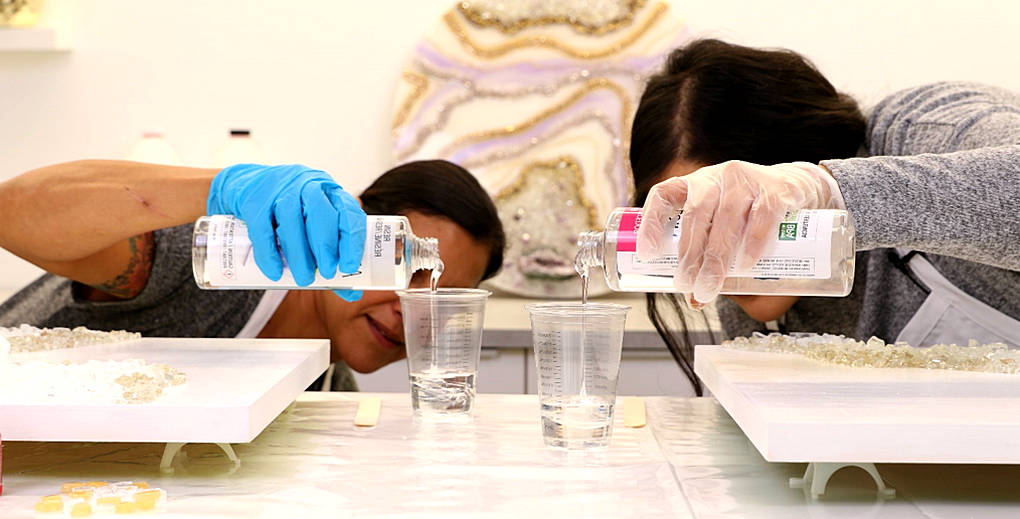
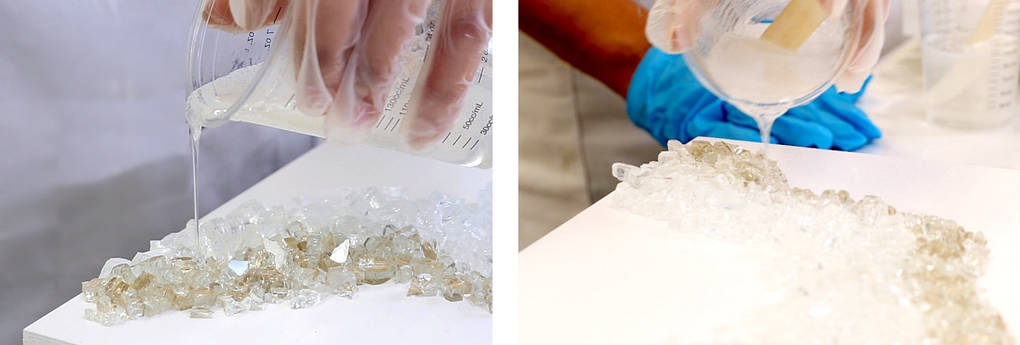
Step 3: Applying the Initial Resin Layer
Mix a small batch of resin (approximately 50ml) to secure the crystals to the panel. Carefully drizzle the resin over the crystal pattern, ensuring each crystal is lightly coated. Pour in a smooth, continuous motion, avoiding stops and starts. Focus on applying slightly more resin around the perimeter to create a barrier and prevent tinted resin from seeping under the crystals later.
- Tip: For real crystals or large quartz pieces, apply resin underneath them for adhesion rather than pouring over the top.
If excess resin seeps from under the crystals, remove it with a gloved finger to prevent dilution of the subsequent tinted resin layer.
How to avoid common mistakes when pouring epoxy resin.
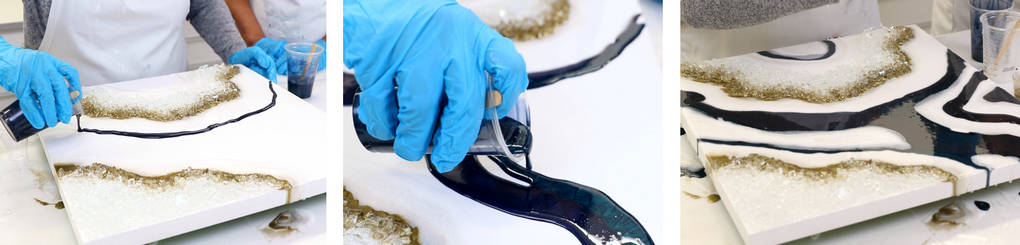
Step 4: Preparing and Applying the First Tinted Resin Layer
Prepare your tinted resin. If you have leftover resin from the previous step, use it for this first layer, which will be closest to the crystals. This layer acts as a transition and should complement the adjacent crystal tones (e.g., gold resin with gold glass, white resin with clear glass, etc.).
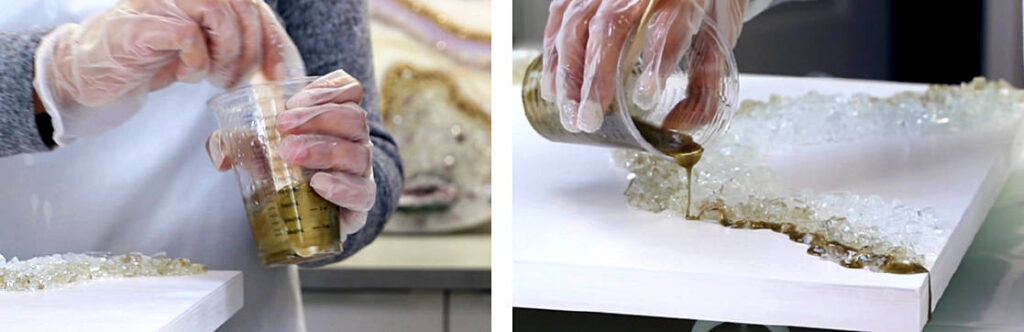
Carefully pour a thin line of tinted resin along the top edges of the crystals and the panel. This layer also helps conceal any imperfections in the crystal arrangement. Extend the design over the panel’s sides for a complete look. Use leftover resin or a craft stick to manage excess resin underneath. Alternatively, tape off the sides beforehand for a cleaner edge.
Step 5: Mixing Resin for the Main Geode Body
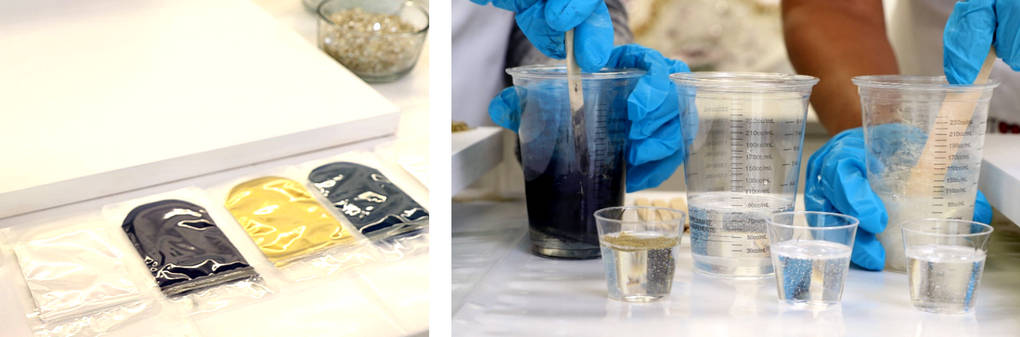
Prepare the resin for the main body of the geode. It’s recommended to choose 2-3 shades of white and 1-2 accent colors that complement the first tinted layer. Examples include various whites (sparkly, shimmery, opaque) paired with colors like navy blue and iridescent turquoise green.
Step 6: Pouring the Main Resin Layers
Once the resin tints are mixed, begin pouring. For a symmetrical look, pour each color next to the others. For a more modern, abstract effect, create broken or branching lines.
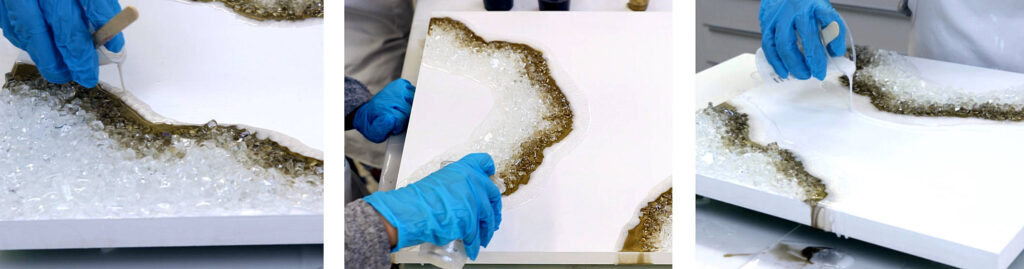
- Tip: Touch up the first tinted line if necessary before proceeding.
Start with the shimmered white resin, pouring a thin line against the first tinted layer. Pour slowly and continuously to avoid blending. Next, pour the sparkly white resin along the interior edges of the crystals. Repeat if needed. Then, pour a thin layer of sparkly white along the outline of the shimmery white. Allow the resin to self-level or use a popsicle stick to fill any gaps. Follow with the opaque white, pouring against the sparkly white.
Monitor the balance between white and the first tinted layer; add more of the first tint if it’s being diluted. Introduce accent colors (e.g., navy blue), leaving a small gap to prevent overpowering the white. Repeat with other accent colors (e.g., turquoise green). Fill remaining spaces with the most abundant remaining color.
- Expert Insight: Resin geode art is a layering process. The first layer establishes the color palette. You can adjust your piece at any time by adding crystals or colors. If you’re dissatisfied with a pour, scrape it off and re-pour. Future steps will allow for further refinements.
Step 7: Removing Bubbles and Curing resin geodes
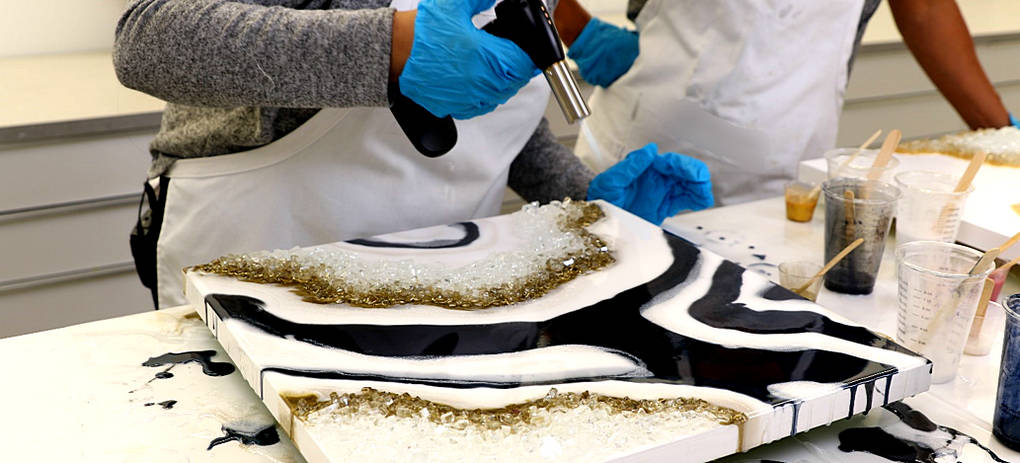
Use a torch to remove any bubbles and check for dust with a toothpick. Cover the piece to protect it from dust and allow it to cure overnight.
Step 8: Removing Loose Stones
After 24 hours, remove any loose stones. If a large patch is unadhered, reapply them with more resin.
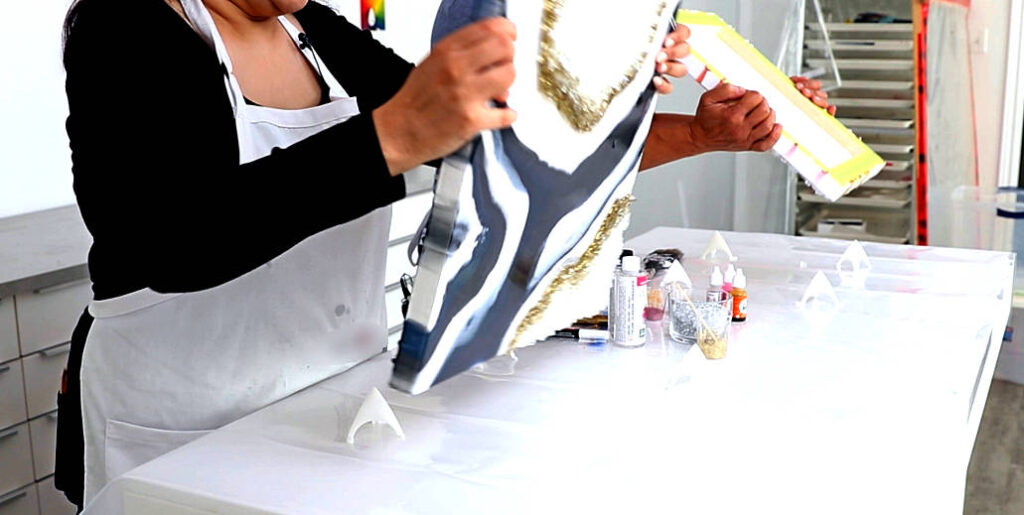
Step 9: Adding Embellishments
Add embellishments like paint marker lines, glitter, and crushed glass. This step enhances the piece and can cover imperfections.
Begin by drawing subtle lines with an acrylic paint marker, using a dominant color from your piece. Carry the lines down the edges. Encircle any resin cells to highlight them, or cover them with crushed glass, glitter, or more resin.
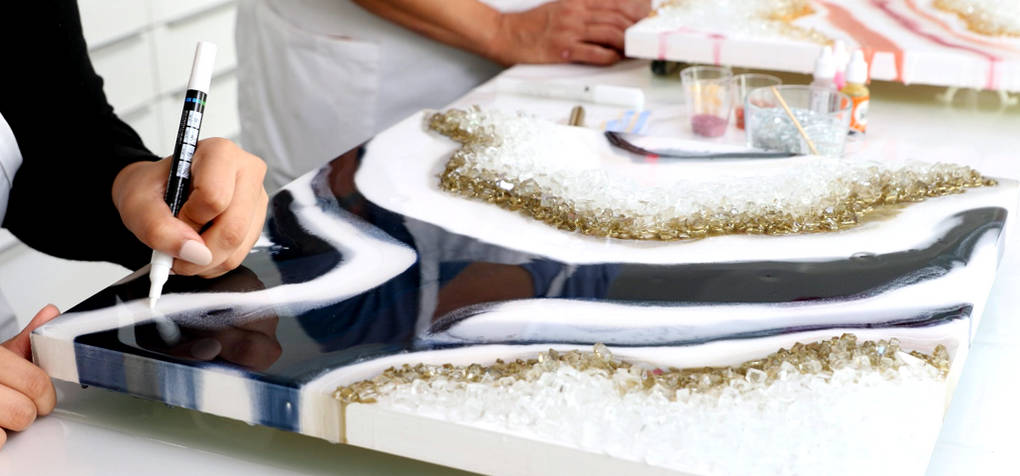
Step 10: Creating a Glitter Guideline
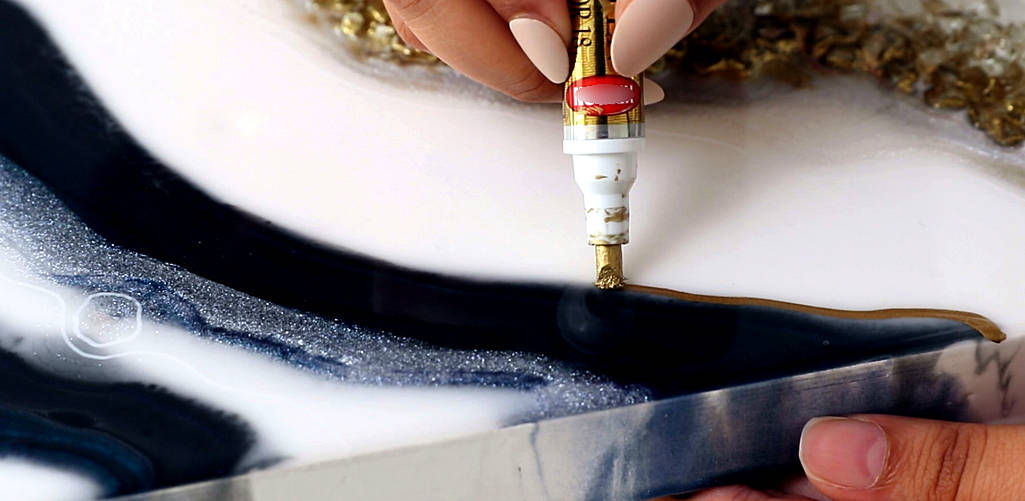
Use a gold paint pen to create a guideline for glitter embellishment, highlighting desired areas or covering imperfections. The line doesn’t need to be perfect as it will be covered.
Step 11: Applying Glitter
Mix a generous amount of glitter with a small batch of resin (about 2 oz) to create a thick paste. Let the resin thicken for about 20 minutes for better control. Transfer the resin to a ziploc bag placed in a cup. Snip a small hole in the corner and follow the gold guidelines with the glitter resin. Extend the glitter resin down the sides.

- Tip: Start with a thin line, as the resin will spread.
Step 12: Final Review and Curing
Review your piece from different angles to identify any areas needing further attention. Torch any resined areas if necessary, cover with a dust cover, and allow to cure for 24 hours.
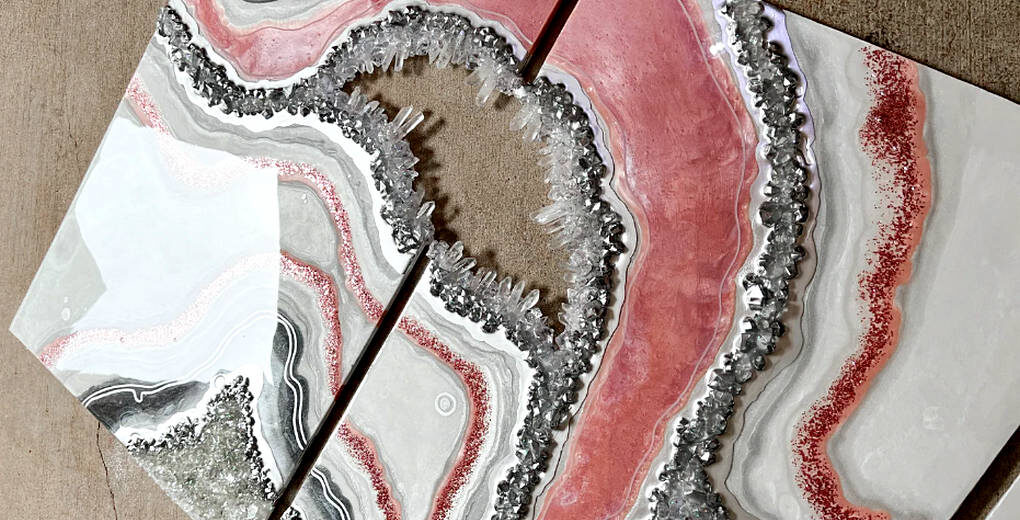
Step 13: Enjoy Your Creation!
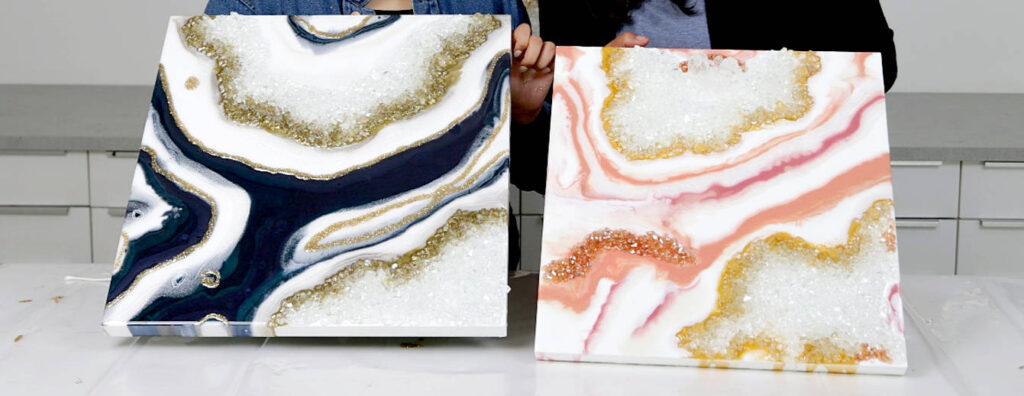
Admire your finished resin geode art!
Also, check out Unique Epoxy Resin Art Ideas to Inspire Your Next Creative Project.
This guide provides a foundation for creating unique and beautiful pieces.