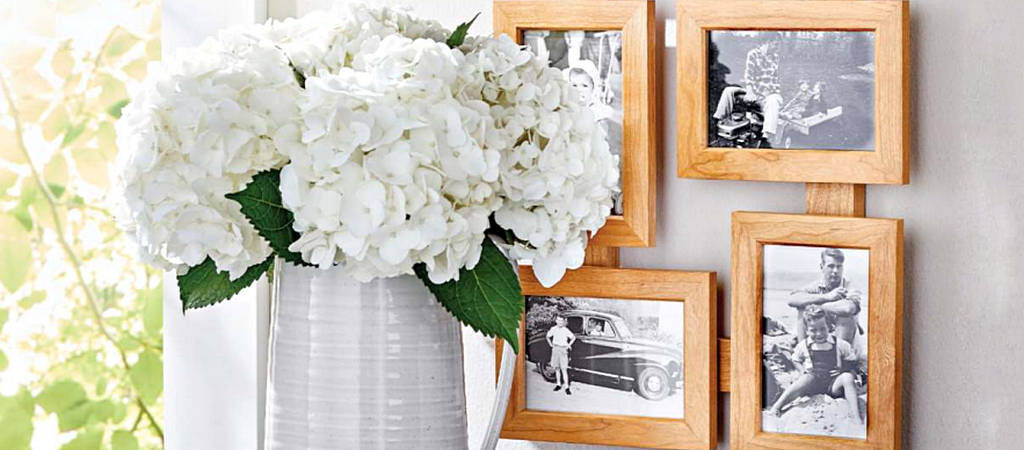
This family photo frame has just enough spaces for your own version of the Brady Bunch — with apologies to Alice.
Start your own TV-sitcom family with this picture frame grouping. It consists of eight individual frames, sized to hold 4×6″ photos, mounted to a larger frame, creating a single, wall-hung unit. Spacers create offset from the rear frame, giving the project visual depth. And if you don’t have a Walton-size family, fill the empty frames with pictures of grandkids. the family pet. or your favorite mother-in-law.
A STACK OF FRAMES
1. From 1/2″ stock, cut a 7/8*30″ blank for each frame (eight total). Chamfer one edge on the front face of each blank and cut a rabbet on the back face [Drawing 1].
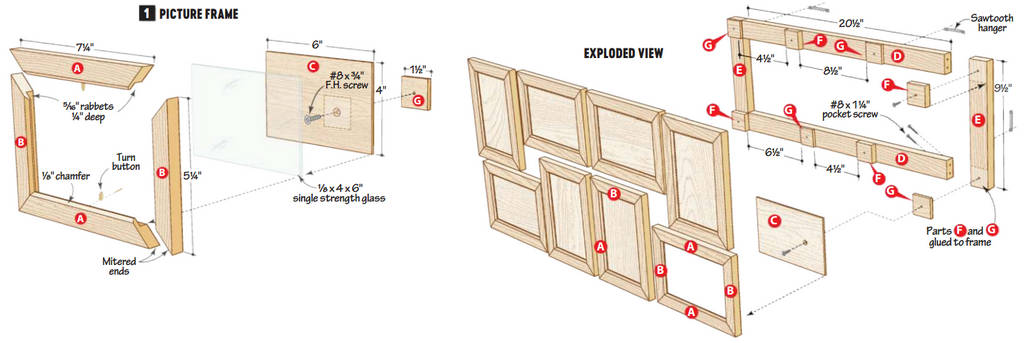
2. Miter-cut the frame sides and ends (A, B) to length [Materials List. Drawing 1]. using a stop block on your miter gauge or the jig.
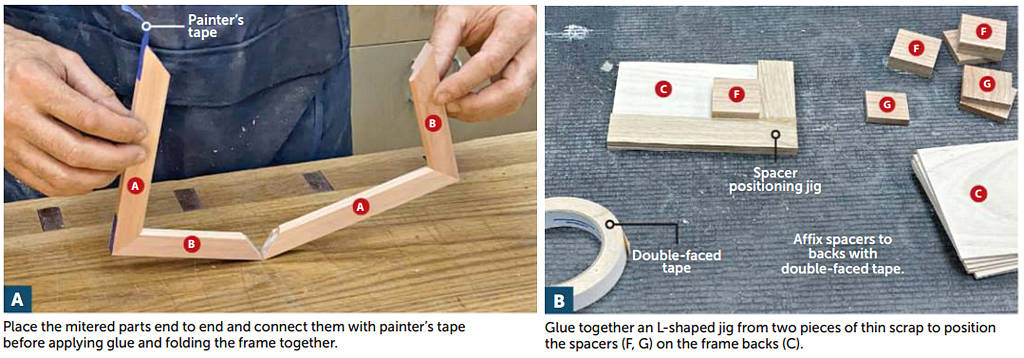
3. Glue each frame, using painter’s tape to hold the pieces together (Photo A). Cut the backs (C) to size [Materials List].
4. Cut the mounting frame rails (D) and mounting frame stiles (E) to size and pocket-screw the frame together [Exploded View].
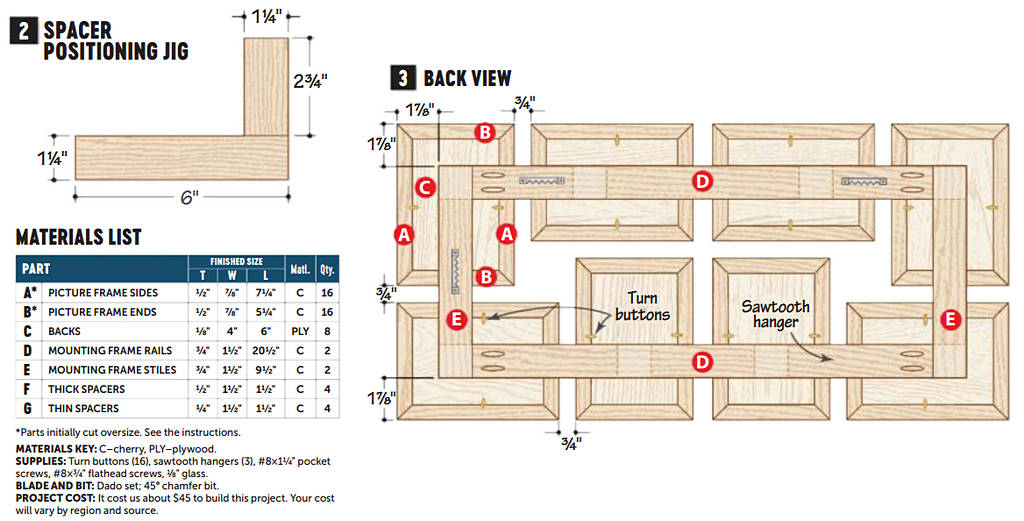
5. Cut the thick spacers (F) and thin spacers (G) to size (four of each). Make a positioning jig [Drawing 2] and use it to temporarily position
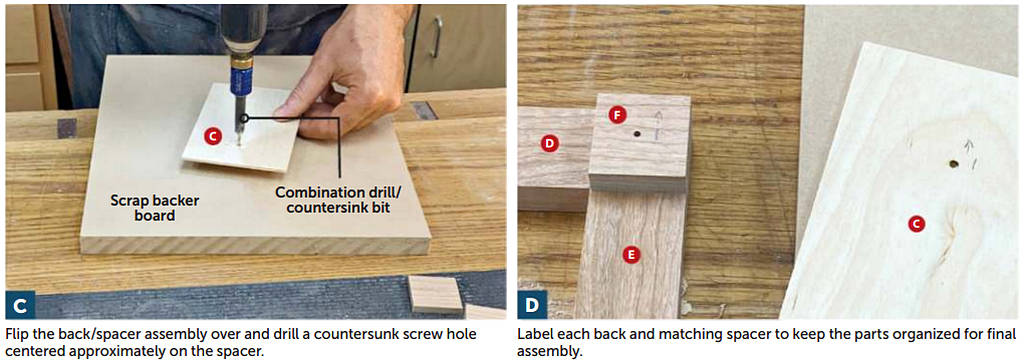
the spacers on the backs (C) with double-faced tape (Photo B). Drill pilot holes through each assembly [Photo C].
6. Working one at a time, separate the spacers from the backs and glue them to the mounting frame [Exploded View. Drawing 3]. Label each spacer/back pair to show both the location and the orientation of the frame [Photo D]. Note that the locations of the spacers on the two mounting frame rails (D) are mismatched [Exploded View].
A FINAL TOUCH-UP
1. Finish-sand the picture frames and mounting frame. After masking the front face of the spacers, apply a finish. (We used three coats of spray lacquer.)
2. Attach two turn buttons to the back of each picture frame [Drawing 3]. Attach sawtooth hangers to the back of the mounting frame.
3. Glue and screw the backs to the spacer blocks. Cut 1/8″ glass to fit in the frames [Drawing 1]. Install the glass and photos before securing the frames to the backs with the turn buttons. Hang the picture frame assembly in a prominent place where your mother-in-law will be sure to see it.
