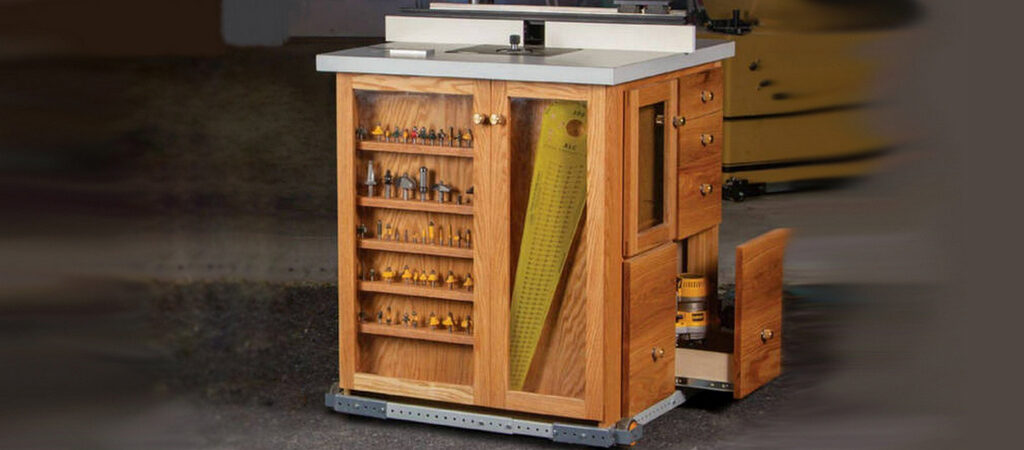
My former router table was, shall we say, the lowest of low-tech. It was a rickety, stamped steel bench-top model with an underpowered motor and a sad fence. In designing a new one, I wanted everything that garage sale find lacked: storage for bits, collets, and wrenches; enclosed dust collection; mobility; simple bit height adjustment; plenty of power; and a reliable fence and miter gauge. With that wish-list in mind, I pulled together what I view as the state of the art in router tech and incorporated it all into one cabinet.
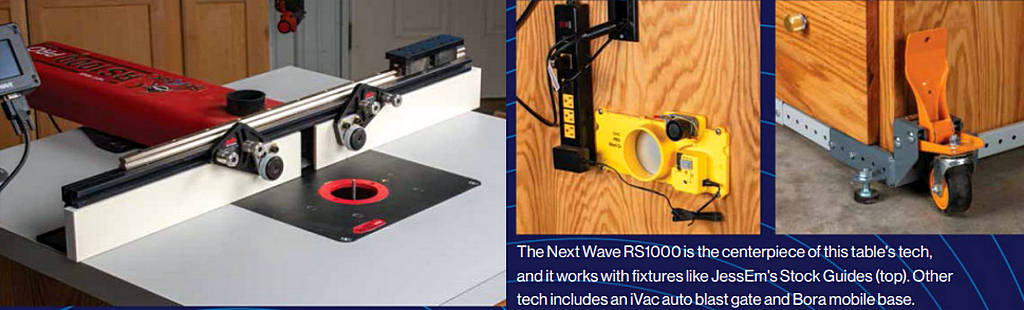
The cabinet itself is made of oak plywood with a solid oak face frame and topped with a custom, laminated tabletop. Spacious drawers on full-length slides provide plenty of storage for hand-held routers and their accoutrement, while bits and other accessories reside in either the pair of shallow tray-drawers or in the shelves behind the acrylic-paneled front doors. Everything is assembled with a combination of tongue and groove joinery and pocket screws. The high-tech part comes in the form of Next Waves computer-controlled fence and the power-sensing blast gate for the dust hose. The entire unit sits atop a mobile base that allows me to wheel it effortlessly around my shop. Is all this tech necessary for every woodworker? Maybe not, but I’d bet at least some of it is on your wish-list too. For all the gadgets and gizmos I included, see the Buyers Guide. Then get to making your own router table wish-list.
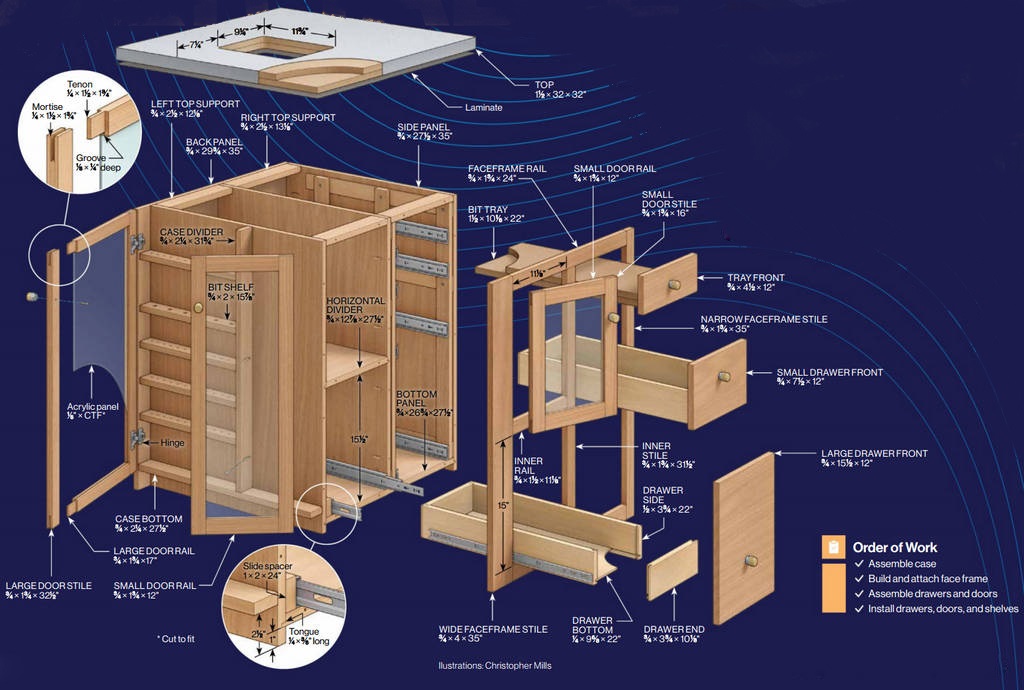
Create the case
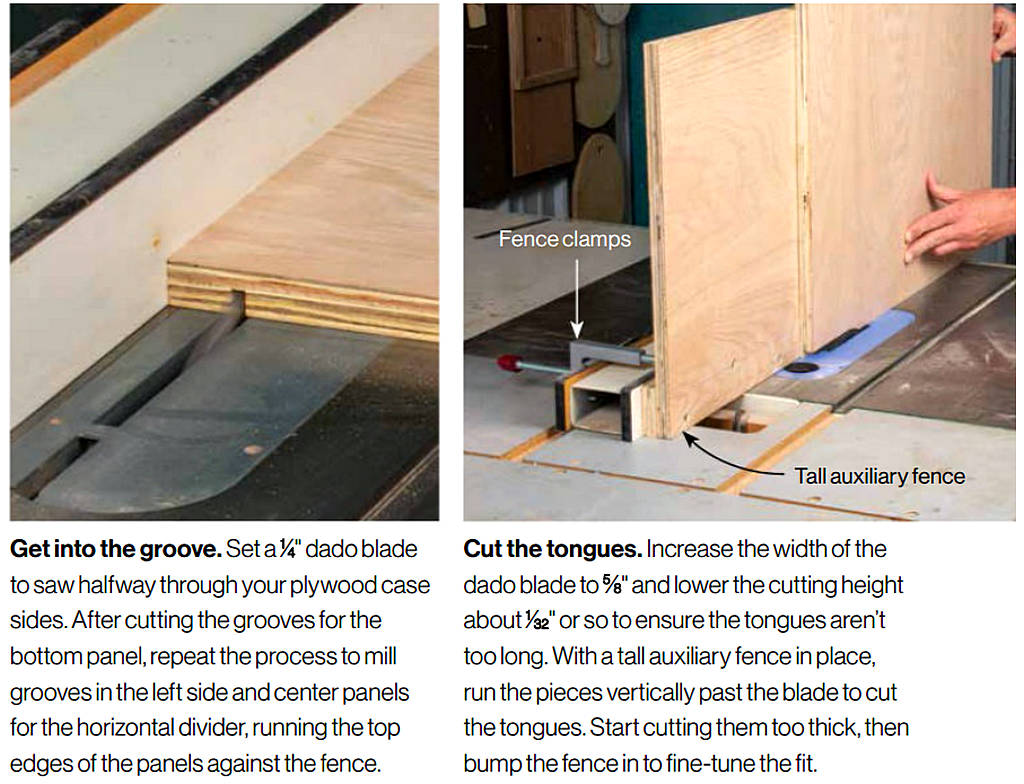
Cut the plywood case parts to size and groove the side panels to receive the bottom panel.
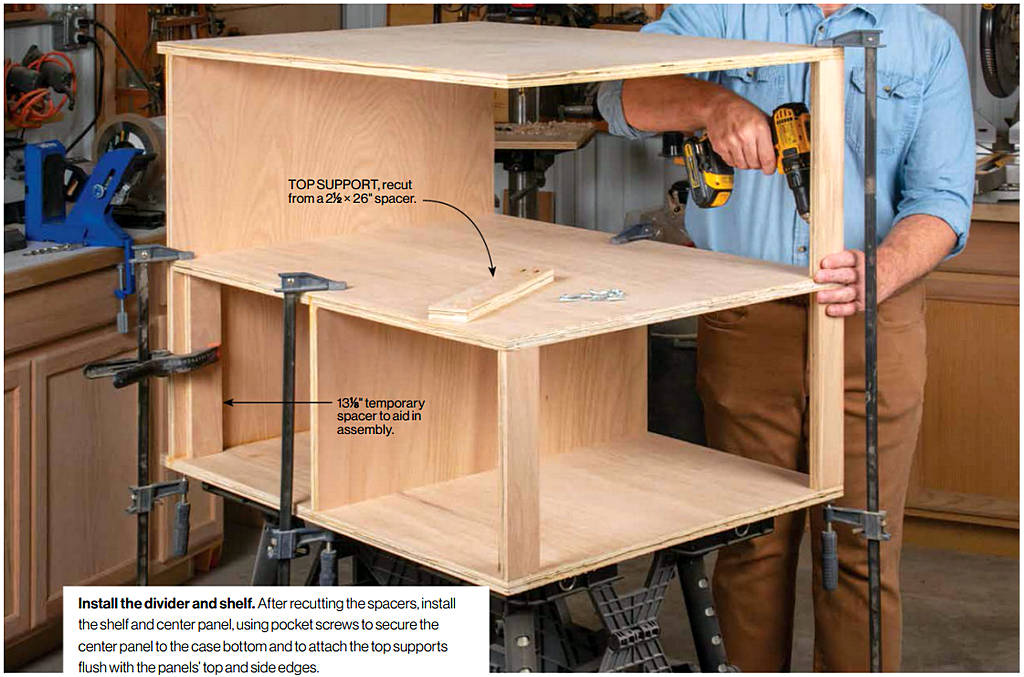
Also groove the left side panel and center panel to receive the horizontal divider. Then cut the mating tongues on the bottom and horizontal divider. Cut two 2½ x 26″ plywood strips to use as spacers at the top of the case as you glue the sides to the bottom. Then recut the spacers to become the top supports and install the center panel and horizontal divider.
Make face frame and back
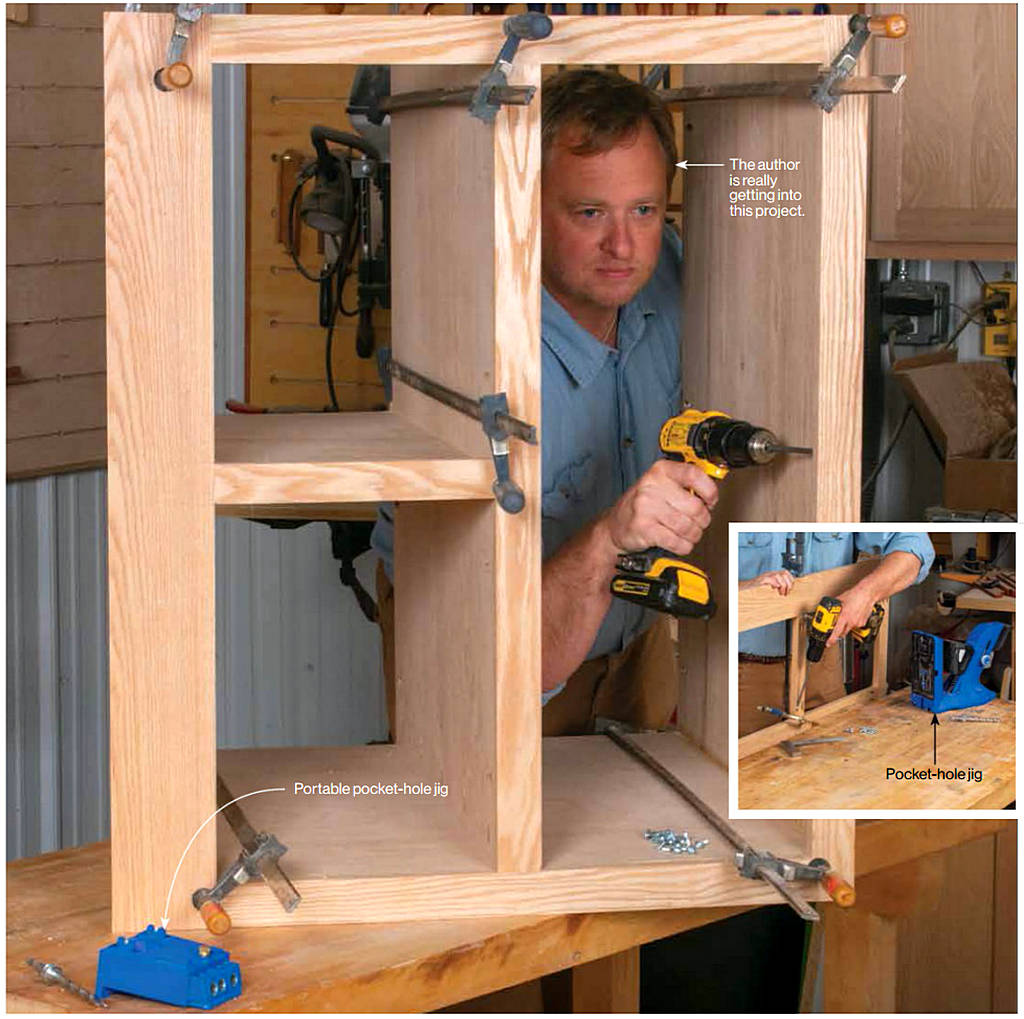
Fasten the parts of the face frame together with pocket screws. Then bore pocket screw holes into the case to attach the face frame and back panel. Attach the back panel and face frame to the cabinet so that they are flush along the right side of the cabinet; the back panels opposite edge and the wide face frame stile will extend past the case’s left panel to form the sides of the router bit case.
Make the drawers and doors
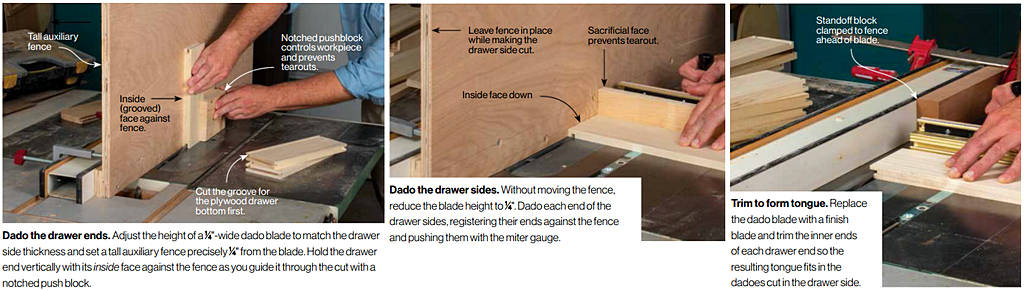
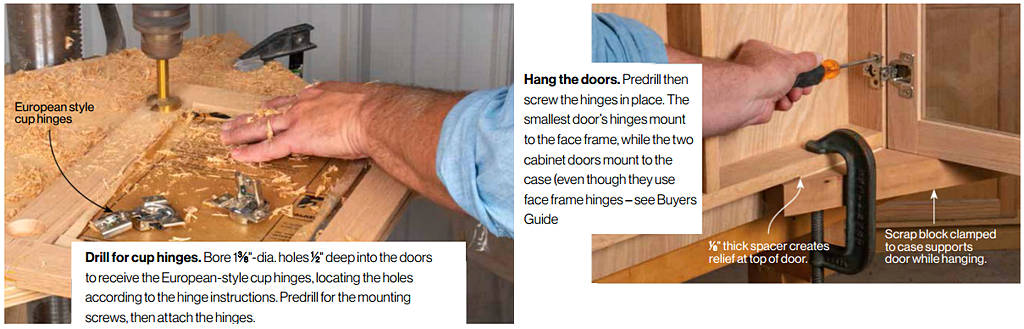
Size and laminate two thicknesses of MDF face to face for each of the tray-drawers. Drill them with a series of ¼” and ½” holes for bit storage. Mill stock for the drawer boxes, then set up a ¼” dado blade to cut the grooves for the drawer bottoms and the corner joints. Make the locking corner joints with a series of three cuts as shown. Then size the drawer bottoms and glue up the drawers. Mill the door rails and stiles to size. Cut the bridle joints at the table saw using a tenoning jig (see OnlineEXTRAS for a shopmade tenoning jig). After cutting the tenons, reduce their width to match the 1½” depth of the mortise by running them on edge across a dado. Then cut a groove centered on the length of the rails and stiles to receive the acrylic panel. Cut the panels to size at the table saw and assemble the doors around their panels, putting glue on the tenons but leaving the panels to float.

Install the shelves, drawers and doors
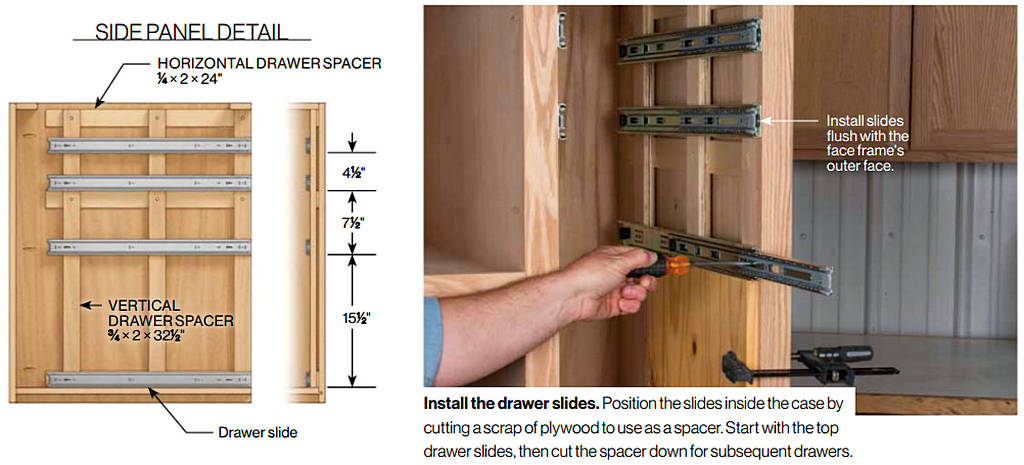
Install the case bottom and case divider with pocket screws. Then drill a series of ¼” and ½” holes in the bit shelves and pocket screw them in place on the wide side of the case. Hang the doors on the front and side of the cabinet. Install the drawer slides where shown below. With the drawers and bit trays in place, size and attach their faces. The bottom edge of the two lowest drawers sit flush with the face frames inner edge to give clearance to the mobile base. Screw the fronts onto the drawers, and use pocket screws to attach the fronts to the bit trays. Finally, add a coat of finish (I used General Finishes new Hard Wax Oil) and install hardware on the drawers and doors.
Install the goodies
Make your own top by screwing together a double-thickness of MDF and laminating both faces and all four edges.
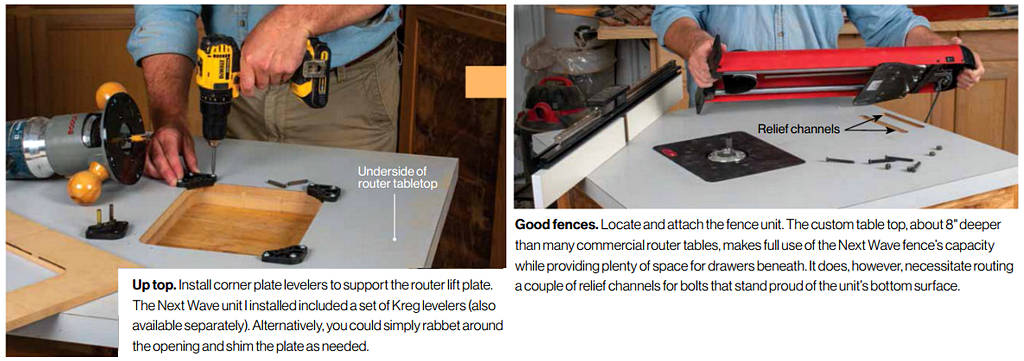
Then cut a hole through the top appropriate to your router lift mechanism or mounting plate. Flush the tables back edge to the right side of the cabinet and leave 1½” overhangs on the cabinet’s front and back. Drive screws up through the top supports to hold the top in place.
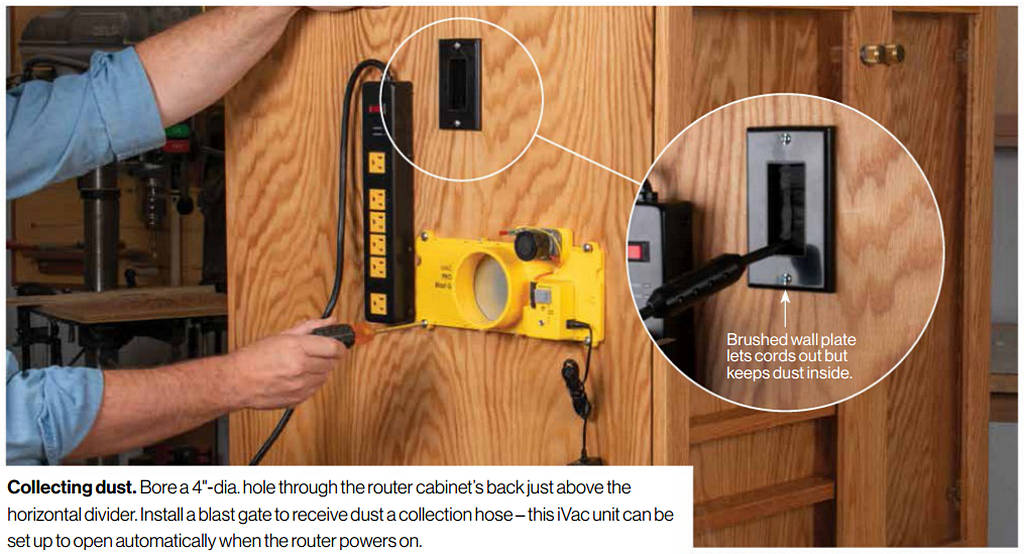
Install and level the router lift, then attach the fence unit as shown. Note, if you don’t want to splurge on the high-tech fence, there are plans for a shop-made one on our website, see Online Extras. Finally, drill for appropriate dust collection hardware and install a power strip to power the router, lift, blast gate, and any other high-tech accessories you’ve included from your wish-list.