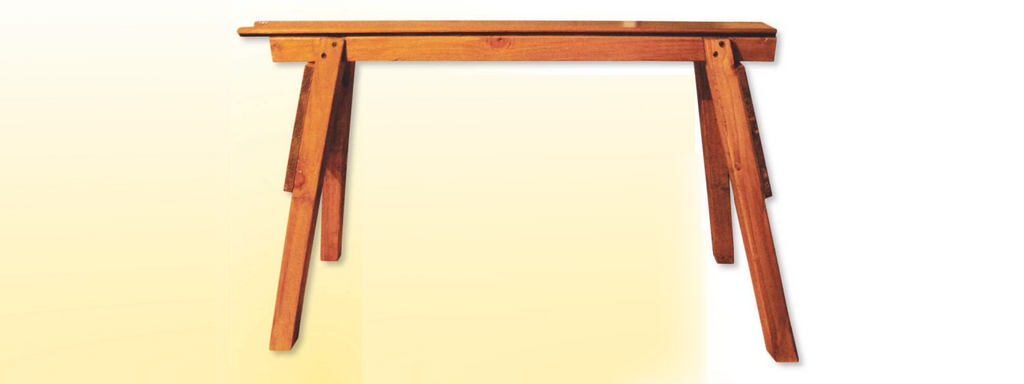
Every woodworker needs a sawhorse or two, says Stuart Gooda and the following steps show you how to build one quickly and easily.
The sawhorse – everyone should have at least one. They make excellent benches, inside or out All you need is a piece of 4×2, 900mm long, four pieces of 2×2. approximately 630mm long, and an offcut of ply for the end gussets.
The only thing you need to know is that the sawhorse depends on one bevel – the 1 in 4. Nothing else is required, just careful marking for the splayed legs and their seemingly difficult compound angles, which appear trickier to set out than they actually are.
Bevel action
The first step is to take the 4×2, cut squarely to length, and mark a line 90mm in from each end so that it’s square across the timber. Now set the 1 in A bevel and mark back at each end of the timber.
Place one of the 2×2 leg pieces, hold it on the previously marked ends, and create a second line. Mark this leg ‘A’ as well as its top. Take each leg and mark all around, lettering each as you go until all four are completed. Next, on the very top of the sawhorse, mark in where one leg is to be 20mm. and carry this onto the other legs.
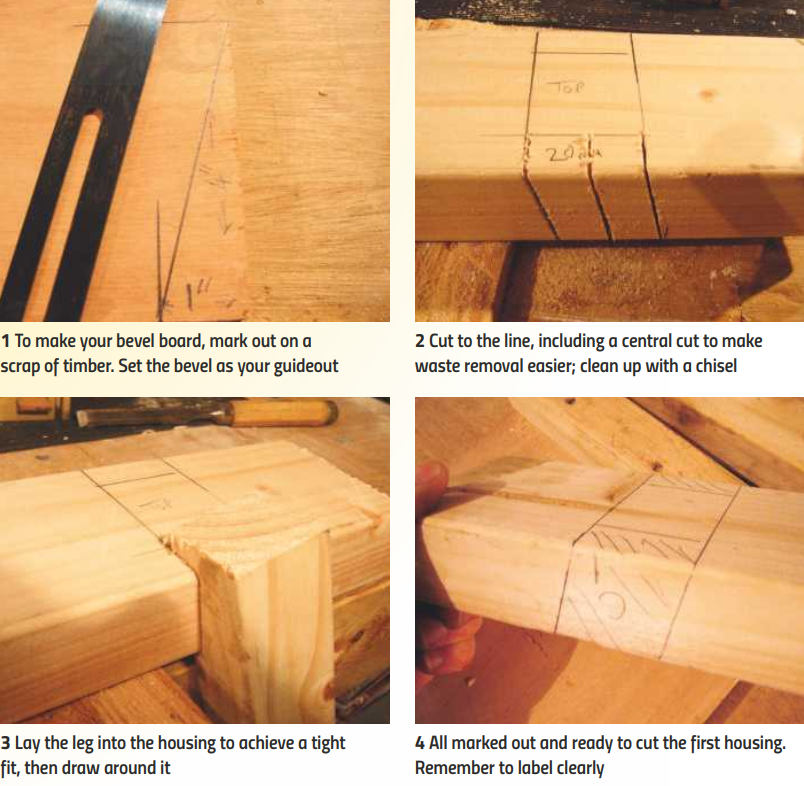
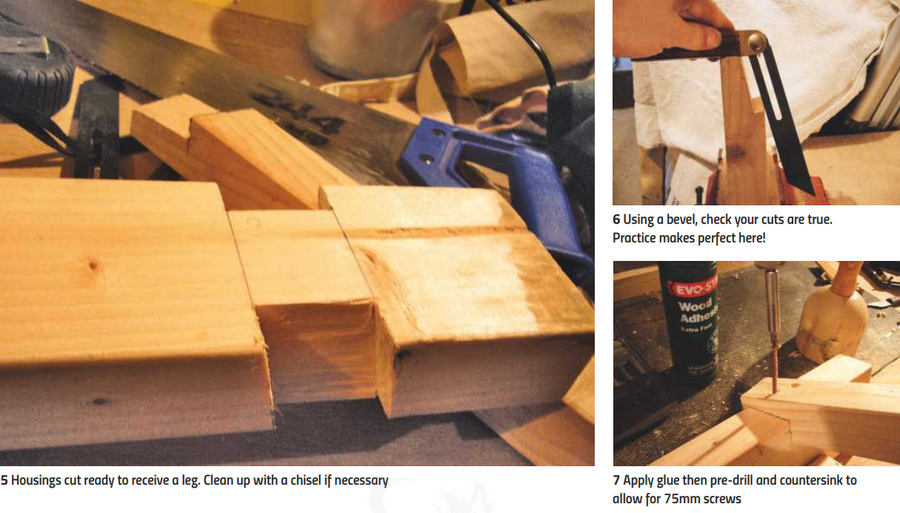
On the underside, mark a 10mm line; this will provide sufficient angle for the legs to splay when sitting in their cut-out housings. Make three saw cuts in joint ‘A’ and chisel out the waste down to the line, leaving a clean housing. As before, repeat this step for each of the joints.
That’s clever
Now for the clever part lay leg ‘A’ into its housing ‘A’ – so you have a tight and firm fit – and draw around it Remove leg ‘A’ and continue the lines around until they meet You’ll have the splayed cut marked on top of the legs. Cut to the line and clean up with a chisel. Now leg ‘A’ should be a perfect fit for housing ‘A’. Continue this process for the other three legs. Temporarily fit all legs into their housings and at this stage, you should have a very wonky-looking sawhorse that’s badly in need of some glue and screws!
Next pre-drill/countersink all legs to take a 75mm screw, squirt a little PVA glue into the housings and secure each leg in place.
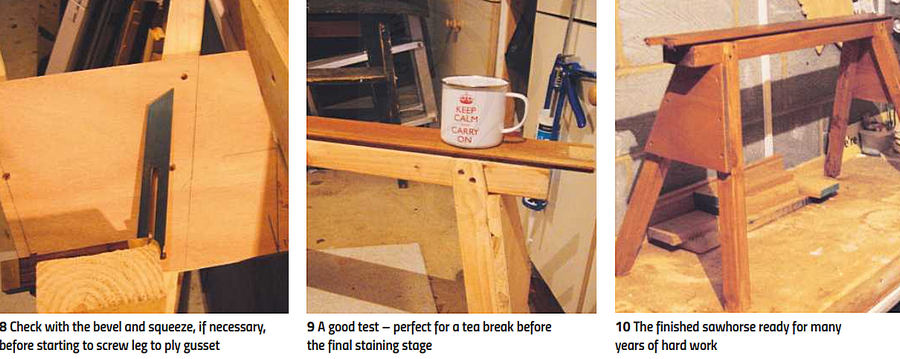
The job’s not yet finished, so don’t worry if the construction still looks slightly lame and lopsided.
Ply gussets
Cut ply gussets to the 1 in 4 bevel on one side, then glue and screw them into one leg and mark from the underside of the top with a 1 in 4 bevel. Now try and splay the leg as near as you can to the line. Remember, the more you push, the more likely you are to open up the top joint, so be careful when doing this.
Locate as near as possible to the line, repeat for the other end and fix in place with glue and 38mm screws. Trim the ply and plane flush. Don’t worry if you can’t achieve the exact bevel for the legs.
Cut off the leg protrusions above the sawhorse top and plane flush if required; any minor gaps will be covered by a sacrificial top. Stand the sawhorse somewhere flat and place a level on the top, blocking up the legs if necessary. Take an offcut of timber, 38mm thick and draw around the bottom of each leg, leaving the correct angle to cut off. When all four are cut the sawhorse should stand level although it might require a little more planing.
Sacrificial top
Lastly, fix a sacrificial top measuring around 950mm long x 20mm + thick to protect the sawhorse, screwed 100mm in from each end. well sunk below the top’s surface. Apply a coat of paint, stain, or whatever takes your fancy.
Job done – and it’s a fine sawhorse to work on, stand on, or even sit on while enjoying a cup of tea during your working day. What’s more, if you make two. the second should turn out even better than the first Place an old door or work surface on top and it’ll also double up as a handy bench!
The Woodworker & Good Woodworking стор. 62-63