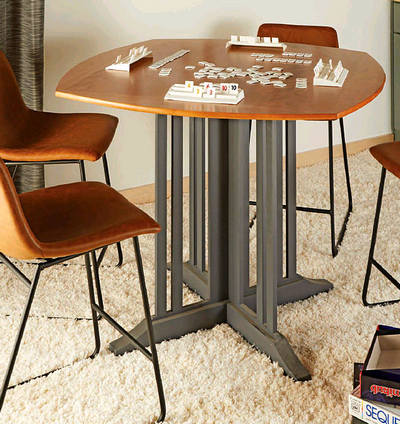
A knock-down table can still be a high-quality piece of furniture. Get rid of that folding table in favor of something more sturdy and stylish.
There are times when you just need one more table. Whether you’re hosting family for a holiday or getting ready for a weekly game of poker in the garage, it’s nice to have something you can set up quick and put away at the end of the day without hassle. When these occasions roll around, I often find myself scrounging for the same flimsy, white, folding table. It’s cheap, it’s plastic, it’s certainly not flat, and it’s got a wobble that drives me mad. But, it is necessary’ — or at least it was.
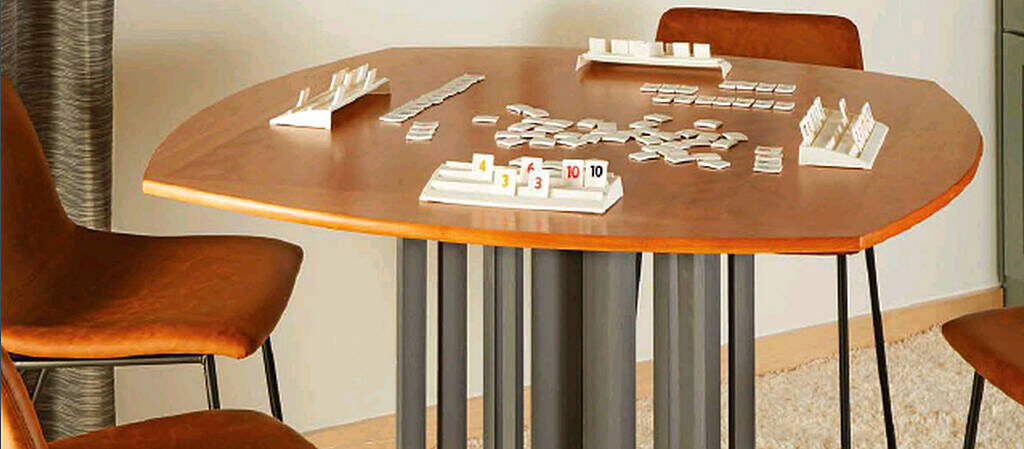
 The table you see pictured here is our alternative to the typical choice. The hardwood leg assemblies keep the table steady while also being able to slide together and apart easily. The top is made from a plywood panel surrounded by hardwood edging, keeping it at a conveniently portable weight. As you’ll see later on in the artide, the design of the table itself is simple, making this a great weekend project to tackle before your next gathering. Whether it’s for kids or cards, this table knows how to be useful — and how to stay out of the way when it’s not needed.
Interlocking LEGS
While the top may be the most eye-catching feature of this table, it’s the leg assemblies that make it what it is. The legs are glued up from a series of spacers and a pair of interlocking core pieces, all sandwiched together by feet at the top and bottom of the assemblies. As you can see above, the assemblies feature mating slots, allowing them to interlock to form the table.
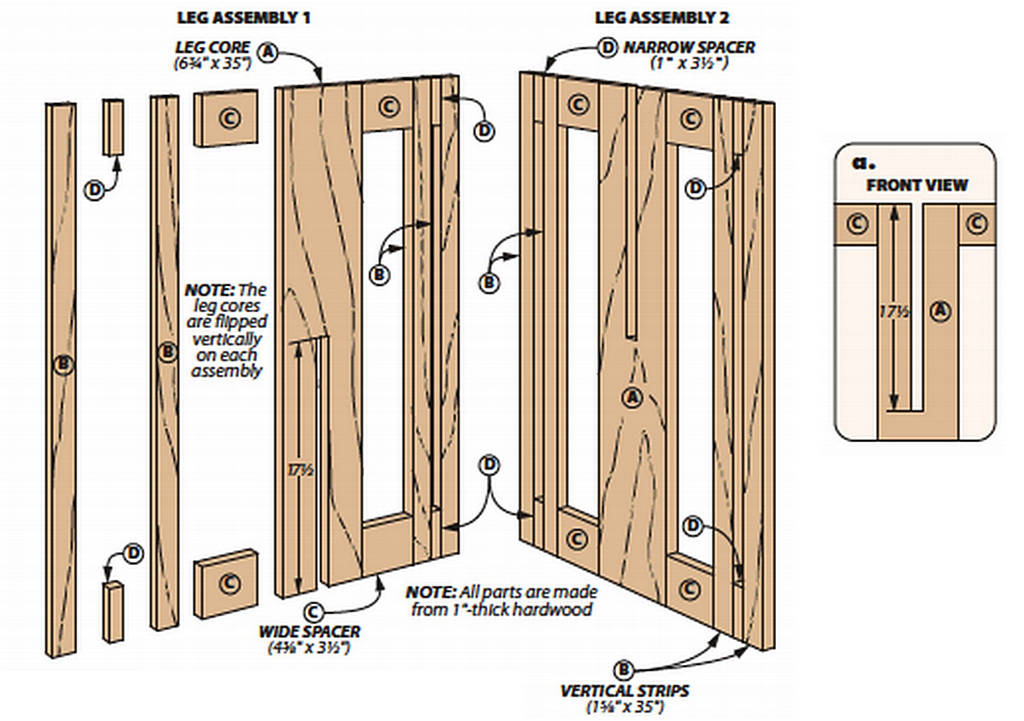
CORE. The slotted leg cores are the central point of each assembly, making them an excellent place to start working. Begin by cutting both pieces to size, then head over to the router table.
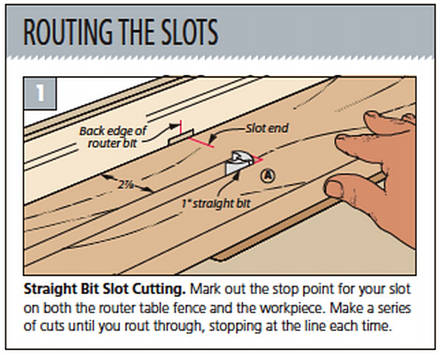 SLOT. The stopped slot down the center of each leg con? allows the assemblies to interlock. Making this slot is simply routing a stopped groove. Begin by laying out the slot on both sides of each piece, then marking the end of the slot to give yourself a stopping point Install a straight bit in your router table and mark the position of the end of the bit on your fence.
Next comes routing. After setting the fence, run the workpiece through to the end of the slot to make the first groove. Raise the height of the bit and make the cut again, stopping at the end of the slot Keep at it until you’ve routed the full slot.
This slot matches the thickness of the cores, but they’ll also need to accommodate the paint later on. Once both pieces have been routed, sand through the slot to give it that extra needed room. Finally, square up the ends of the slots with a chisel.
VERTICALS. The vertical strips are long, straight pieces that provide support for the outer edges of the table. They’re simple, and once you’ve cut them to size set them aside until the assembly.
SPACERS. The spacers are a similar story to the vertical pieces. For now simply cut all the spacers to size and move on.
FEET & ASSEMBLY
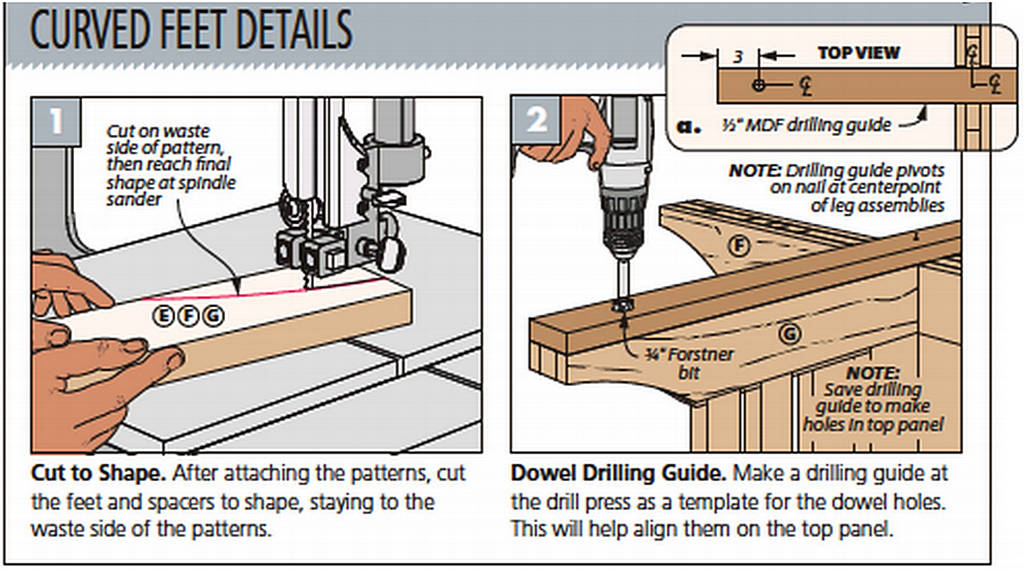
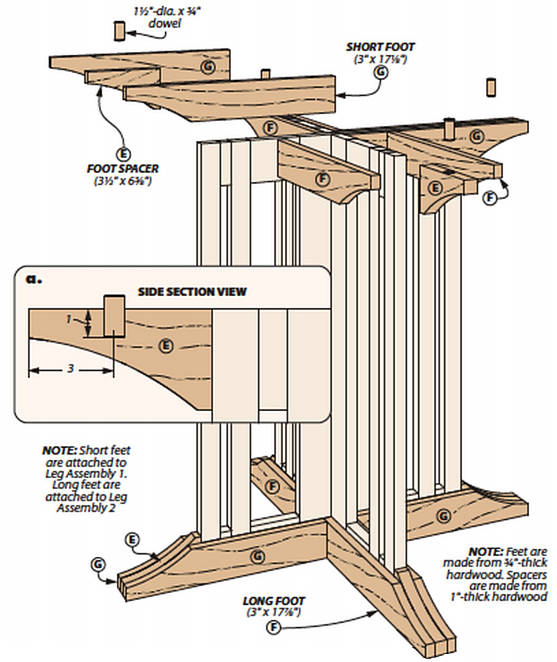 Now for the last sets of pieces on the leg assemblies. The feet sandwich together the leg assemblies, and their curves add a bit of visual variety. Once you’ve cut the feet and foot spacers to size, print out the patterns provided for their curves (along with the ones for the foot spacers). Attach the patterns, then head over to the band sawf for some shaping.
PATTERN CUTTING. Cutting the feet and spacers to shape is a simple task, but a little care goes a long way. As in Figure 1 on the next page, stay to the waste side of the patterns, then sand to the final shape. To make sure they’d be identical, I stuck them together with double-sided tape and sanded them at once.
ASSEMBLY. It’s time for the assembly. First, glue up the leg assemblies as shown on the previous page, using cauls to keep the pieces flush. Once dry, glue on the feet and foot spacers as well. Again, cauls help to keep the edges flush here. Since wet glue likes to make things slide when under pressure, I found pin nails to be helpful in keeping the pieces from shifting while being clamped up.
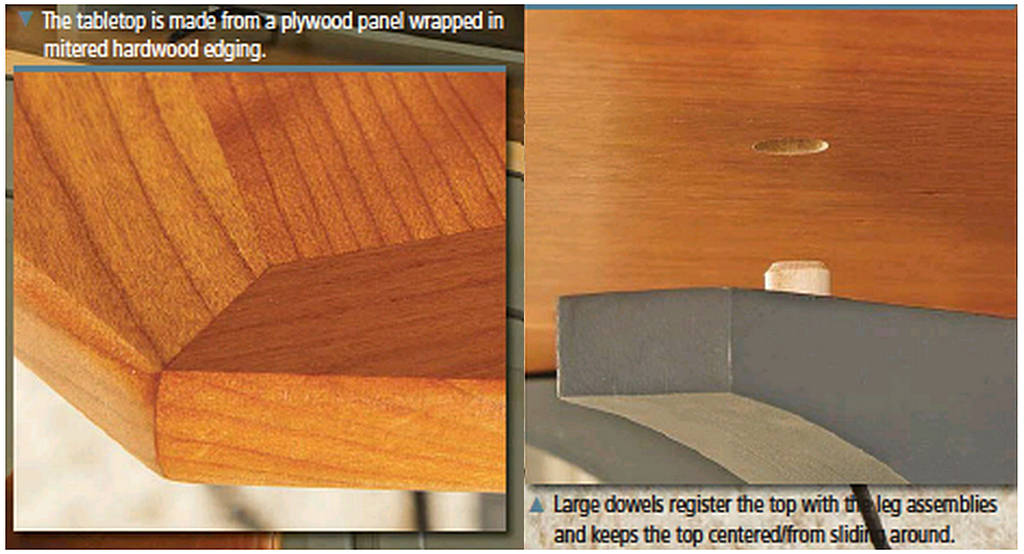
REGISTRATION HOLES. Holes in the upper curved spacers allow dowels to fit in and register the top when setting up the table (detail ‘a’). The holes and dowels are pretty basic, but they’ll need to properly align with each other. My solution was an MDF drilling guide.
As shown in Figure 2 below, I began with a strip that spanned the length of the leg assemblies. I marked out the centerline, as well as where each hole would go. From there, I used the guide to bore both sets of holes.
Topping off the TABLE
The tabletop is the last piece of this puzzle, and as you can see above, there’s not much to it — just a plywood panel wrapped with hardwood edging. The panel and edging are held together by tongues and grooves while the ends butt together with simple miters. Finally, some shaping gives it a great look.
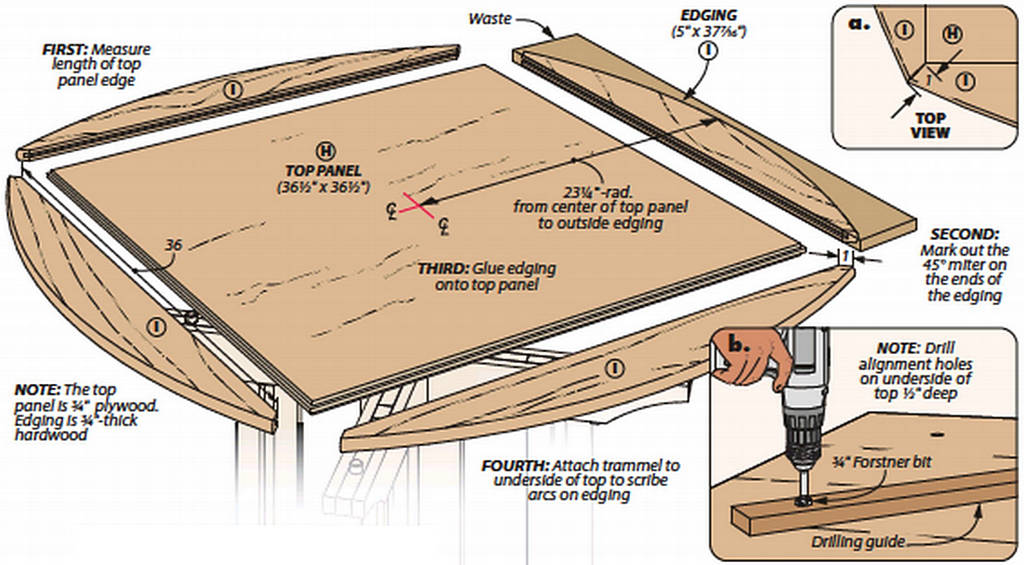
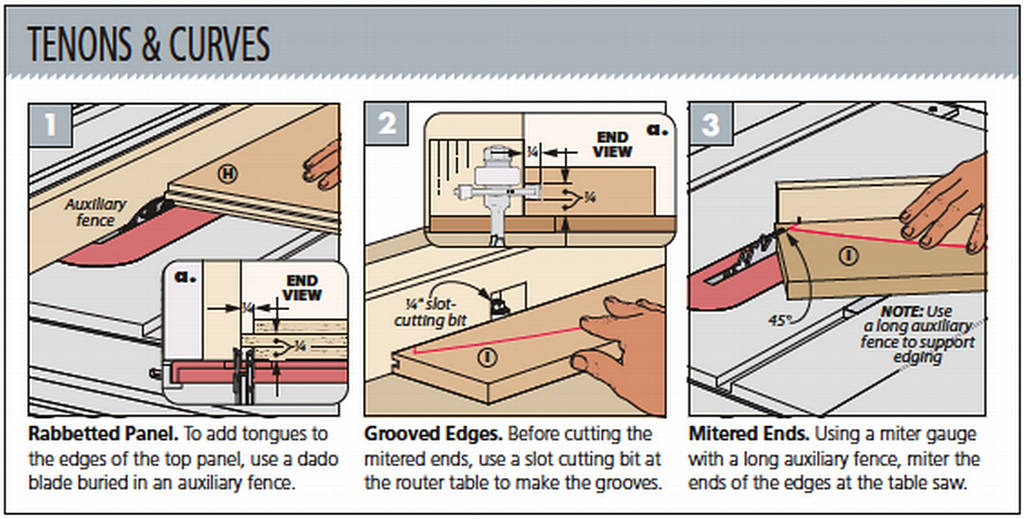
TOP PANEL. When selecting the piece to make the top panel from, it pays to be choosy and find a panel that matches the grain of the two edging pieces beside it After cutting it to size, you’ll next need to form the tongues (Figure 1 below).
Now it’s time for the drilling guide again. First, use a straight edge to mark corner-to-comer across the panel to find the center. From there, center the guide as you did on the legs and bore out the holes in the bottom of the panel (detail ‘b’).
EDGING. There are a few things to address on the edging pieces, and while none of them are particularly difficult, they should be handled in a certain order. First, head to the router table to cut the grooves for the panel’s tongues using a 1/4″ slot-cutting bit (Figure 2, previous page).
Now to miter the ends. Set your miter gauge up at 45° and make these on the table saw (Figure 3). Sneak up on the final size, dry fitting the pieces in place to make sure they’ll be gap-free.
ASSEMBLY & SHAPING
 Before doing any more work on the edging, it’s time to glue up the tabletop, as getting a good glue up would only be more difficult later on. Once the edging is glued onto the top panel, the final shaping can be done.
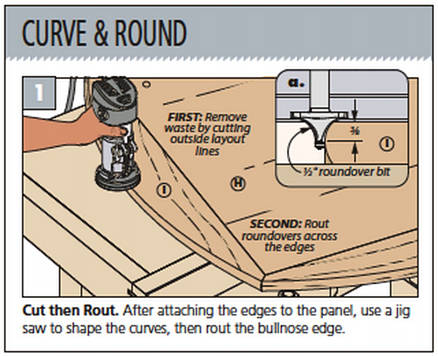
CURVT & ROUND. To create the arcs on the edging, I used a trammel based on the dimensions in the main drawing on the previous page. After those were scribed, I used a jig saw to shape the table-top. The jig saw doesn’t leave pretty edges, so you’ll need to dean them up with a block plane. They don’t need to be perfect, just smooth enough for a bearing to ride easily across.
A roundover bit is used to ease the comers of the edging (Figure 1). Be sure the bearing rides exactly on the centerline — if it’s too high or too low you’ll be left with a ridge in the center. A small flat will be left behind, but a little sanding will take care of it.
SETTING UP THE TABLE. Setting up the table is an easy, two-step process. First, slide the two leg assemblies together along their slots. Once the)”re interlocked, insert the dowels and set the top in its place. All the pieces should lock in firmly, and when it’s time to put the table away, simply pull them back apart.

