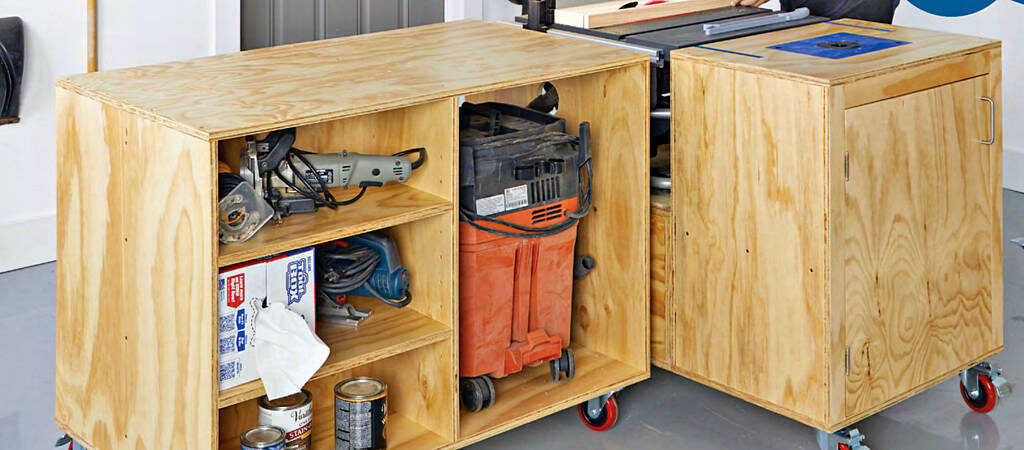
Make your power tools work big in a small footprint with this project center. It combines a tablesaw cabinet, router table, and outfeed support in one mobile, stowable package.
Large projects challenge small shops, especially when working with handheld power tools and benchtop machines. This project center meets that challenge with a simple-to-build cabinet that provides a solid foundation for your tablesaw and router. The addition of the outfeed cabinet ensures larger workpieces have solid support as you make a cut. And the router table doubles as side support during tablesaw use.
Supported by sturdy locking swivel casters, the tablesaw and router cabinet assembly rolls smoothly around the shop for easy setup and locks securely for use. When you’re done, unlock the casters and park everything out of the way. Looking for more bench space? In the next issue we’ll show you how to build a matching assembly table that will expand your storage and working surface even more.
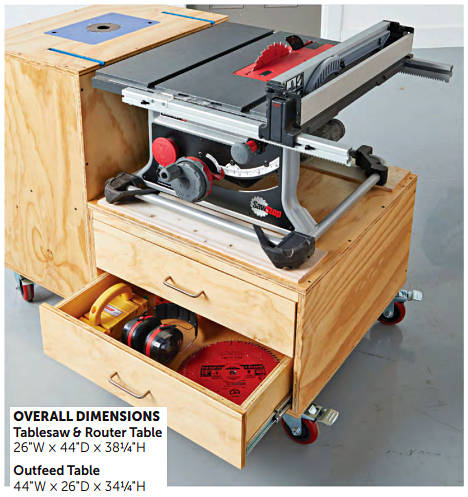 START WITH THE TABLESAW CABIHET
The actual thickness of plywood is often less than its stated value. Measure yours and account for this as you build, cutting parts to fit as you go.
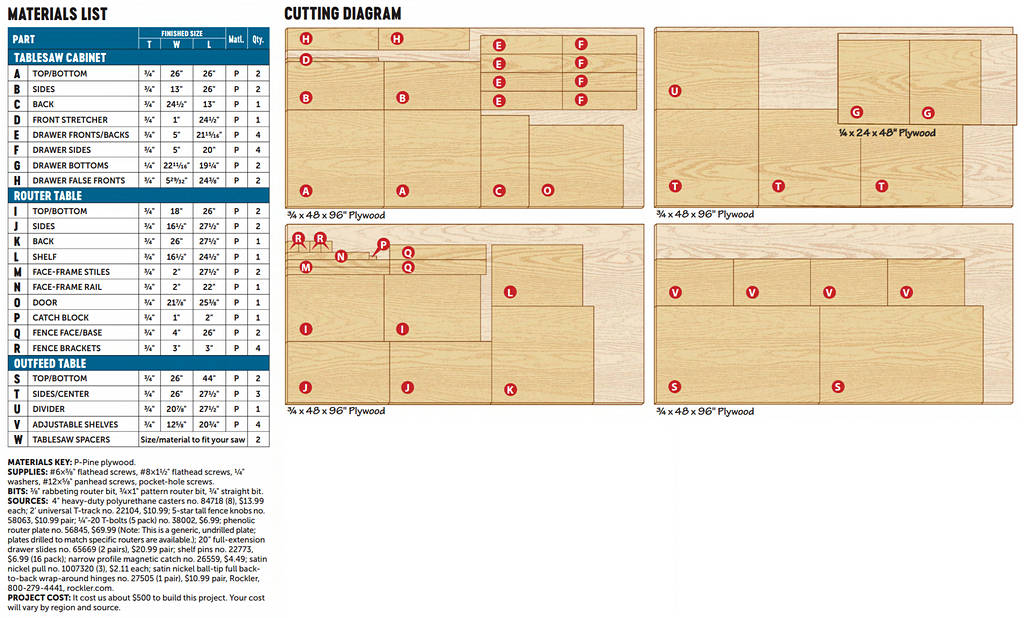
1. Cut the top/bottom (A) and sides (B) to size [Materials List, Drawing 1], Assemble one side and the bottom using glue, screws, and assembly squares to ensure a square case. Cut the back (C) to size, then glue and screw it into place, ensuring the edges are flush. Finally, glue and screw the remaining side and top into place, using the back to square the case.
2. Rip the front stretcher (D) to width [Drawing 1] and cut it to length to fit under the top. Glue and screw it into place, then finish-sand the tablesaw cabinet.

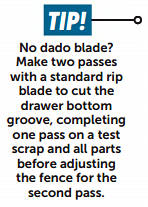 3. Cut the drawer fronts/backs (E) and sides (F) to size [Drawing 2], Then cut grooves to fit the 1/4″ plywood for the drawer bottoms.
4. Drill pocket holes in the ends of the drawer fronts and backs. Dry-assemble a drawer and cut the drawer bottoms (G) to fit in the grooves, disassemble, then glue and screw both drawers together with the bottoms glued into place, checking for square.
5. Cut the false fronts (H) to size and screw them to the drawer fronts, centered side-to-side and flush at the bottom [Drawing 2], Attach the cabinet 2 members of the drawer slides to the drawers [Photo A].
6. Screw the case member of each drawer slide to the cabinet [Photo B].
7. Attach the drawer pulls centered on the false fronts and insert the drawers into the tablesaw cabinet.

ON TO THE ROUTER TABLE
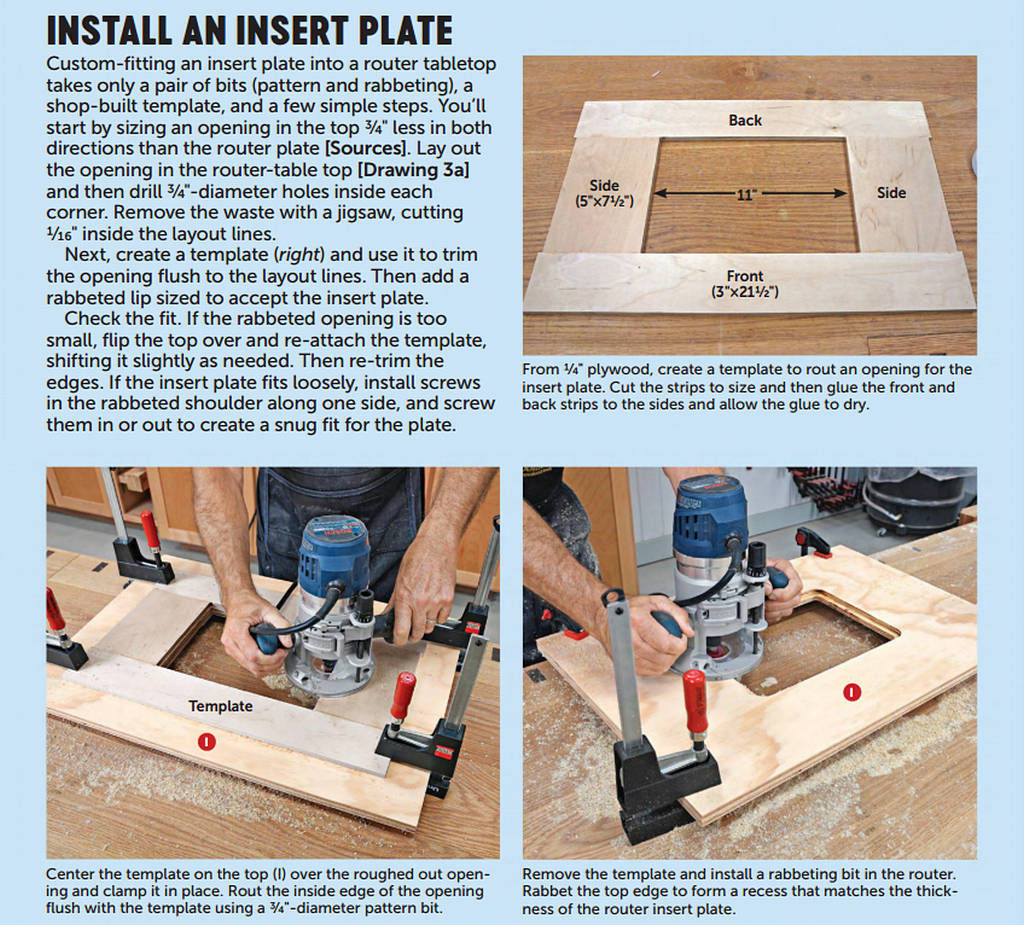
1. Cut the router table top/bottom (I) to size [Drawing 3] and set the bottom aside for now Form an opening in the top of the router table [Drawing 3a] (see Installing an Insert Plate).
2. Rout stopped dadoes sized for the fence T-track [Photo C].
3. Cut the router table sides (J) and back (K) to size [Drawing 3], then glue and screw them together. Drill an access hole in the back for the router power cord. Glue and screw the bottom (I) to the sides and back, keeping the rear edge of the bottom flush with the outside face of the back (K).
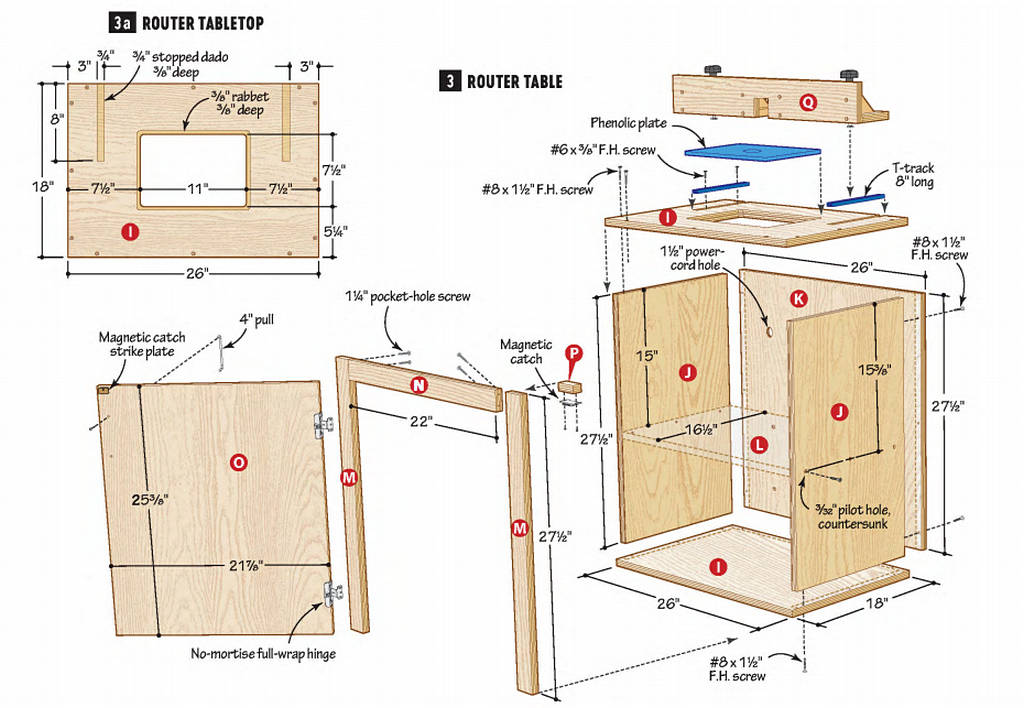
4. Cut the shelf (L) to size and then glue and screw the shelf to the sides and back (J/K).
5. From 3/4″ plywood, cut the face-frame stiles (M) and rail (N) to size [Drawing 3], Drill pocket holes in the rail, then glue and screw the rail to the stiles. Glue the face-frame assembly (M/N) to the cabinet (I-L). Finally, glue and screw the top (I) into place.
6. Measure the opening and size the door (O) to leave a 1/16″ gap all around [Drawing 3], Attach the hinges to the door and then to the face frame. Cut the catch block (P) to size and glue it behind the face-frame rail (N) opposite the hinges and flush with the bottom of the rail. Screw the door handle and magnetic catch into place.
ADD A SIMPLE, STURDY FENCE
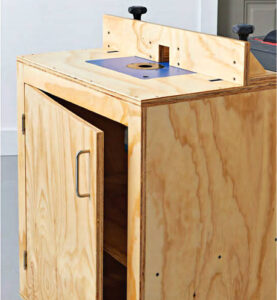 1. Cut two pieces of T-track to length to fit the stopped dadoes in the top (I) [Drawing 3], Screw the T-track into place.
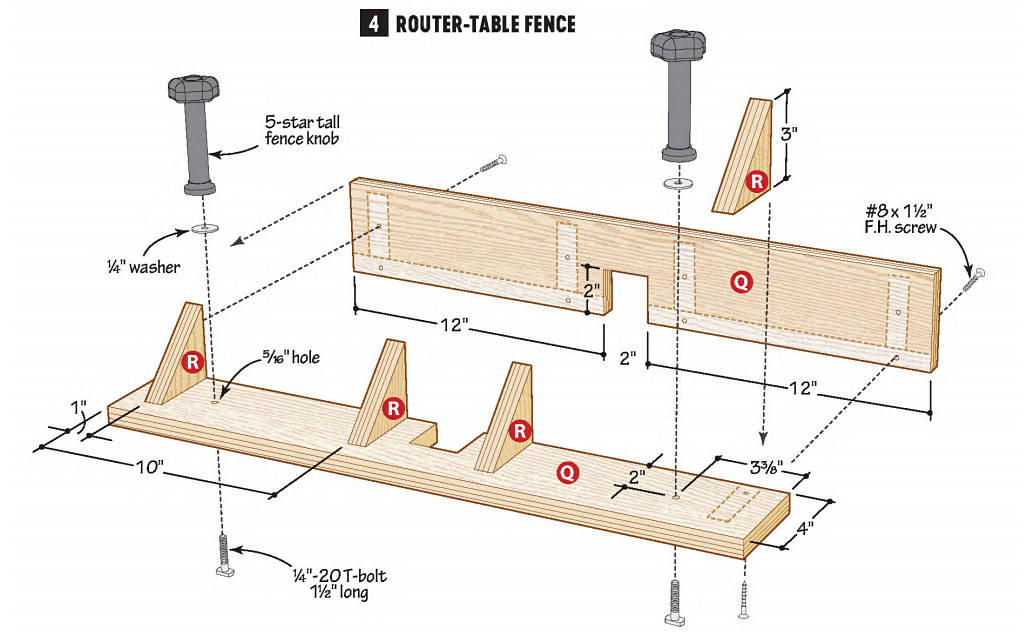
2. Cut the fence face and base (Q) to size [Drawing 4], then cut out centered notches in each. Use the T-track to mark the locations for the mounting holes in the base for the router fence knobs, then drill the holes. Glue and screw the face to the base.
3. Miter-cut a set of brackets (R) to size. Glue and screw them to the fence/ base assembly.
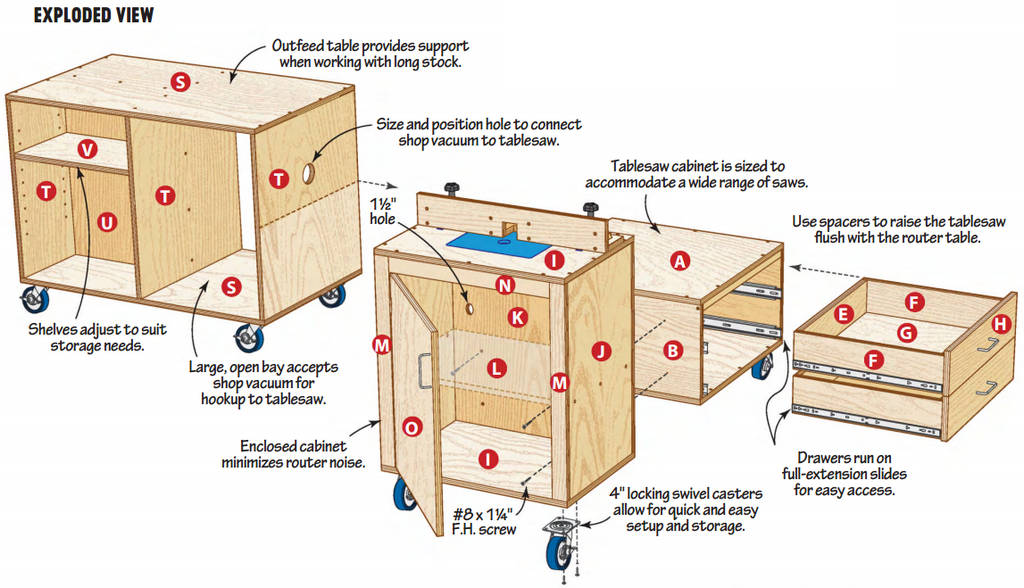
4. Remove the drawers and screw the router table to the tablesaw cabinet [Exploded View], flush at the bottom and along the sides.
5. Screw a set of casters to the bottom outside corners of the assembly, making sure the locking mechanisms are accessible. Flip the assembly onto the casters and reinstall the drawers.
ONE CABINET TO GO
1. Cut the top/bottom (S), sides/center (T), and divider (U) to final size [Drawing 5], Drill shelf-pin holes in the left side and center [Drawing 5a].
2. Glue and screw the left side, divider, and center together, making sure the shelf-pin holes face each other and the divider is centered. Next, glue and screw the assembly to the bottom, then add the remaining side and top.
3. Flip the assembly on its side and screw the casters into place.
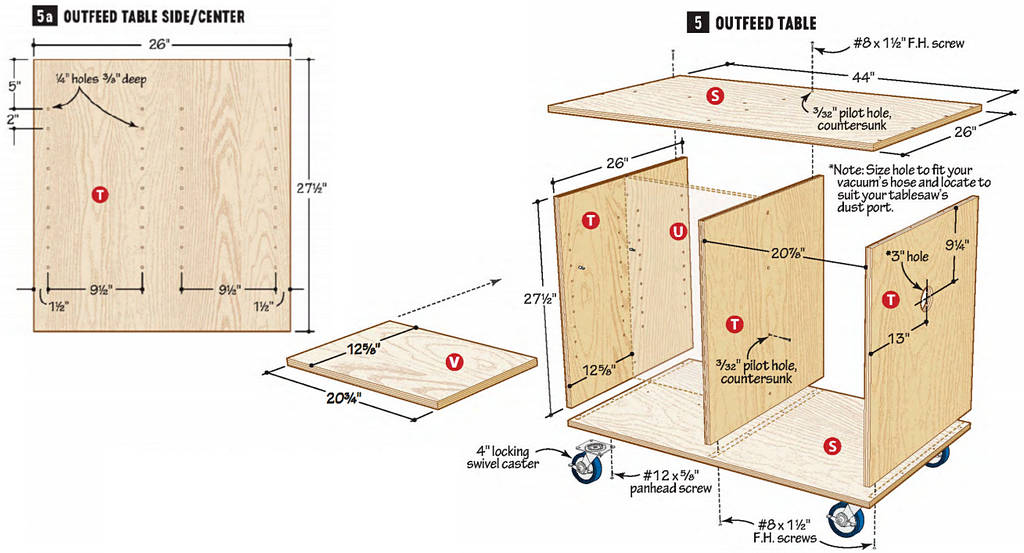
4. Cut the adjustable shelves (V) to size and finish-sand.
5. If you plan to use the open bay of the outfeed table to hold a vacuum for the tablesaw, drill a hole in the side to fit the dust hose, locating it in a position convenient to your tablesaw’s dust port.
6. Disassemble as needed to finish-sand, then apply a finish. Polyurethane provides good protection for shop projects such as this.

7. Reassemble everything, attach your router to the insert plate (see Mounting a Router, previous page), and then slip it into the router table. Add a pair of spacers (W) under the saw, thicknessing them to bring the top of the saw table flush with the tops of the router table and outfeed table. Your compact station is now ready to rock and roll (when you need it to)!
