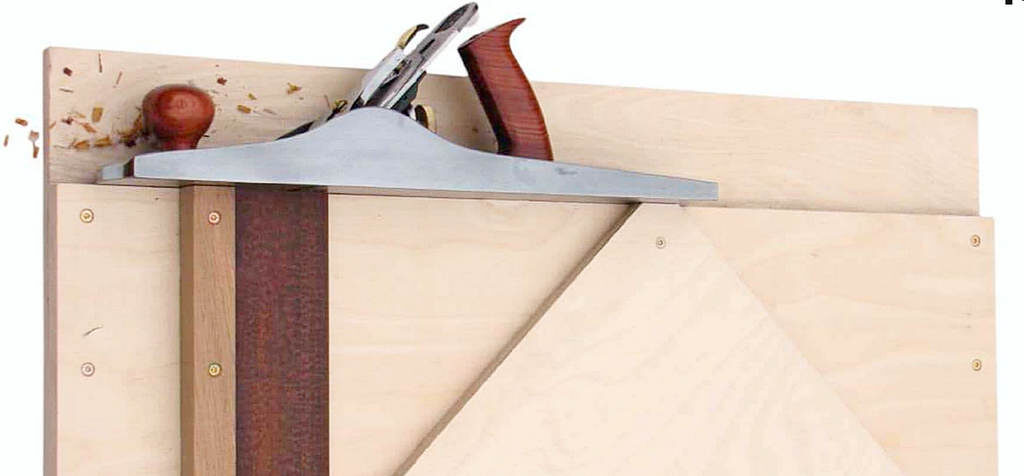
Phil Davy shows you how to make this nice and easy project that will certainly prove useful in the future
Needing to joint some bookmatched timber for a guitar front and back recently, I discovered my old chipboard shooting board was rather worse for wear. It’d become damp and swollen, and destined only for the woodburner, so I decided to intervene and make a new jig from birch ply. This material is nicer to work and arguably more durable than MDF, though in terms of stability, they’re similar. I got lucky when it came to purchasing new stuff, and managed to find some cheap plywood. Even though this meant I didn’t have to consider cost too much, it’s by no means an expensive project.
Multi-purpose jig
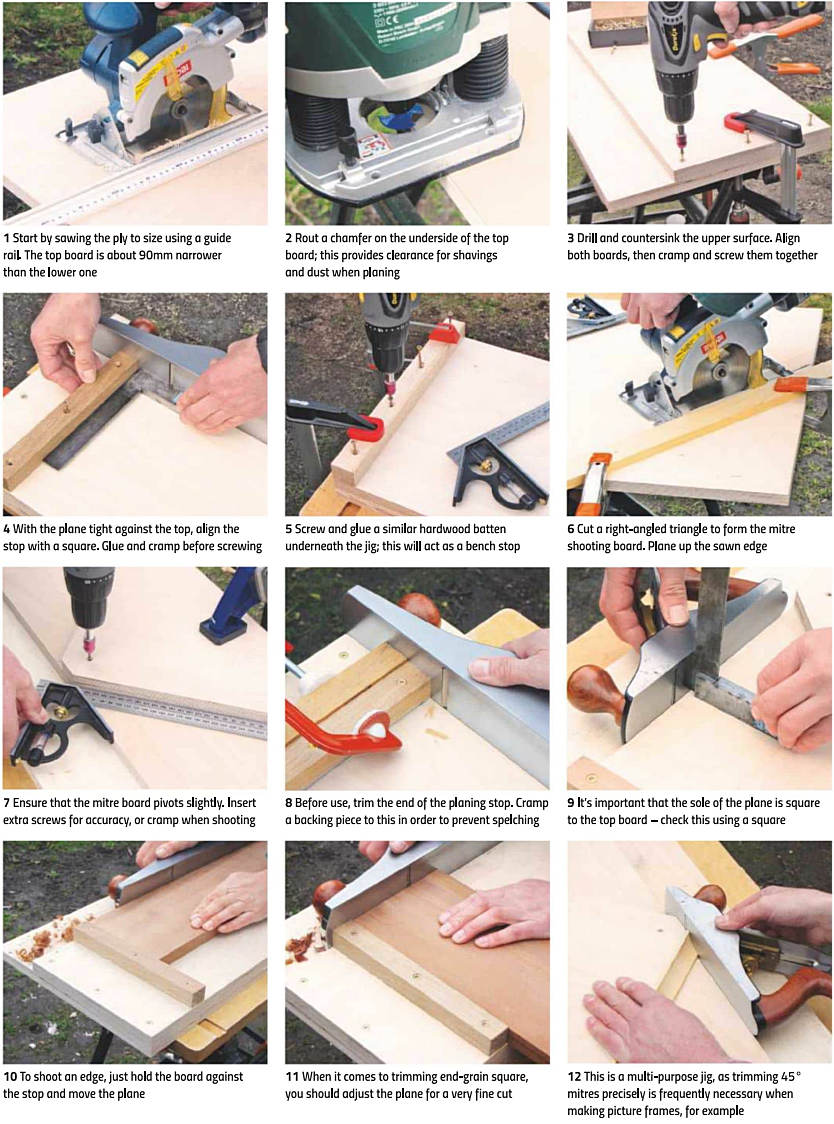
I decided to make a multi-purpose jig that could also be used for trimming mitres. This is really easy to do; all you need is an extra piece of ply cut to a right-angled triangle. Accuracy is vital here, so keep checking angles as you progress, and don’t make the mistake of assuming the corner of any new board is exactly 90°.
For occasional mitre trimming with this jig, you can use a single pivot screw, which allows you to align the board against a 45° square. Clamps are sufficient to hold it securely, though you may want to add Bristol levers or locating pins if you’re looking to make a more sophisticated jig.
Nice & easy
This is one of the easiest workshop jigs to build, simply consisting of two pieces of 18mm board screwed together. I didn’t bother with glue in case I need to replace the lower board. You could line the track – which supports the plane – with plastic laminate; this would increase lifespan. Jig length really depends on the plane you’ll be using – in my case, I made mine 770mm long x 330mm wide overall, which suits a No.6 fore plane. The upper board is 240mm wide, leaving a 90mm track for the plane to move along. I made the upper planing stop and lower bench stop from 30mm square oak – the size you choose isn’t important.
When gluing the stop in place, make sure that it’s square to the shooting edge. Even better, check it’s square to the plane’s sole. Cramp the stop and re-check, then insert the screws once the glue’s dried. Also, you should either cut a chamfer
along the lower edge of the top board or rout a groove in the lower board. This allows sawdust to be cleared more easily when shooting a plane. No matter what size plane you use, however, the blade edge should be honed straight, rather than curved.
How shooting board is made:


