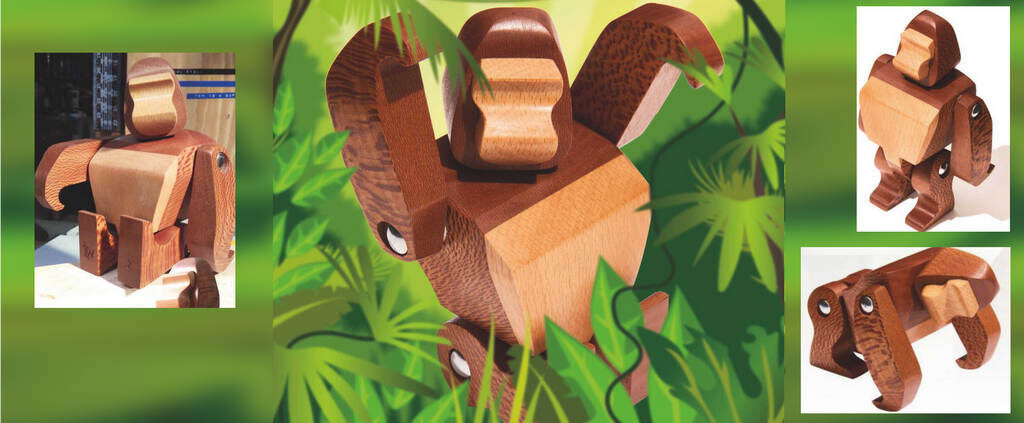
Tom Wilson’s fantastic gorilla build uses beech and London plane to create a wonderful wooden version of this magnificent beast.
Many have tried to tame the wild animal, but few – if any – have succeeded. Although not renowned for our knowledge of the natural world, we at The Woodworker agree that this stylish project by Tom Wilson of Curio Studio comes very close to capturing the essence of the mighty gorilla. We stand by in awe.
Initial sketches
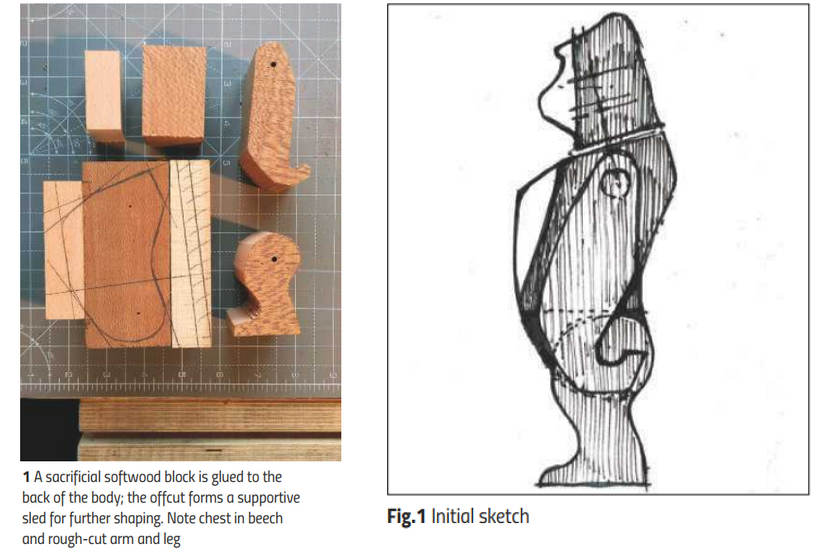
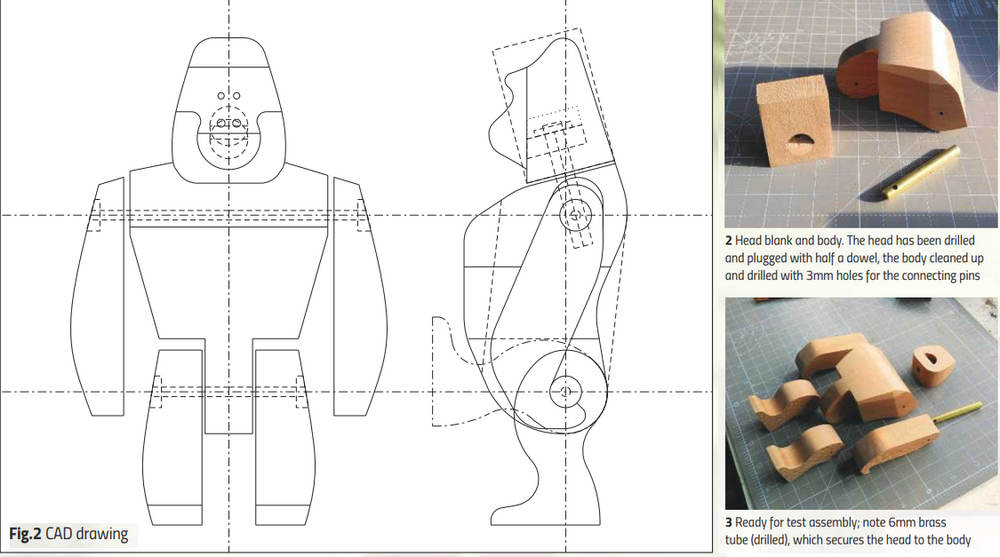
The build begins by sketching many versions and iterations of the gorilla (Fig. 1 ), testing out variations in proportions, profiles and exploring the assembly sequence. The profile can then be set up accurately as a CAD profile (Fig.2). This allows the geometry to be refined, and exact locations for connecting pins and tube accurately set out.
Individual component profiles
Profiles for the individual components can then be transferred to the timber (photo 1), before roughing out arm and leg profiles using a bandsaw, followed by final shaping and sanding.
Once fully shaped, the profiles can be cut in half lengthways, making a pair of each. The head and face blocks are also cut down to size before profiling on the bandsaw.
To form the body, the beech chest is first glued then clamped to the London plane, before gluing a sacrificial softwood block to the back of the body. Once the back profile is cut, the hatched area of softwood can be removed, with the remaining softwood forming a sled for making further cuts (photo 1), while keeping the body orthogonal to the bandsaw.
Shaping the body
The body can now be shaped and sanded, before 3mm holes for the connecting pins are drilled and 90° internal corners cleaned up with a chisel. Next, the head is roughed-out and a 12mm blind hole drilled. This is partially filled with a halved dowel, which provides a flat surface within the hole.
6mm brass tube is used to secure the head to the body. This is drilled to accept the 3mm brass pin, which also secures the arms in place. Once body, head and limbs are shaped and sanded, a test assembly can be carried out (photo 3).
Final shaping of the arms & legs
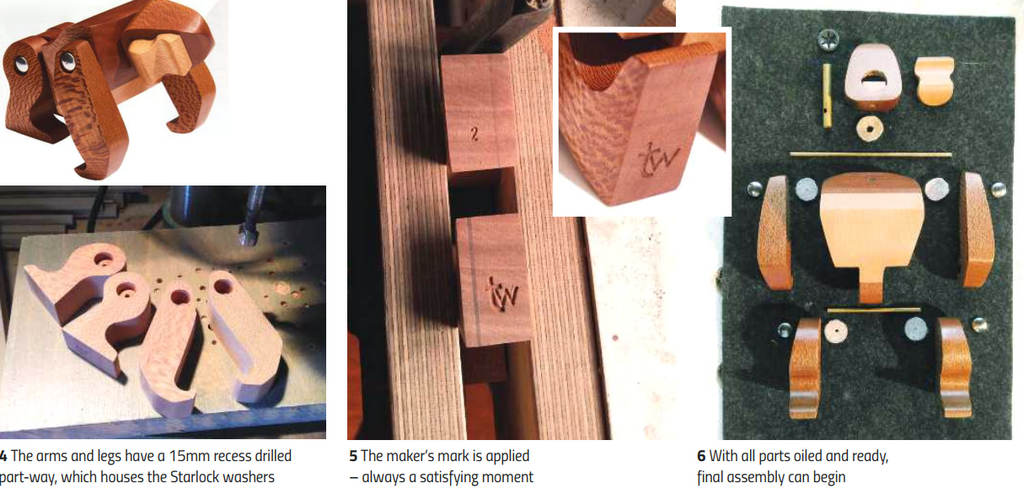
Prior to carrying out final shaping of the arms and legs, recessed holes are drilled using a 15mm Forstner bit (photo 4); this allows the push-on Starlock washers to be recessed. Once the outside faces are shaped to completion, the holes can be deepened as required.
Before the arms and legs are shaped along their outer faces, the legs are held securely in a vice for stamping. I stamp my maker’s mark into the bottom of one foot. As this is the second gorilla I’ve made, a No.2 is stamped into the other (photo 5).
Assembly
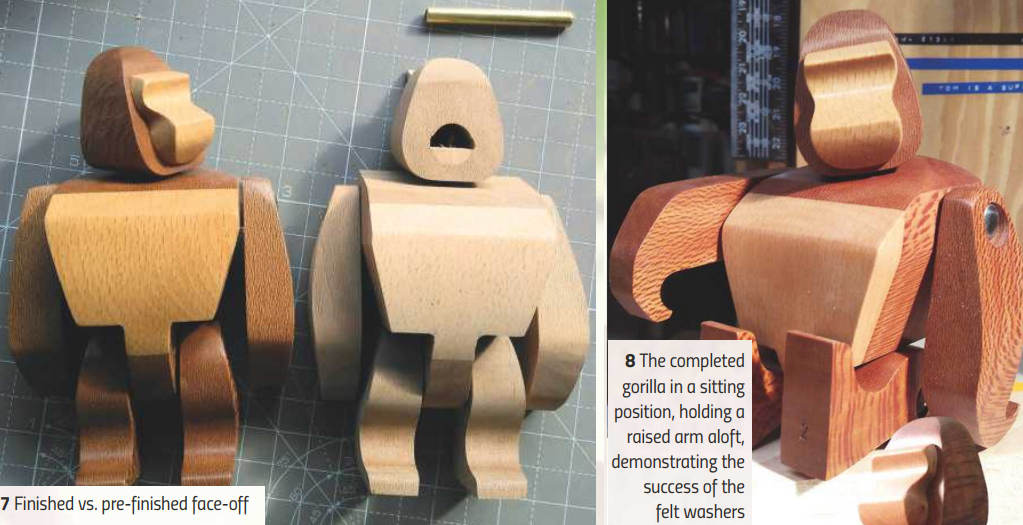
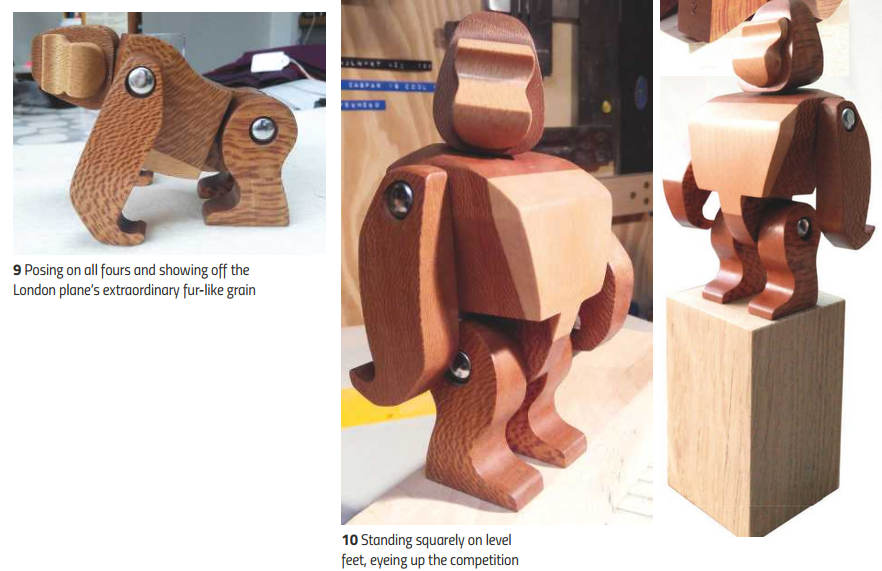
All parts are now shaped and sanded to 240 grit, before being given three coats of finishing oil, rubbing back with fine wire wool between each. The next step is to cut the brass pins, make felt washers, then all is ready and waiting. Firstly, the legs are assembled, with felt washers between them and the body, and a dome-capped Starlock washer pushed onto each end of the brass pins. These have to be cut accurately to ensure a tight fit. The felt washers provide friction and so allow the limbs to be posed in different positions. Next, the 6mm brass tube is pushed into the neck hole, and the 3mm arm pin inserted, ensuring it passes through the hole drilled in the tube. The arms are then fitted using the same method as for the legs.
In the last act of construction, the head is pushed onto the tube, and a Starlock washer located into the hole, before it’s pushed down over the tube. A length of dowel is then halved and slotted, and used to push the washer onto the tube. Finally, once everything has been checked and all’s secure, the face can be glued into position where it covers the hole.

