Michael Allsop shunned kit-made canoes to chase his dream of sailing a scratch-built one.
Getting on for 20 years ago now, I discovered an old book languishing in my school library, which contained plans along with construction details for a selection of wooden boats and canoes.
This little hardback sparked a flame of interest in my teenage self and ever since that day, I’d been determined to make a wooden boat. Early attempts, however, didn’t make it beyond some pallet wood frames, which sat in my parents’ garden and gradually collapsed. But last year, with the spark re-ignited by several canoeing trips in hired boats, my wife and I decided to find a suitable design, and finally set about building our very own canoe.
 While reaching the above decision was easy, what proved more difficult was actually finding a boat that’d accomplish the various criteria we’d set. It had to be stable and strong, yet with traditional lines and good looks – and it had to be built in three weeks over the Easter holidays.
There are several high-quality kits available, which provide you with pre-cut plywood panels and all the epoxy resin and fibreglass required, but we’d fallen for a design by Eric Schade of Shearwater Boats in the US, which was available in plan form through Seawing Boats in the UK.
With an eye to saving money, along with increasing the satisfaction of creating the boat from scratch, we ordered the plans and started by sourcing the five sheets of marine ply, as detailed in the bill of materials.
Careful labelling
Bearing in mind our three week construction window – we were due to take over my parents-in-laws’ double garage as we don’t possess the necessary indoor space for waving 17ft lengths of plywood around – all the smaller joinery components needed to be made in advance. Consequently, the winter months saw the fashioning of stems for each end of the boat from thick marine ply, the seat frames, thwart and yoke from solid ash, and the decks from meranti and oak. These could be finished as much as possible then set aside ready to be dropped in at the appropriate stage (photos 1-4).
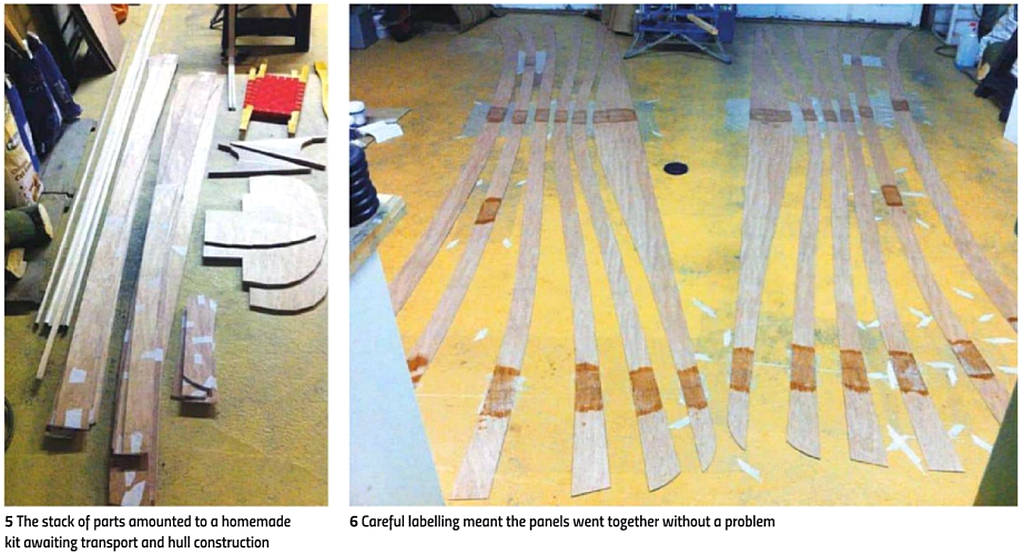
A week or so before the Easter holidays, we completed as much of the hull as possible, which amounted to marking up and cutting out the 10 panels required to make it.
Bearing in mind the canoe’s length, however, each panel was made up from two full lengths of 8×4 ply with an extra foot or so from an additional sheet This resulted in a stack of parts that required careful labelling if we weren’t to end up with a very unusual canoe.

Canoe assembly
Now armed with our homemade kit of parts (photo 5), we transported everything needed from our Derbyshire home to the in-laws’ house in Northumberland. Fortunately my father-in-law is a keen woodworker, so should it turn out I’d forgotten anything – we’d already had to go back for the spokeshave – he’d probably have it.
The first job was to lay out the hull components and check that everything matched up and looked symmetrical. My wife’s careful labelling was very much appreciated at this point. These parts were then butt-joined with strips of biaxial fibreglass tape followed by epoxy resin (photo 6). After 24 hours curing, we could confidently plane the chamfers on the panel edges where they’d overlap on the sides or meet edge-to-edge down the middle of the boat. Previously, during the cutting stage, several little holes had been drilled along the panel edges; these needed to be cleaned out again in order to take the copper wire that’d be used to stitch the panels together.
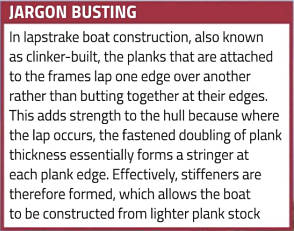
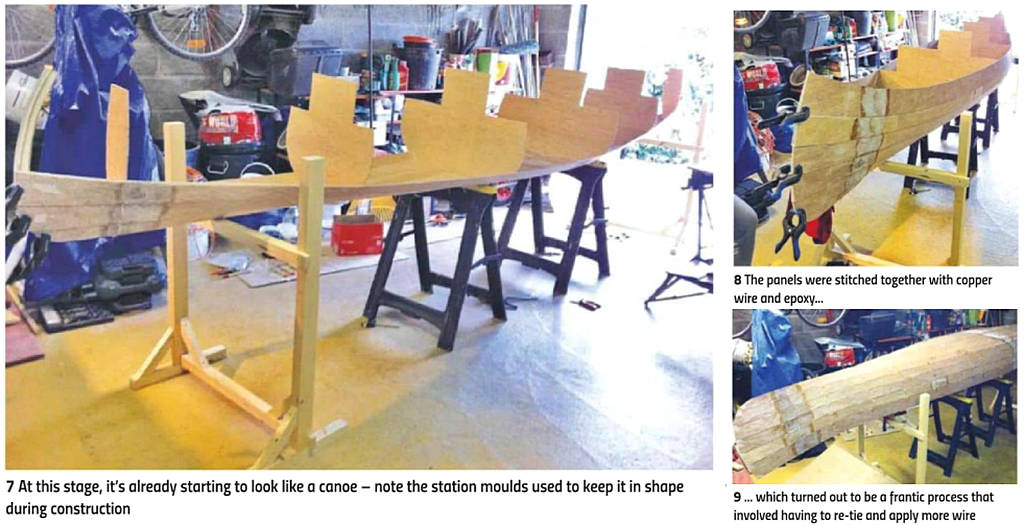
Assembling the boat was surprisingly quick and extremely satisfying. First the bottom two panels were laced together with copper wire and several station moulds – the forms used to shape a boat’s planks in order to give it true and fair lines – positioned along the boat’s length. It was then a relatively straightforward task to gradually add panels on each side until they’d all been attached, at which point it looked like we’d nearly finished.
But no, much more work was to come…
Epoxy nightmares
Building a boat is stressful. It must be, given the recurring nightmares we suffered during the next phase of construction, which involved seams popping, epoxy dribbling out to leave dry joints, and copper wire snapping in inaccessible places…
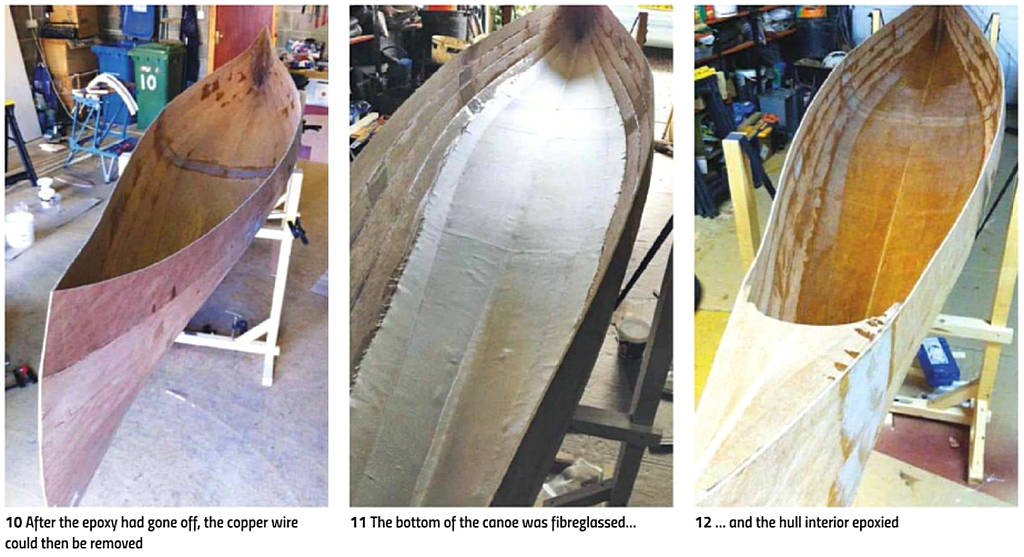
While most of these luckily didn’t occur, our initial swift progress (photo 7) was hampered by a spell of cold weather, which prevented the epoxy going off on the bottom seam. This led to a rather unpleasant moment when I realised that the bottom of the boat was starting to open up having removed the copper ties. Rapid re-tying and applying more epoxy brought it back into line (photos 8 & 9), but we had to hold fire for a few days before being able to remove the remaining copper wire (photo 10).
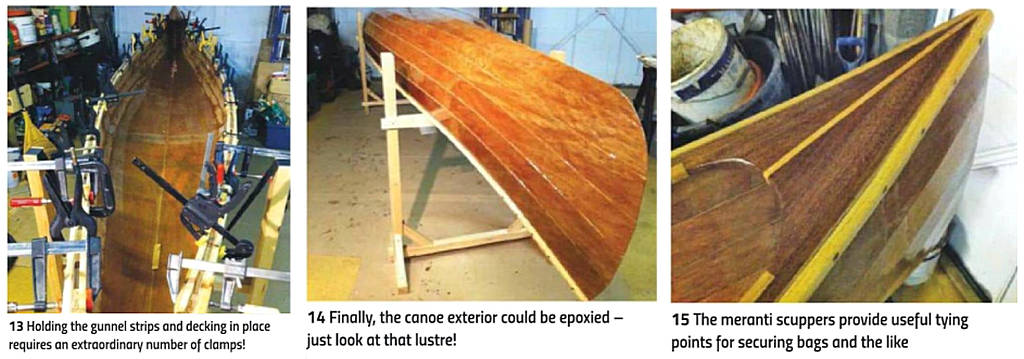
However, once the epoxy fillets had set, it was wonderful to snip out all the wire and see the boat’s shape in all its glory (photo 11). Following a little preparation, the bottom two planks on each side were fibreglassed, with the rest of the hull receiving a coating of epoxy resin, both inside and out (photos 12 & 14). This took a couple of days, again with a day or so in between to ensure the resin was hard enough to rest on the trestles without marking.
With the boat becoming stronger and more rigid by the day, it was time to fit the inner and outer gunnel strips and decks (photo 13). The gunnels had been routed to shape from 10ft long lengths of ash and, while slim, still needed a lot of persuading, and several screws to keep them in place at the curved ends. Luckily the design covered this, and the gunnel screws went through the ply skin and into the decks, helping to hold it all together while the thickened epoxy set.
The scuppers – made from meranti to match the decks (photo 15) – are designed to mimic the ends of frames from the time when canoes were made according to a plank-on-frame method. Not only do these provide useful tying points for securing bags within the canoe, but also act as drainage holes, allowing water to escape when the canoe is turned upside down for storage or portage.
Finishing
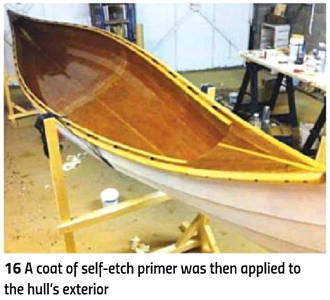 A lot of standing back and admiring went on at this stage, but we needed to crack on and get the canoe painted, otherwise it wouldn’t be dry enough to tie onto the roof rack. It seemed a travesty to cover up the gorgeous epoxied hull, but we were keeping the wood finish on the inside and had agreed that a glossy white canoe was the order of the day.
The next step was to apply a coat of self-etch primer on the hull’s exterior (photo 16). The boat immediately looked more finished as a result, and when the gloss was applied the following day, it really did look rather fine. The paint -International High Gloss Low Drag yacht paint – was wonderful to apply and dried to a very smooth, uniform finish. The inside was treated to several coats of International Schooner Gold varnish, which mellowed the ash fittings and gave a gorgeous depth of colour to the ply panels. A few days later when all was dry, we loaded our canoe onto the car to take it home and commence some rigorous testing.
Will she float?
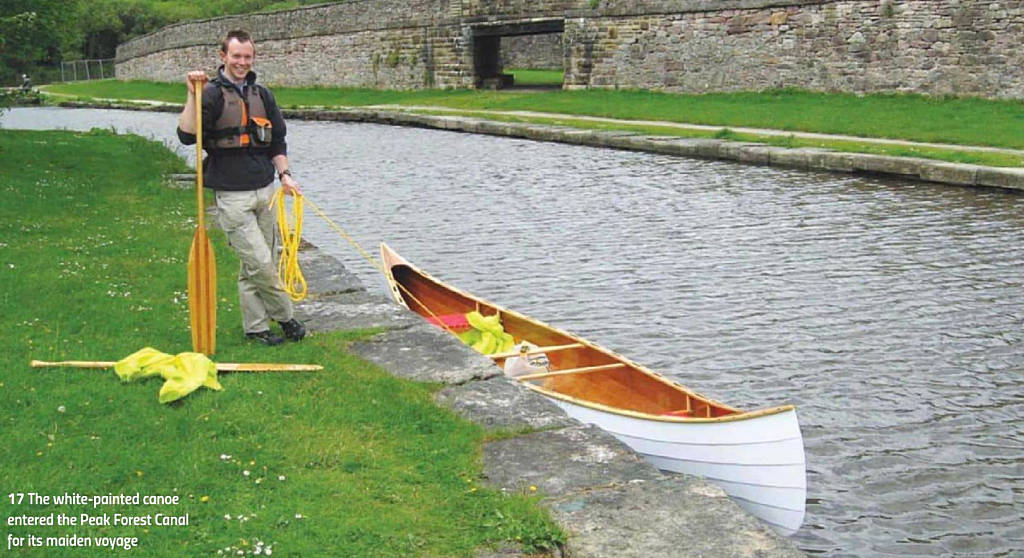
We live close to the Peak Forest Canal in the Peak District, so took it along to Bugsworth Basin for its maiden voyage (photo 17). Much to our relief, all went smoothly and we were very happy with the finished vessel. Over the next few months, seating arrangements were tweaked, and as time passed and we became more familiar with the canoe, the more impressed we became with the design and its handling characteristics.
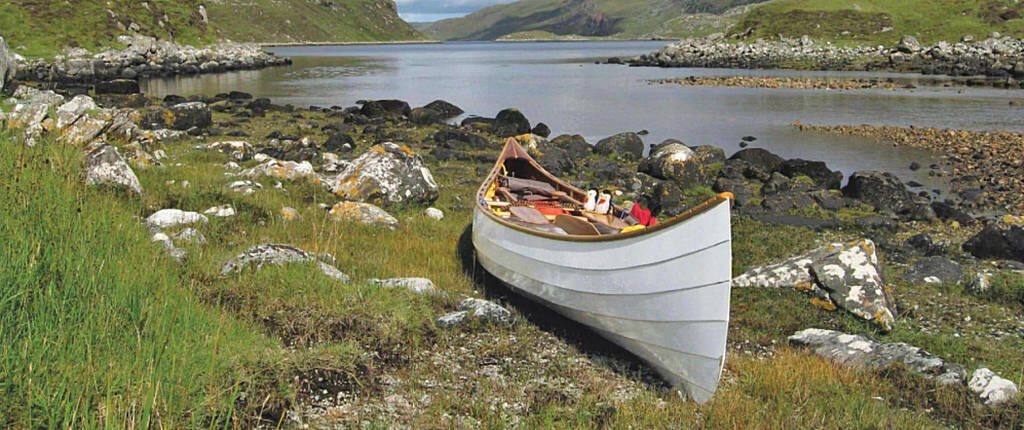
After a trip on the Thames and a few other waterways, we felt prepared for a trip to Scotland during the summer, for whatever the lochs could throw at us. As it turned out this included waves that occasionally rolled over the gunnels, but the canoe never faltered – a sure testament again to Eric Schade’s design. It’s often said that people build a canoe, sell it, then build a better one which they then keep. In our case, however, we’ll certainly be hanging on to this one for a while yet.
