There is something very satisfying about using hand-turned pens made from some exotic timber – and they’re so easy to make.
Pen making has become extremely popular, in fact there are turners who make nothing else, such is the market for unique, nicely made wooden pens. However, you are not restricted to just using wood; pens can be turned in a variety of other materials: offcuts of Corian worktops turn up nicely and there is a whole range of other plastic and acrylic materials specially made for pen making. Other turners laminate blanks up from coloured veneers, or use bone and horn.
The mechanisms are available in a huge variety of designs and qualities, and you can make pencils and fountain pens to match.
The various suppliers can also kit you up with presentation sleeves or boxes for your finished pen to make it even more distinctive.
You must work very carefully to get the exact sizes and there is very little room for error but. if something does go wrong, not much material is lost. Pen blanks are obtainable ready-cut to size, but I tend to cut my own from offcuts and scraps salvaged from bigger blanks.
Any wood will turn into a pen. but the fine-grained and more decorative ones are best, as they will stand turning to the very thin sections required. However, the highly decorative burrs and curls are much more difficult to work, so save these until you have gained some experience.
I suggest starting with a simple parallel design, to get the hang of the procedure. Instructions are normally supplied with each pen, but the principles are the same for most designs.
With pen making more than any other type of turning, it is important to work methodically, as you are using a lot of very small components that are easily lost and need to be assembled in the right order. The most critical stage is the initial drilling and it is worth investing in a top-quality drill bit to ensure the hole is exact size and doesn’t wander off along the length of the blank.
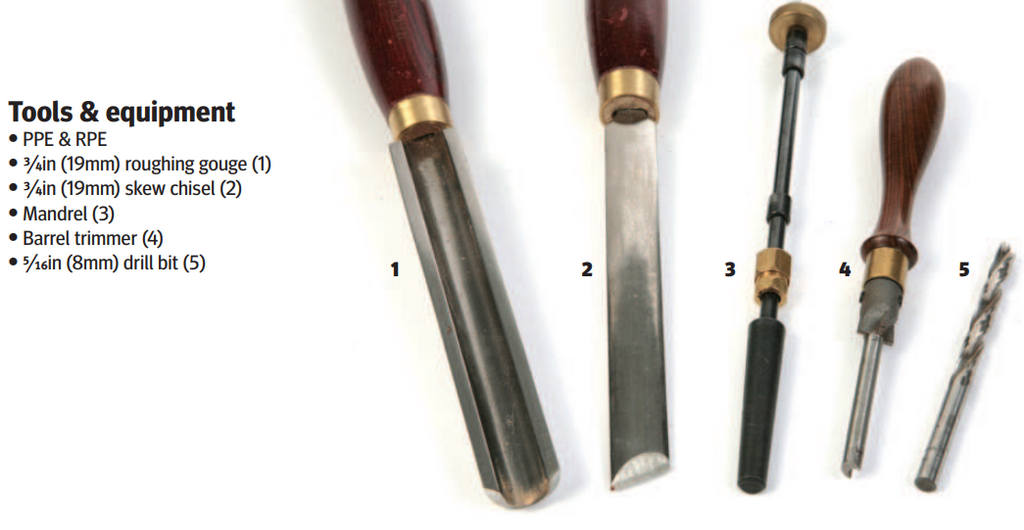


- If you are cutting the blanks yourself, make them slightly oversize, as the drill bit nearly always goes off line slightly. I cut mine about 9/16 in (15mm) square if there is enough material.
- Now it is safe to cut the blanks through the middle, leaving them about 1/8 in (3mm) longer than the length of the brass barrels.
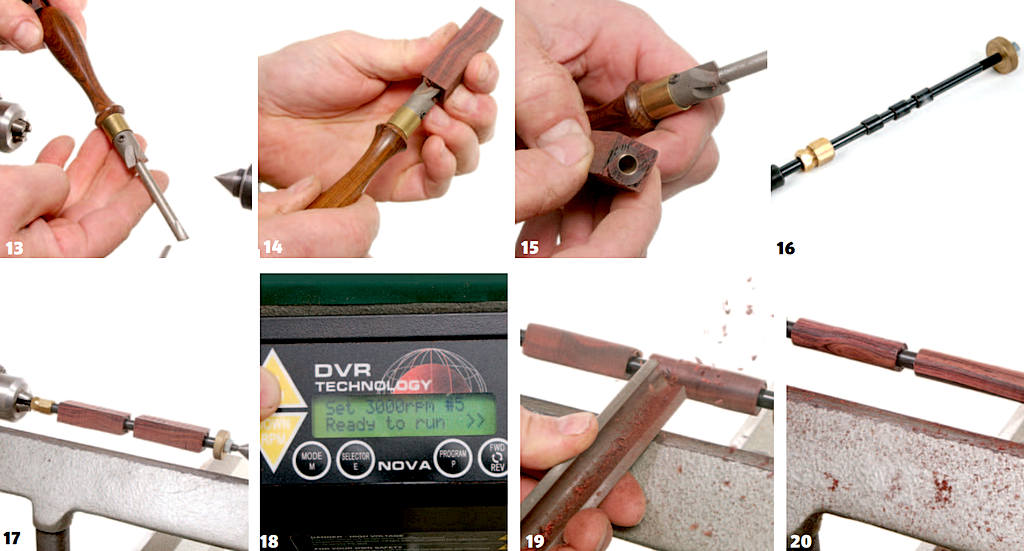
- For these straight pens you will need a sharp 5/16 in (8mm) bit – my preference is the brad type with a central spur.
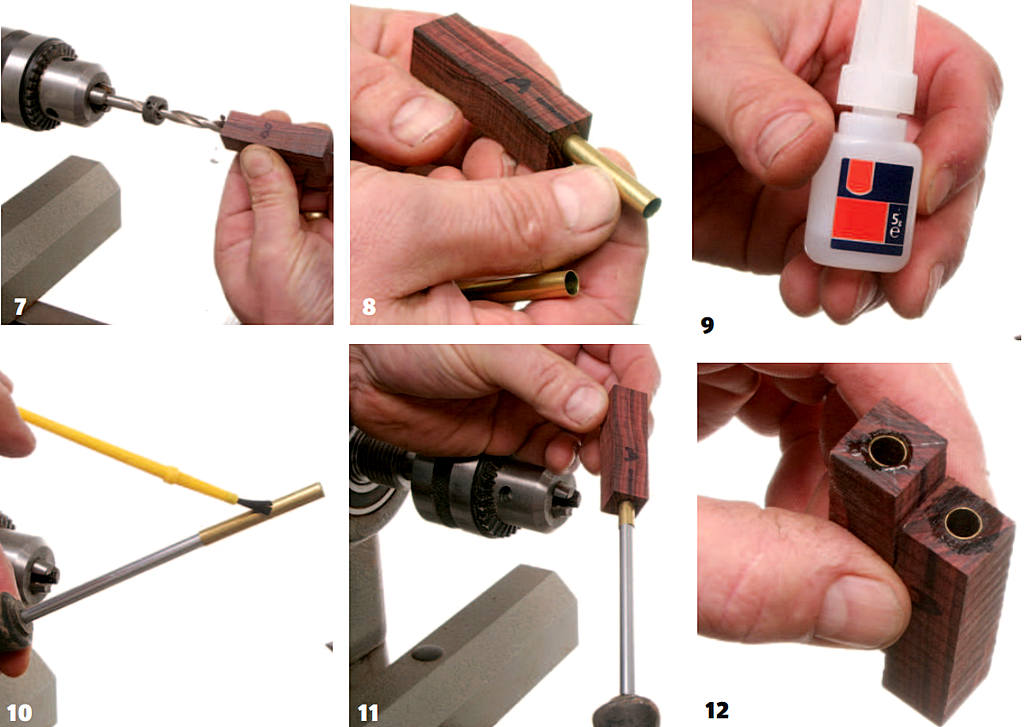
- For accuracy, use a drill press with the blank held securely in a drill vice and drill from the middle outwards on each blank.
- Drill slowly and carefully, allowing the swarf to clear. If you force the drill and the blank becomes too hot. it will crack when you turn it down to the final thin diameter.
- No matter how carefully you set up the vice, the hole will always go a little off centre at the exit end. which is the reason it is necessary to cut the blanks slightly oversized.
- If you don’t have a drill press, use the lathe with the drill chuck fitted in the headstock and feed the blanks on to the drill with pressure from the tailstock. With this method, leave the blanks slightly over length and trim them afterwards, as you cannot drill right through without damaging the revolving centre.
- The brass barrels must be a snug sliding fit in the hole – if they are loose it will be hard to turn the wood down thin without it breaking up. The drill bit has to be good quality and sharp to achieve this sort of accuracy.
- Use superglue to stick the barrels in place. The very thin type will do. but a slightly thicker one. with a longer curing time, will allow you to get things lined up properly before it grabs.
- Paint the glue on to the outside of the barrels, holding them on a screwdriver so that you don’t get glue all over your hands.
- Use the same arrangement to slide the barrel into the bore, making sure it goes well ia Act quickly, as the glue will soon grab hold of it if you hesitate too long.
- If you have cut the blanks to the right length to start with, the brass barrel should finish up just below the surface of the timber at both ends.
- To trim them to exact length the ideal tool is a barrel trimmer, which will also clean out any stray glue that might have got into the inside of the barrel.
- I prefer the hand-operated trimmers as they are more controllable, but they are available to fit in an electric drill. Take care if you do use one of these, as it is very easy to trim the barrel too short.
- Trim the timber back until it is just flush with the end of the barrel no further.
- To hold the barrels for turning you will need a mandrel. These either fit directly into the tailstock. or can be gripped in the drill chuck. There are various sizes to suit the size of pen you are making, but many of them use a 5/16 in (8mm) stem with differentsized spacers.
- Fit the blanks onto the mandrel with the grain lined up correctly, and a spacer gauge in the middle and at either end. Tighten up the locking nut to stop them spinning.
- Select the top speed on your lathe -somewhere around 3000rpm is ideal if you can get that high.
- Although you can buy specialist pen-turning tools, it is quite easy to use standard tools. I find a 3/4 in (19mm) roughing gouge is actually easier to control than a much smaller one.
- Bring the blanks down to somewhere near the diameter of the gauge spacers, using the gouge.
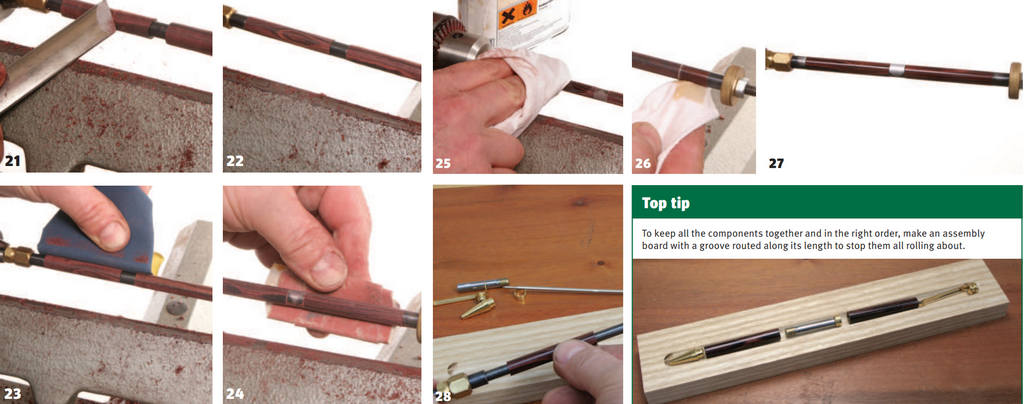
- Then use a skew chisel to reduce it down further, aiming to get as near as possible to the spacer diameter.
- At your first few attempts you may not be able to get the diameter correct and even straight off the tool but don’t worry unless it is a long way out.
- You can even things up using some 240 grit abrasive wrapped around a block, but beware of getting the timber too hot or it will crack.
- Finish off by working down the grades of abrasive; I finish around 800 grit for a really fine surface.
- There are dedicated pen finishes available but if you are only making a few. I find that standard cellulose sealer and friction polish leave a very satisfactory surface. Rub in a couple of coats of sealer with the lathe stationary and flat it down with fine abrasive.
- Apply the friction polish as the lathe is spinning, building up several coats as each one dries.
- Leave the blanks for several minutes before handling, to allow the polish to harden off properly and avoid finger marks.
- Slide the finished barrels off the mandrel, keeping them orientated correctly to each other.
- To keep all the components together and in the right order, make an assembly board with a groove routed along its length to stop them all rolling about.
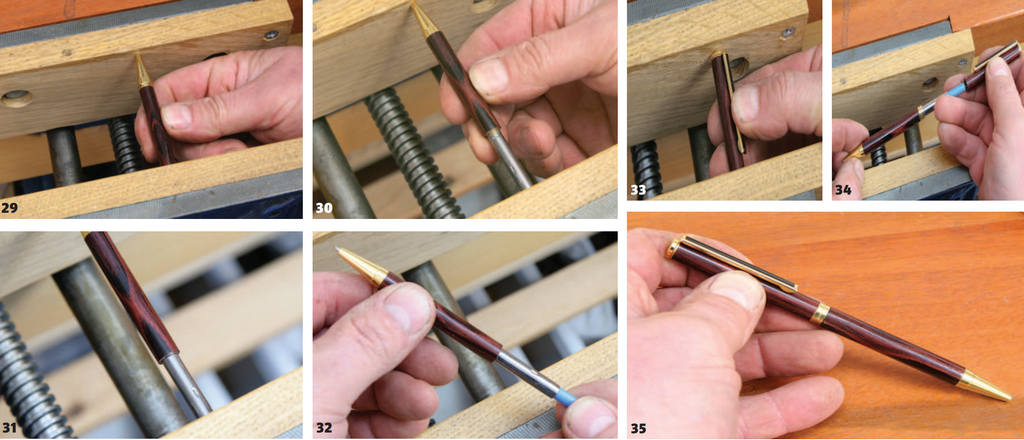
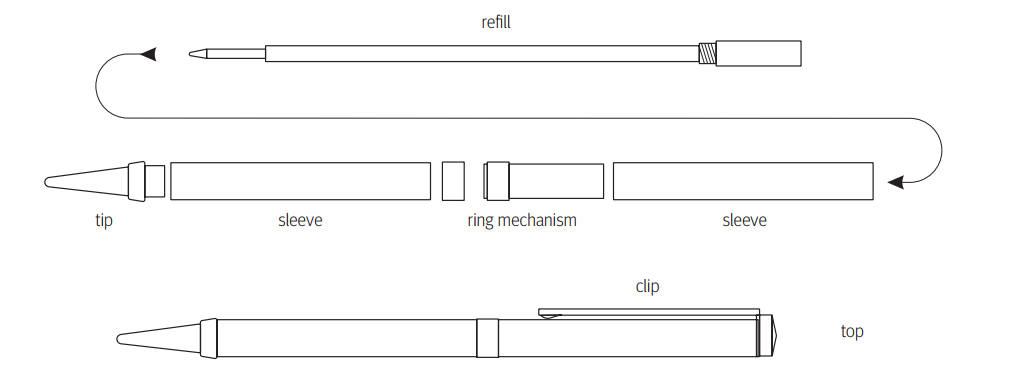
- Press the mechanism into the top end of the first barrel making sure it goes in straigh
- Keep pressing it in until the crimped groove on the mechanism is in line with the end of the barrel.
- Try screwing in the ink cartridge to see if the nib protrudes enough from the tip. If it doesn’t press the mechanism in a fraction more.
- Now press the top through the clip into the top end of the second tube.
- Screw in the ink cartridge, then slip on the central ring and push the top on to complete the pen.
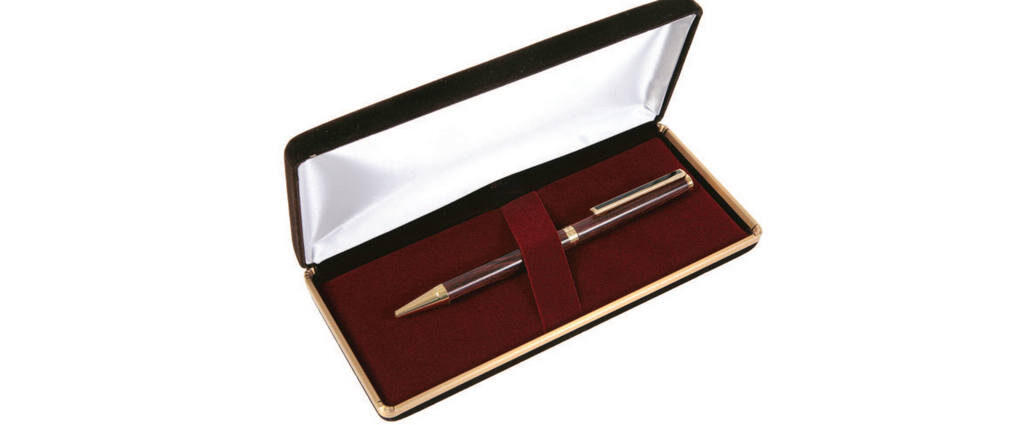
- The finished pen.
