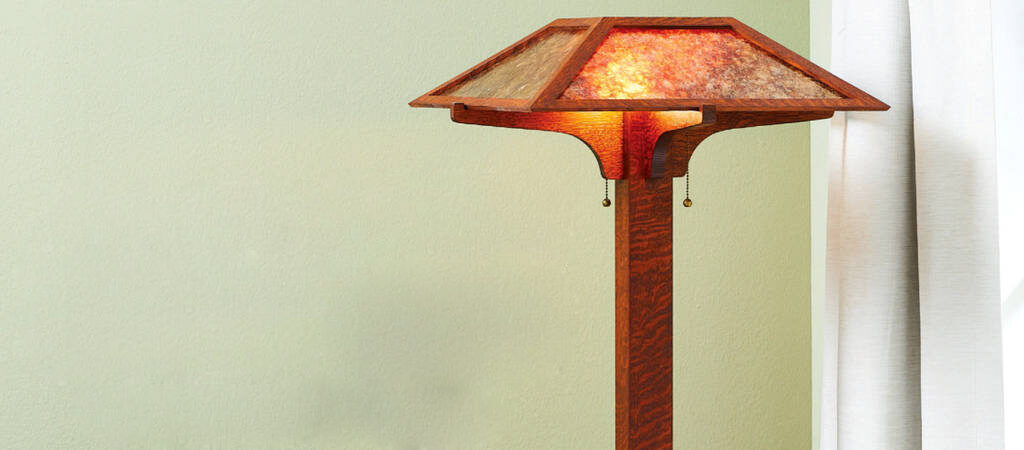
With its timeless design and period details, this handcrafted floor lamp really shines—whether it’s on or off.
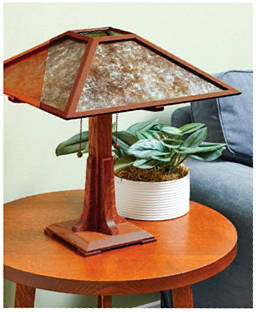
Mica panels and quartersawn oak transform this floor lamp into a focal point. And if the design looks vaguely familiar, that’s because we featured a smaller tabletop version way back in issue 148 (May 2003). Together, they make a handsome pair that will light up any living space.
A STRONG SUPPORT SYSTEM
 Building this lamp starts by creating a sturdy structure to support the lampshade. This consists of a lamppost, lampshade supports, and a base.
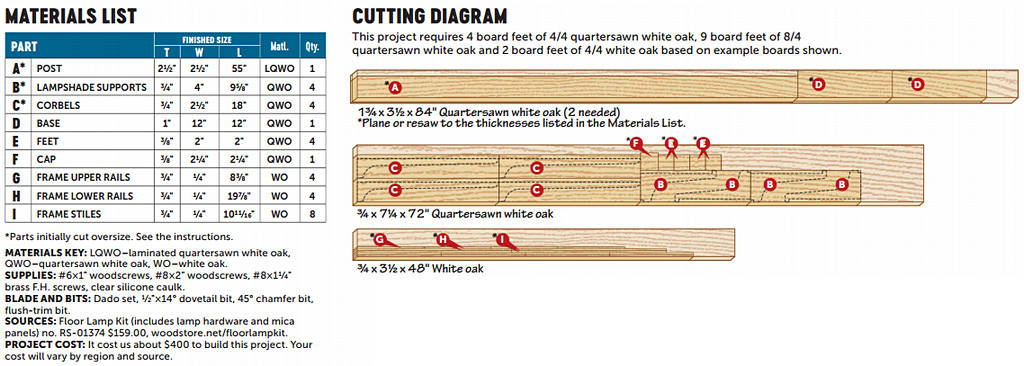
1. From 1¼”-thick stock, cut two 2¾”-wide blanks about 56″ long for the post (A) [Exploded View, Materials List], To create a wiring channel, cut a centered ½”-wide groove on the inside face of each blank [Drawing 1]. Glue and clamp the halves together, keeping their edges flush. Joint one glued edge of the post and plane the post to final width of 2½”, removing equal amounts of material from both edges to keep the wiring channel centered in the post. Trim the post to final length.
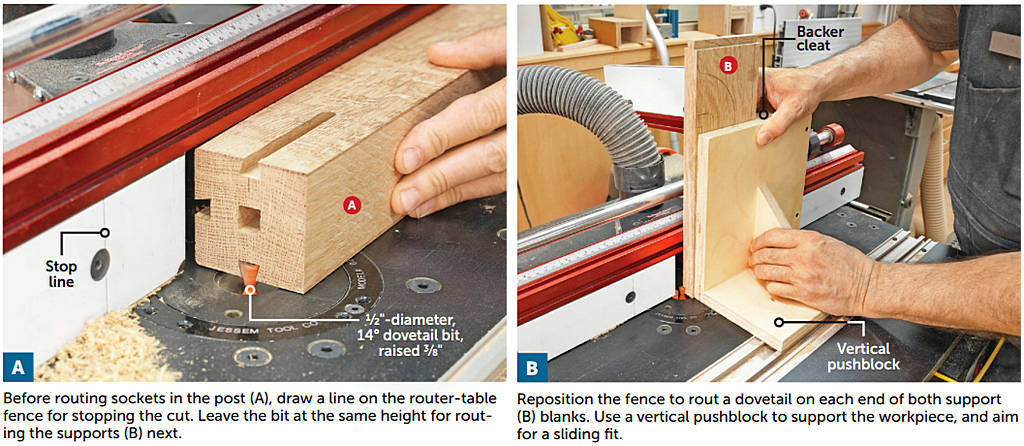
2. Rout a stopped dovetail socket centered on each face of the post [Drawing 1, Photo A].
3. From ¼” plywood or hardboard, make a template for the lampshade supports (B) [Drawing 2]. Cut two 4×14″ blanks and, using the template, lay out the four supports, one on each end of both blanks [Cutting Diagram], Rout a dovetail on each end of the two blanks [Photo B].
4. Bandsaw each support to rough shape, then adhere the template to each support with double-faced tape and rout with a flush-trim bit to final shape. Notch the bottom of the dovetails to allow the supports to seat fully into the dovetail sockets [Drawing 2], Finish-sand the post and supports and glue the supports into place.
5. Make a template for the corbels (C) [Drawing 3], Trace the profile onto four blanks. Bandsaw and flush-trim the corbels. Finish-sand, then glue the corbels to the post flush with the bottom [Exploded View].
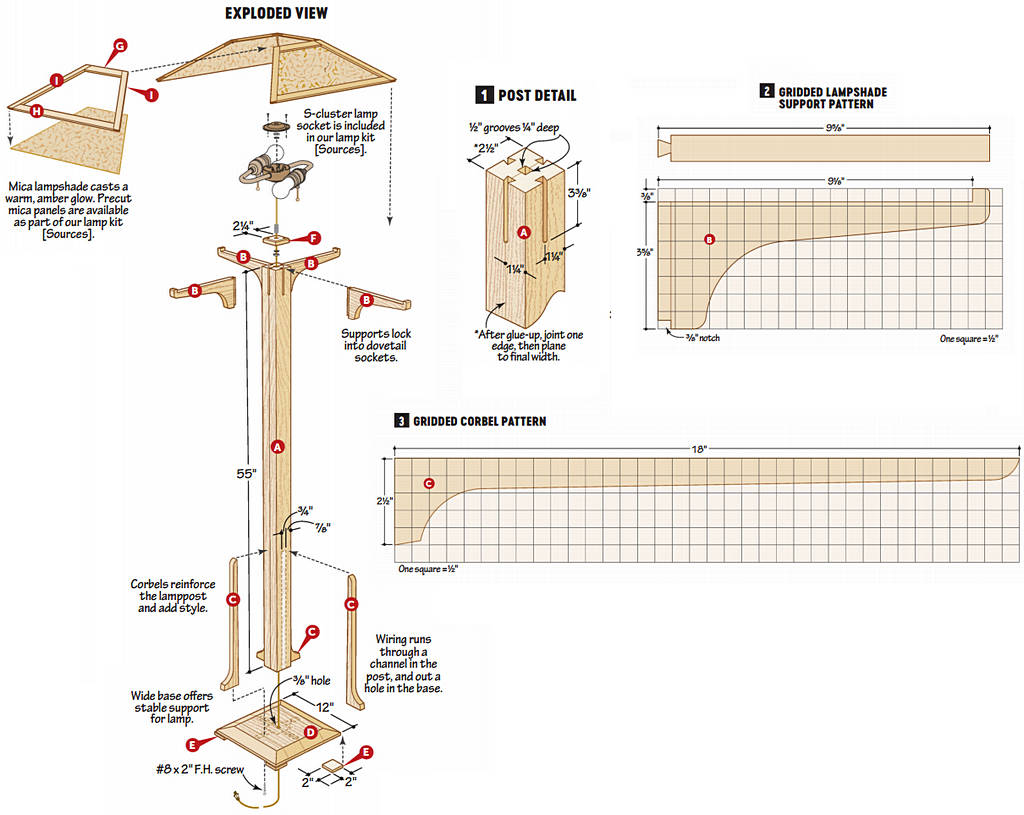
6. Glue up a blank for the base (D) and cut it to size [Drawing 4], Using a tall auxiliary fence for support, bevel-cut all four top edges of the base at the tablesaw [Drawing 4a], Drill a centered hole in the base along with holes, counterbored from underneath, for corbel-mounting screws. Finish-sand the base.
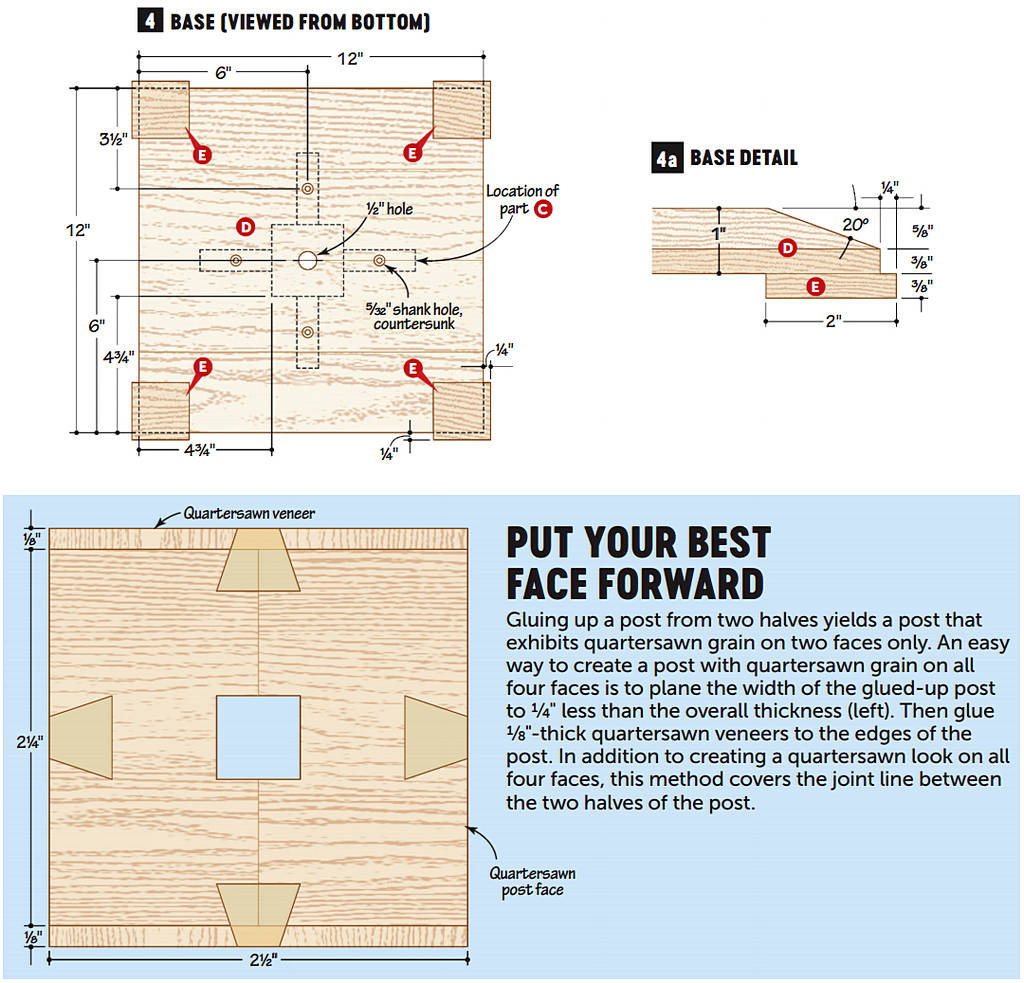
7. Cut the four feet (E) and cap (F) to size [Materials List]. Drill a centered counterbore on the bottom face of the cap, then drill a through-hole [Drawing 8]. Chamfer the top edges of the cap. Finish-sand the feet and cap and set the cap aside for now. Glue the feet to the base.
8. Center the base on the bottom of the post/corbel assembly (A-C) and screw the base into place (no glue).
THROWING SHADE
Four wood-framed mica panels make up the lampshade. A shop-made jig aids in cutting the angled half-laps that connect the frame pieces.
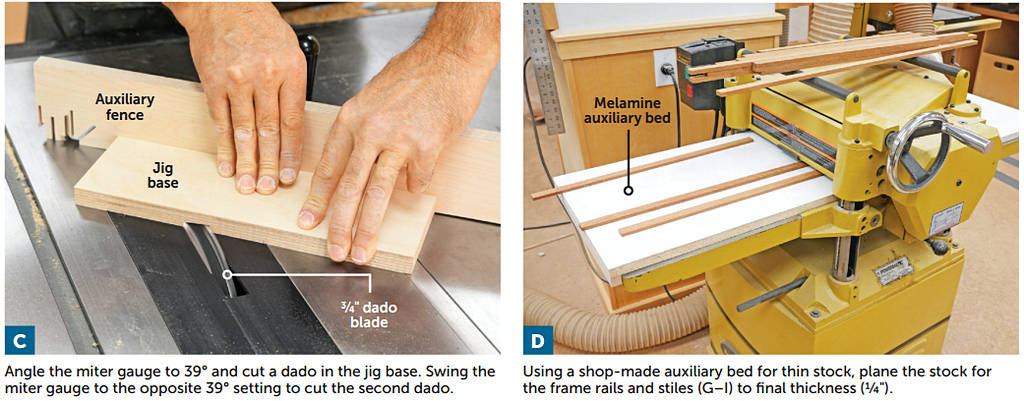
1. Build the half-lap jig [Drawing 5], using your miter gauge to cut the angled dadoes in the base [Photo C].
2. Mill the stock for the shade frames by planing 4/4 flatsawn white oak to ¾”. Rip enough 5/16″-wide strips from the board for all of the frame rails and stiles (G-I).
3. Using a planer or drum sander, mill the strips to a final thickness of ¼” [Photo D].
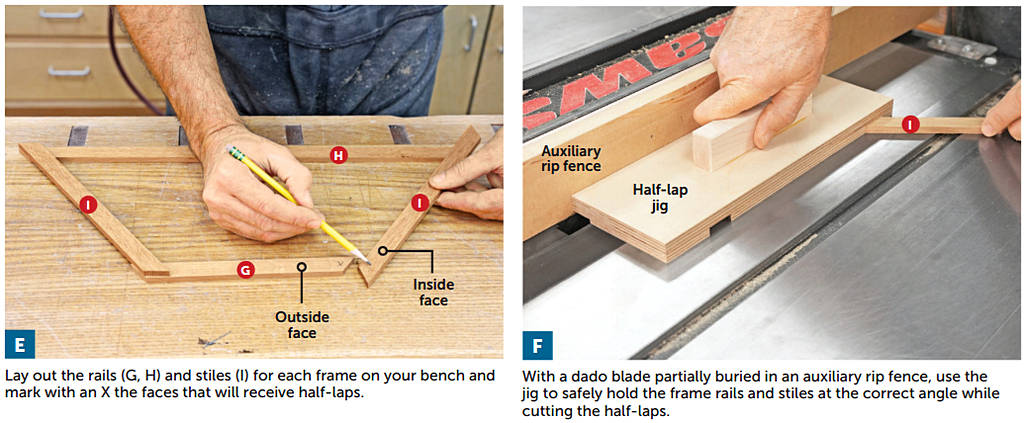
4. With your miter gauge set to 39″, miter-cut the frame rails and stiles to length [Drawing 6] while looking for the best grain appearance. Lay out the parts for each frame on your bench and mark the half-lap locations [Photo E].
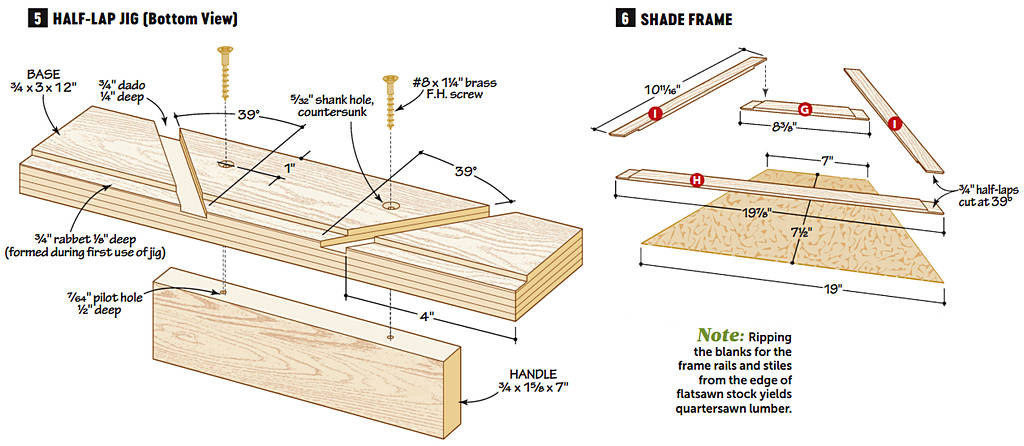
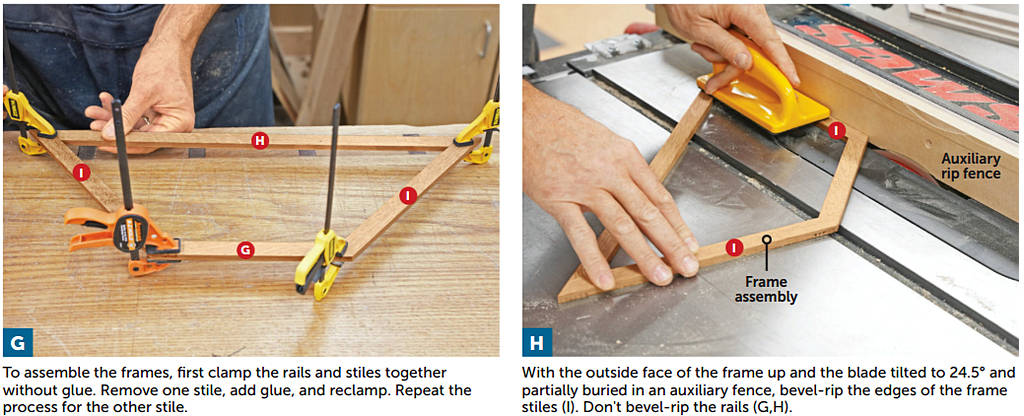
5. Using the jig and a dado blade, cut mitered half-laps in the frame pieces [Photo F]. Glue up the frames [Photo G]. Allow the glue to dry completely before moving on to the next step.
6. With a rip blade tilted to 24.5° and partially buried in an auxiliary fence [Drawings 7,7a], bevel-rip the edges of the frame stiles (I) on the inside face [Photo H].
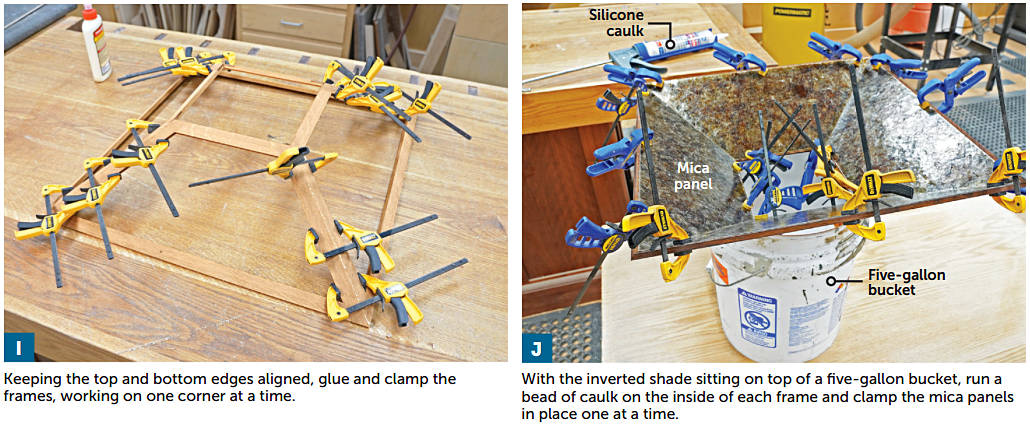
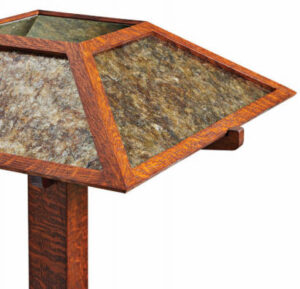 7. Finish-sand the frames, then glue up the shade [Photo I]. Complete any final sanding on the shade, base, and cap and apply a stain and finish. (We used Lockwood Early American Maple golden amber dye followed by Varathane Gunstock stain, then top-coated with General Finishes High Performance water-based satin finish.)
8. Cut the mica panels to size and dry-fit them in the inverted shade [Photo J], Remove the panels and, working on one side at a time, run a small bead of clear silicone caulk along the inside face of the frame and drop the panel into place. Allow the caulk to cure overnight.
WIRE THE LAMP
1. Remove the cover from an S-cluster socket. Install a ⅜” lock washer and ⅜” lamp pipe nut on the end of a 1″-long lamp pipe and thread it through the base of the socket, leaving enough protruding below to reach through the hole in the cap (F) [Drawing 8], Secure the socket to the cap using another lock washer and lamp pipe nut.
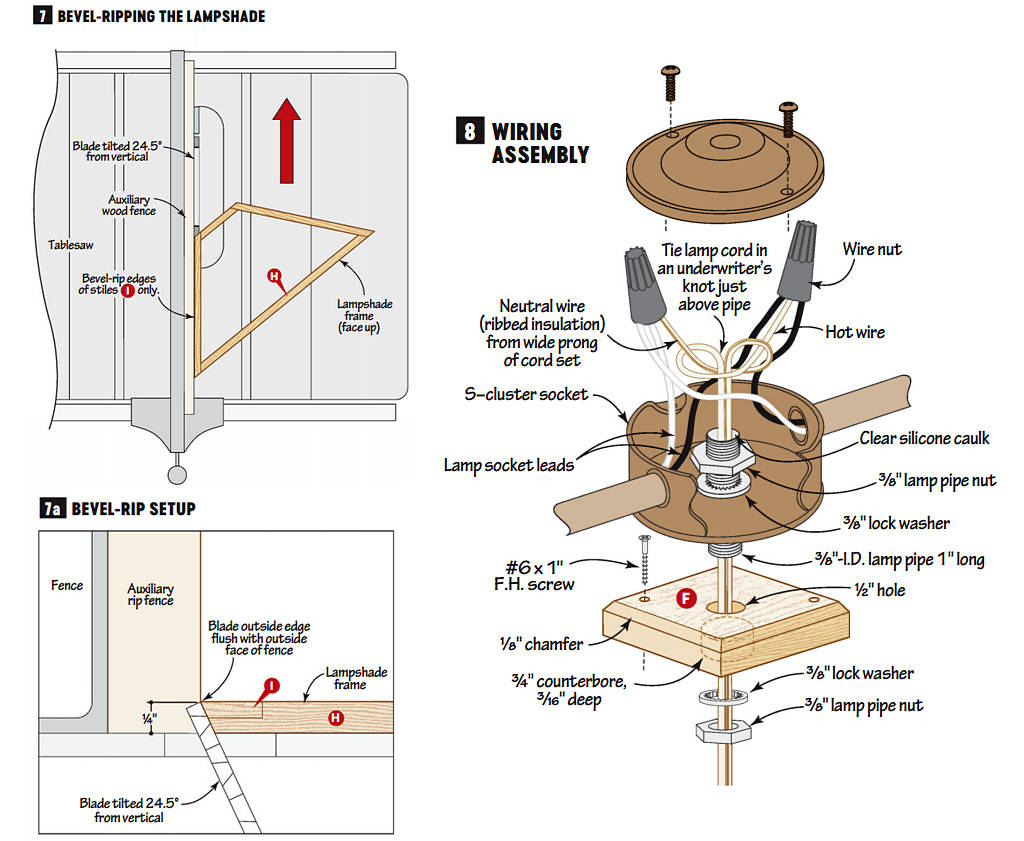
2. Feed the free end of a 10′ lamp cord set through the bottom of the post and then through the pipe in the cap (F). Wire the lamp [Drawing 8].
3. Apply a dab of silicone caulk in each end of the lamp pipe to protect the cord. After the caulk cures, glue and screw the cap to the top of the post (A) and replace the socket cover. Screw two light bulbs into the sockets and place the lampshade on the supports. Finally, place the lamp in your desired location, plug it in, and bask in the amber glow of a project well done.
