This guide empowers you with all the information needed to transform a beautiful bloom into a breathtaking, everlasting art piece. We’ll demonstrate the process using a classic rose, but feel free to experiment with different flowers as you perfect your technique in resin casting dried flowers. This is a great project for those interested in resin pour dried flowers techniques.
1. Unveiling the Kit’s Treasures for Resin Dry Flower Projects
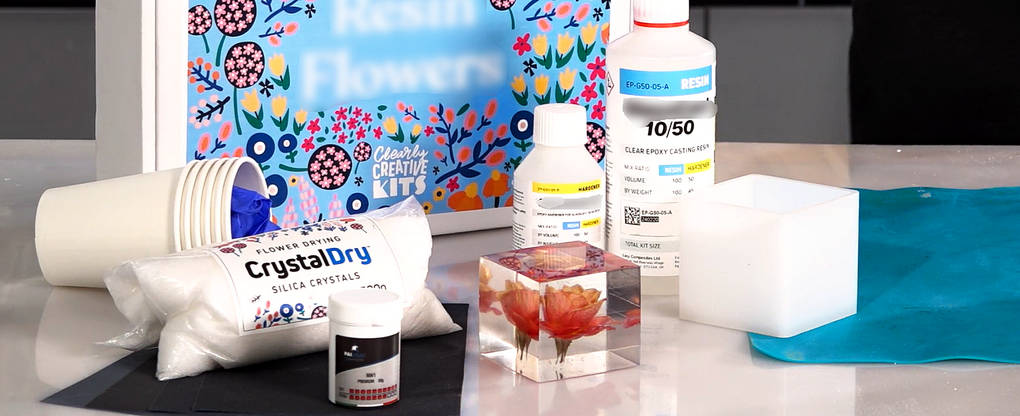
Your Resin Flowers Kit boasts a treasure trove of tools to bring your dry flower resin art vision to life:
- 500g GlassCast 50 Epoxy Resin (indicated as an example, you can choose an analog): This crystal-clear epoxy resin creates a flawless, glassy finish, ideal for resin pouring.
- Silicone Cube Mold (65mm): This mold provides the perfect shape for your paperweight.
- CrystalDry Flower Drying Silica Crystals: These crystals gently extract moisture from your flowers, preserving their delicate form for resin pouring dry flowers.
- Abrasive Paper Mini Kit and Polishing Compound: This duo smooths and polishes the top surface of your paperweight for a flawless finish.
- Nitrile Gloves, Mixing Pots, and Sticks: Maintain cleanliness and safety while handling the epoxy resin.
2. Additional Supplies You Might Need for Pouring Resin Over Dried Flowers
For a seamless crafting experience when pouring resin over dried flowers, consider having these items on hand: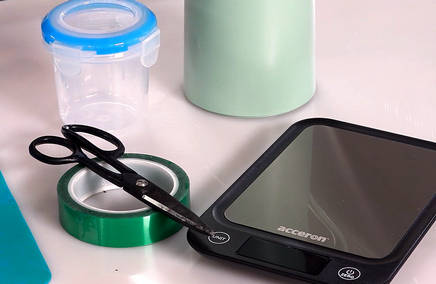
- Eye Protection: Shield your eyes from splashes during epoxy resin work.
- Protective Gear: An apron, old clothing, and a protective mat safeguard your work area.
- Digital Scales and Timer: Ensure precise measurements and track curing times.
- Airtight Container: Safely store your drying flowers.
- Scissors and Tape: Prepare your flower for drying.
- Protective Work Gloves: Shield your hands when demolding your creation.
3. Safety First! Essential Tips for Working with Epoxy Resin
Always prioritize safety when working with epoxy resin. Here’s a quick safety summary for how to make dried flower resin safely:
- Nitrile gloves are mandatory while handling epoxy resin or hardener.
- Never touch uncured or partially cured epoxy resin with bare skin.
- Wear suitable eye protection for additional safety.
- While GlassCast 50 is solvent-free with minimal odor, work in a well-ventilated area or wear a vapor mask.
4. Creating the Perfect Environment for Resin Casting Dried Flowers
Epoxy resins are highly sensitive to temperature and moisture. Here’s how to create the ideal working environment for resin casting dried flowers:
- Maintain room temperature between 20-25°C (68-77°F) for optimal epoxy resin consistency. If your resin appears cloudy, it’s crystallized. If it was frozen, you can warm it up in a hot water (60-70 C) for half an hour.
- Work in a room between 15-25°C (59-77°F). Higher temperatures significantly decrease pot life (working time) of the epoxy resin. The table below provides a detailed breakdown.
- Epoxy resins are susceptible to moisture. Ensure the environment is dry and well-heated.
| Ambient Temperature (°C) | Pot Life (mins) | Initial Cure (hours) |
| 15 | 80 | 96 |
| 20 | 60 | 72 |
| 25 | 40 | 48 |
could technically do this in two pours, we recommend three shallower pours to minimize heat buildup during the curing process, especially when working with resin pour dried flowers.
- Why Three Pours for Resin Pouring Dry Flowers? Large pours of epoxy resin can generate significant heat as they cure. This can cause issues like cracking, discoloration, or even scorching. Three smaller pours help dissipate the heat, ensuring a flawless finish for your resin pouring dry flowers project.
- Calculating per Layer: Ideally, each pour would use about 83g of GlassCast 50. However, because the flower itself takes up some volume, you can reduce each layer to approximately 80g. This brings your total epoxy resin usage to around 240g for the entire project.
- Resin Provided: Your kit provides 500g of GlassCast 50, enough to make up to two paperweights (depending on the size of your flowers). Smaller flowers will require less epoxy resin, allowing you to create even more pieces of dry flower resin art.
- Mixing Ratio: GlassCast 50 is mixed at a ratio of 100:45 by weight (resin to hardener) or 100:50 by volume.
-
Measuring and Mixing the Epoxy Resin: Precision is Key for Resin Casting Dried Flowers
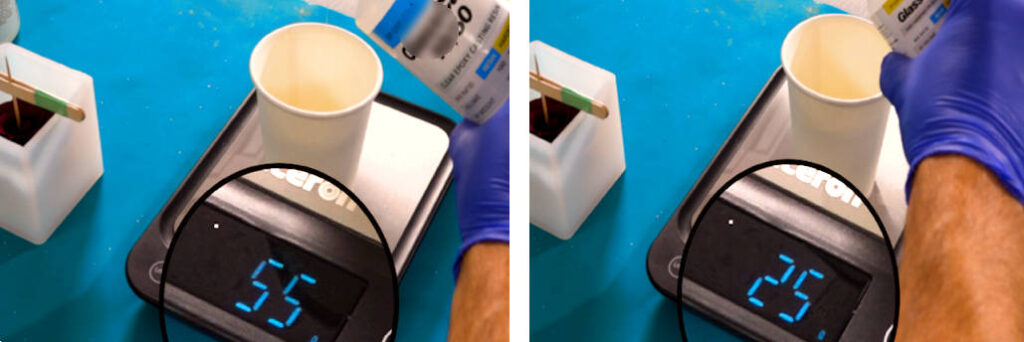
Accurate measuring and thorough mixing are crucial for a successful resin casting dried flowers project. Here’s the breakdown for each layer:
- Measuring: Carefully weigh out 55g of Part A (resin) and 25g of Part B (hardener) into a clean mixing cup.
- Initial Mixing: Slowly and thoroughly mix the two parts together for 3 minutes. Use a mixing stick to scrape the sides and bottom of the cup frequently to ensure no unmixed epoxy resin clings to the edges.
- Reducing Bubbles: Mixing slowly helps minimize the introduction of bubbles into the epoxy resin.
- Double-Potting: After the initial 3 minutes, transfer the mixture to a second clean cup and mix again for another 3 minutes using the same careful technique. This process, called “double-potting,” ensures a complete and even mix, essential for how to make dried flower resin projects look professional.
- Letting it Rest: Once fully mixed, let the epoxy resin stand for a few minutes. This allows any remaining bubbles to rise to the surface and pop.
-
Pouring the Resin in Layers: A Step-by-Step Approach for Pouring Resin Over Dried Flowers

Now for the exciting part: pouring resin over dried flowers! We’ll do this in three distinct layers:
- Layer 1: Securing the Base (Resin Pour Dried Flowers)
- This first layer’s purpose is to secure the base of the flower in the mold, allowing subsequent pours to fully encapsulate the flower head for your resin pour dried flowers creation.
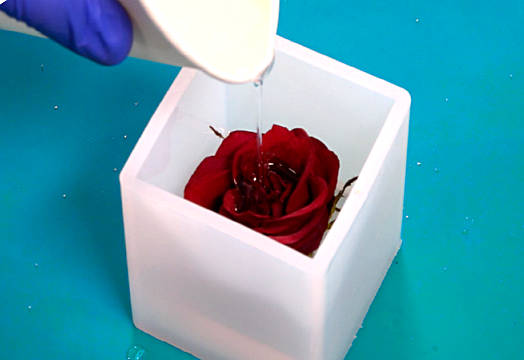
- Pour the epoxy resin mixture slowly and carefully into the base of the silicone mold, avoiding pouring directly onto the flower during this first layer. This will help minimize bubbles and ensure the flower is positioned correctly.
- Check for any bubbles that may have formed and pop them with a toothpick or heat gun if necessary.
- Cover the project to prevent dust from settling on the epoxy resin, but ensure there’s still some airflow. Maintain a dry environment and a consistent temperature of 20°C (68°F).
- Allow this layer to partially cure for approximately 12 hours. This is what we call the “B-stage,” where the resin is firm but still slightly tacky. This allows for proper cross-linking between layers, minimizing visible layer lines in your pouring resin over dried flowers project. To test for the B-stage, gently press the resin with a gloved finger or mixing stick. No resin should stick.
- Layer 2: Encapsulating the Flower Head (Resin Casting Dried Flowers)
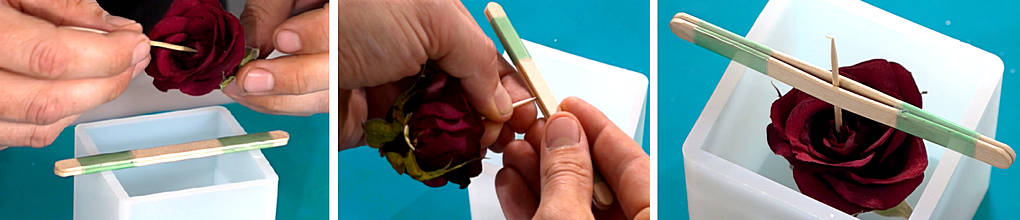
- Once the first layer has reached the B-stage, carefully remove the clamp. Cut the tape, remove the lollipop sticks, and gently twist and pull out the cocktail stick from the center of the rose.
- Prepare your second batch of GlassCast 50 epoxy resin, following the mixing instructions from section 5. Allow the mix to stand to release bubbles.
- Carefully and slowly pour the second layer of resin into the flower head. This helps push out any trapped air between the petals in your resin casting dried flowers creation.
- Again, check for bubbles, cover the project, and allow it to partially cure for another 12 hours to reach the B-stage.
- Layer 3: The Final Touch (Dry Flower Resin Art)
- Prepare your final batch of epoxy resin, using the same mixing and bubble-releasing techniques.
- Slowly pour the resin into the flower head once more to displace any remaining trapped air, completing your dry flower resin art.
- Fill the mold completely to the top, ensuring the flower is fully encased on all sides with resin.
- Cover the mold and allow it to fully cure.
-
Bubbles: The Tiny Menace (and How to Conquer Them in Your Dry Flower Resin Art)
While careful mixing and pouring techniques minimize bubbles, some may still appear in your dry flower resin art. Here’s how to deal with them:
- During Curing: The full cure time for GlassCast 50 is 48 hours at an ambient temperature of 20°C (68°F). During the first few hours of the cure, check your project periodically and pop any surface bubbles that appear. A toothpick, a heat gun (used carefully and briefly), or even a gentle breath can be effective.
- Temperature Considerations: Remember, the 48-hour cure time is based on a 20°C (68°F) environment. Temperatures above or below this will affect the cure time. Higher temperatures will speed up the cure, while lower temperatures will slow it down. Refer to the temperature/cure time table from earlier in the guide.
-
Demolding, Flatting, and Polishing: Revealing the Masterpiece of Your Resin Dry Flower Project
After the 48-hour cure (or longer, depending on your ambient temperature), your epoxy resin paperweight should be ready for demolding. This is the final stage of how to make dried flower resin projects shine.
- Checking for Curing: Before demolding, check if the casting is fully cured. Press firmly on the surface with a mixing stick. If it feels solid and no marks are left, it’s ready. For extra assurance, pick up the mold and feel all around; it should feel rock solid.
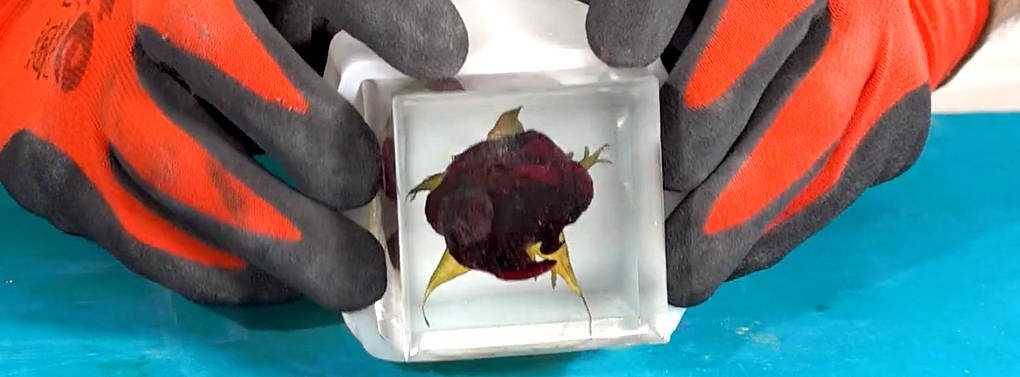
- Demolding: Now for the grand reveal! Wear work gloves for this step, as the top edge where the resin meets the mold can be sharp.
- Break the airlock by gently prying and loosening the mold all around the cast block.
- Turn the mold upside down and press firmly down, pushing the cube out.
- Flatting (Leveling): Your paperweight will look fantastic, but the top face will likely need some flattening to achieve a perfectly smooth, level surface. This is where the abrasive papers come in.
- The Process: You’ll work through progressively finer grits of sandpaper to remove scratches and create a smooth surface.
- Start with 120-grit sandpaper: Wrap it around a flat block (a piece of wood or a sanding block works well). This helps maintain a flat sanding surface.
- Sand in one direction: This ensures even abrasion across the entire surface.
- Move to 240-grit: Once the entire surface has been sanded with the 120-grit, switch to 240-grit. Rotate the casting 90 degrees and sand in the opposite direction. This helps to remove the scratches left by the previous grit.
- Check for Scratches: Before moving to the next grit, carefully inspect the surface to ensure all scratches from the previous grit have been removed. This is crucial for a smooth finish.
- Repeat: Repeat this process for each grit of abrasive paper included in your kit, rotating the casting 90 degrees each time and sanding in alternating directions.
- The Process: You’ll work through progressively finer grits of sandpaper to remove scratches and create a smooth surface.
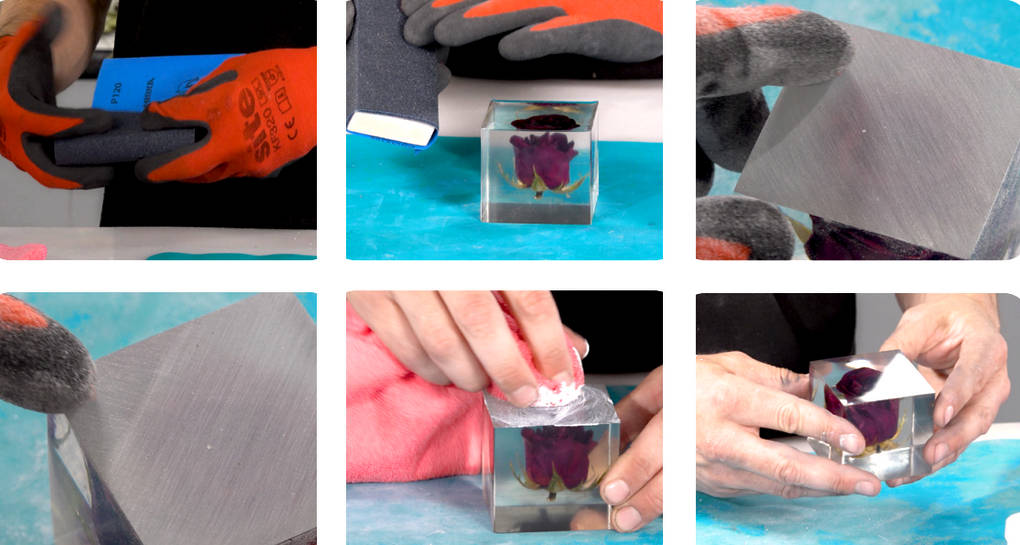
- Polishing: Now for the final touch that will bring out the crystal-clear shine in your resin dry flower creation!
- Hand Polishing: Apply the polishing compound to a soft cloth. Work the compound into the surface of the epoxy resin in a circular motion until the compound has diminished. Wipe away any residue. Repeat as needed until you achieve a high-gloss finish.
- Machine Polishing (Optional): If you have a polishing machine, this process will be much faster and easier, especially for larger projects.
-
Congratulations! You’ve Created a Timeless Treasure of Dry Flower Resin Art
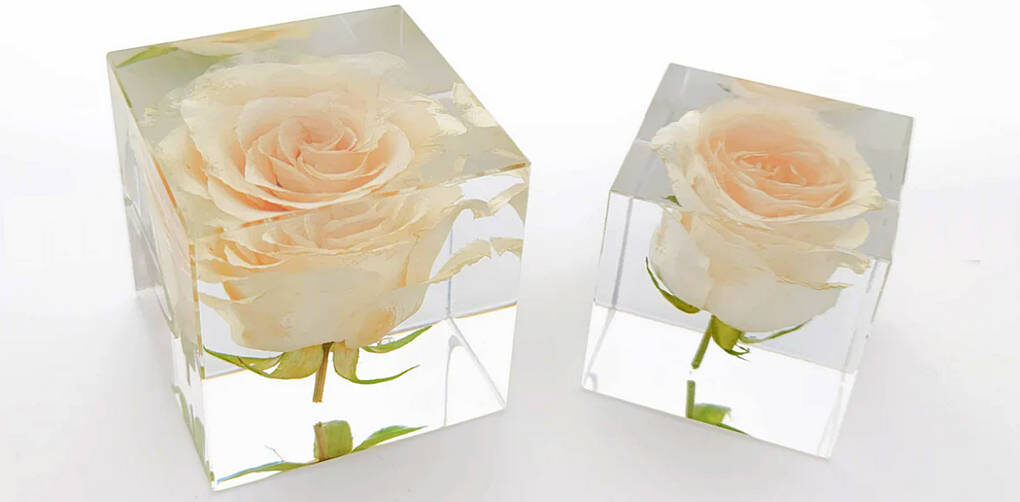
There you have it—a stunning resin flower paperweight! The mold has created smooth sides, and the top surface is now like glass. The techniques and processes outlined in this guide can be adapted to create a wide range of resin flower castings, making beautiful pieces of dry flower resin art. You’ve now learned how to make dried flower resin keepsakes that will last a lifetime.
-
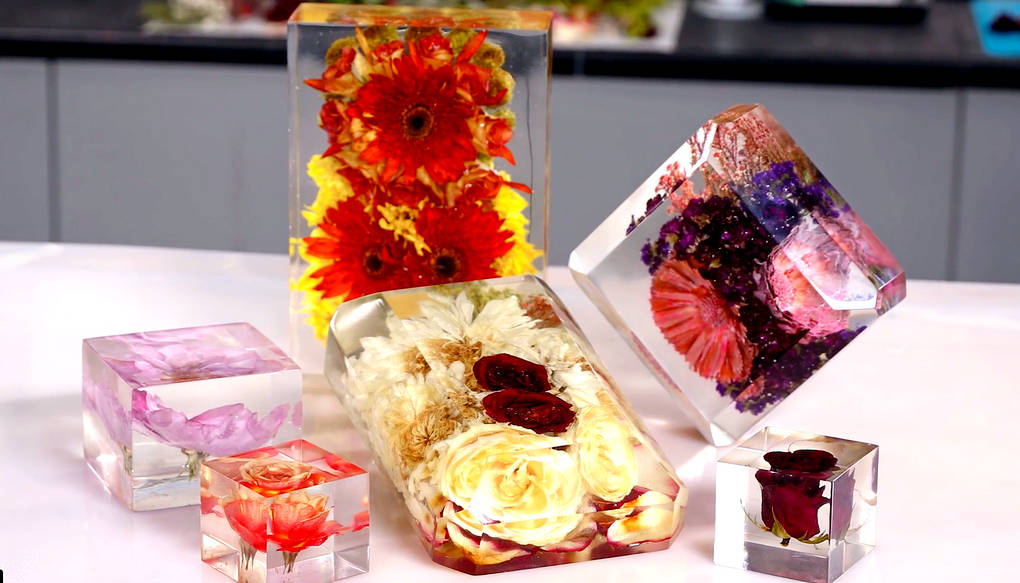
Alternative Projects: Expanding Your Creative Horizons with Resin Dried Flowers There are so many possibilities with resin dried flowers.
- Endless Possibilities with Resin Dried Flower Pouring: The possibilities are endless depending on the type of flower you use, the type of mold, and any additional embellishments like glitter or flakes. Consider incorporating other small items or creating layered effects using different colors of resin.
- Scaling Up Resin Dried Flower Projects: Resin dried flower pouring techniques can be scaled up to encapsulate entire bouquets in larger blocks of resin, or scaled down to preserve tiny, delicate flowers and petals for use in jewelry, creating beautiful and personalized resin dried flowers.
- Dried Flower Resin Casting Inspiration: Browse our website pages for more dried flower resin casting project ideas and inspiration and other dried flower resin art projects. You’ll find many ways to use these techniques, from simple paperweights to complex layered creations.