Routers are great tools for shaping edges in furniture making, but they also have a number of other uses, as John Bullar discovers in the next part of this series.
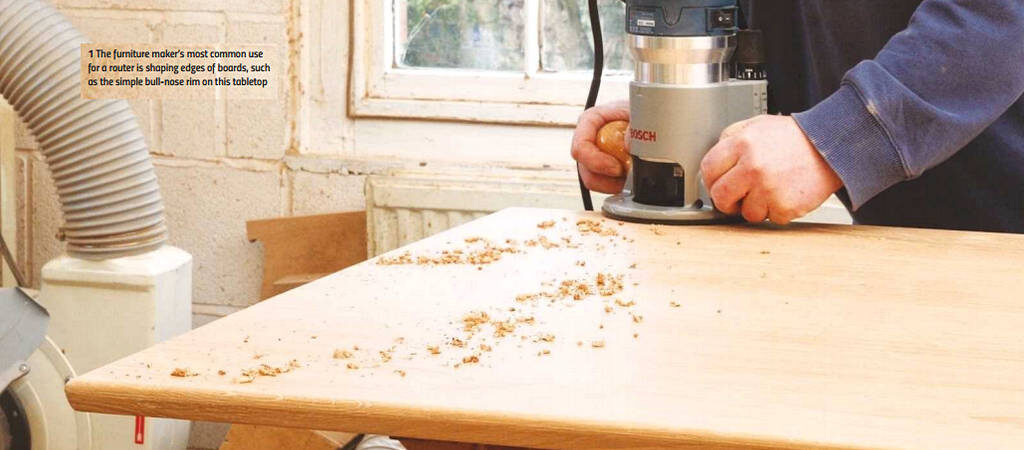
Routers are great for shaping edges – turning a plain square-edged board into a friendly round-edged tabletop, for example (photo 1) – but they also have a multitude of other uses. While this article is a general introduction to using the hand-held router and router table in furniture making, being such a versatile tool, router applications also crop up in other parts of this series.
Simple origins
The first type of furniture maker’s router was a humble block plane with narrow blade protruding beneath it which was intended for routing out deep channels or rebates (photo 2). Early makers would also own a set of moulding planes, often running into dozens, for shaping the edges of panels and cabinet tops.
Over the past 100 years, however, the electric router has progressively replaced both these tools. In theory, a modem router is simple enough: a geared electric motor vertically mounted over a flat plate known as the ’sole’, which slides across the wood.
A cutter, clamped to the motor spindle, pokes through the middle of the sole to cut the wood beneath. The motor can be lowered to cut deeper and raised to reduce or stop cutting, usually with a spring-loaded plunge- mechanism.
Putting this into practice requires planning and care. You can work freehand to make a groove just a few millimetres deep with a small diameter cutter, such as for patterns or signing your initials on a piece of wood (photo 3). However, for larger or deeper grooves, the router must be guided to stop it running away and damaging the wood.
Well look further into this below, but first a word on cutters.

Cutting bits
Routers come in two man sizes with 1/4in chucks for small trimming jobs or 1/2in chucks for heavy-duty routing. Cutters or ‘bits’ in both sizes are made from high speed steel (HSS) or tungsten carbide (TC). Steel-edged cutters tend to have more complex shapes while carbide edges last much longer (photo 4).
The router turns extremely fast around 20.000rpm. and the cutter should slice off a minute shaving with each turn. This requires the edge to be razor-sharp otherwise the tool tip heats up and scorches the wood. To avoid blunting, router cutters should never be forced into the wood, nor allowed to remain in the same spot they must be gently fed forward n a slow, controlled manner With care, old router cutters can be sharpened although many makers regard them as disposable once the edge is dulled (photo 5).
Depth & direction
Avoid making deep cuts with a router as this is when it’ll try to veer off on a path of its own, damaging the work and possibly the tool as well. Instead make a series of shallow cuts, thus increasing the overall depth at each stage. To help with this, the mechanism on a plunge router has a rotating turret stop, which guides the user to cut in three stages (photo 6).
Looking down on a hand-held router, the spindle rotates clockwise (photo 7); this means that as the tool is pulled towards you, the cutting edge moves from right to left, pushing the router rightwards To prevent it moving that way when making a straight channel, we either need a rigid edge or ‘fence’ fixed to the bench on the router’s right-hand side, or a sliding fence fixed to the left-hand side. Conversely, if you were pushing the router away, then the fences would be on the opposite side. It’s not only heavy-duty cutting that requires firm guidance to prevent the router drifting off course; for delicate work we also need to stop the groove juddering and weaving about (photo 8).

Cutting curves
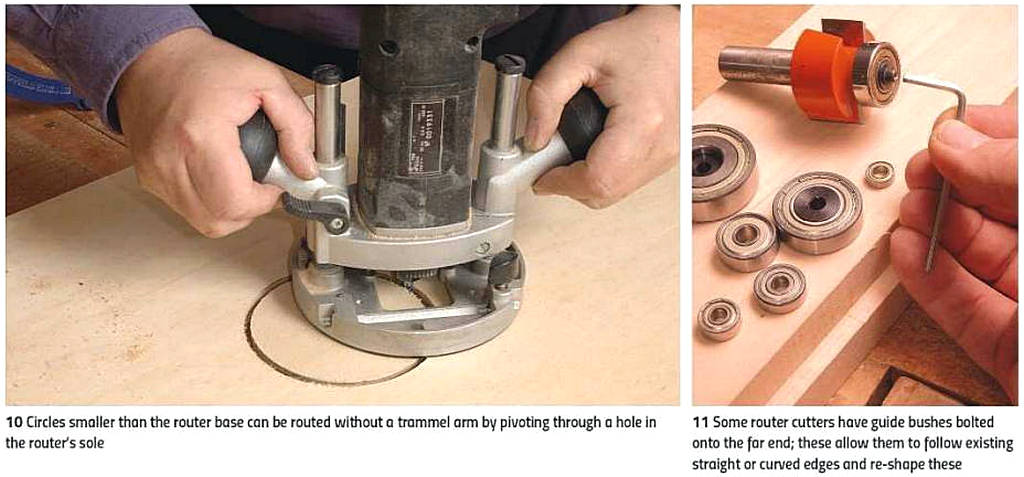
Cutting curves is an easy task for the router but again, it needs to be restrained for accurate work. The trammel arm (photo 9) works like a compass used in school geometry; it tethers the router to move in a precise arc or circle (photo 10). It can be made from a simple board or batten with one end fixed to the router and the other swivelling on a bolt or wood screw. If you don’t want a screw hole visible in the centre, then either cut from the underside or else glue a temporary block to hold the screw, sawing and planing it away afterwards.
Guide bushes
Router cutters with guide bushes built in follow the shape of an existing edge, cutting away wood alongside the bush. The bush itself is a roller bearing bolted onto the end of the cutter so the bearing turns slowly as it runs along an edge while the cutter whizzes round (photo 11).
Guide bush cutters, some with different sizes of bearing, come in a vast range of profiles, ideal for rebating, re-shaping edges or producing mouldings. It’s important that the bush runs along a smooth edge as any roughness transmits through the cutter and into the finished profile.
Balancing act
A weakness of the plunge router’s design is that it’s top heavy, so therefore needs support in order to avoid wobble, especially when working on small parts (photo 14). Sometimes a steady pair of hands will suffice, but often the maker needs to put together support blocks when using the router on small edges. This is the reason why many makers prefer to use a router table.
Router table
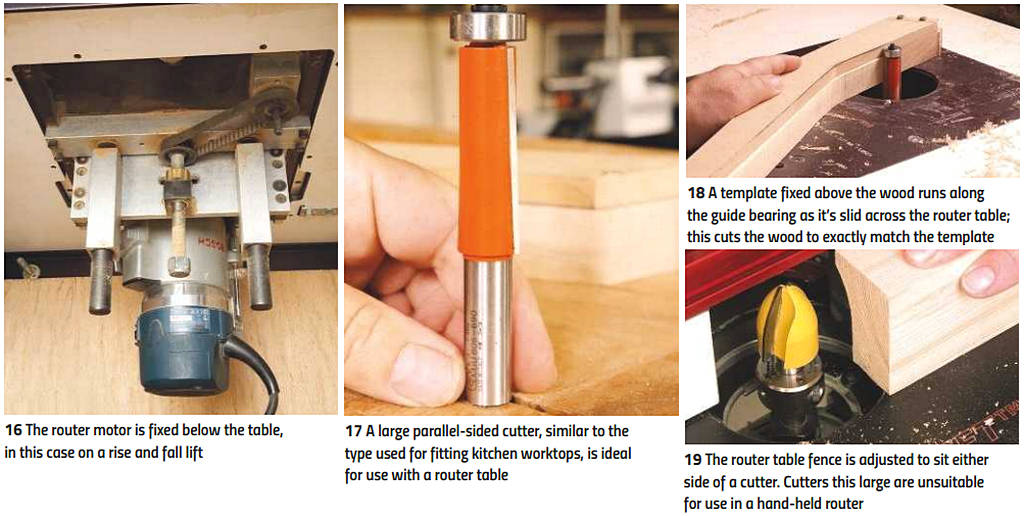
The router table takes the same tool and turns it upside down for a totally different approach – the cutter sticks up through a hole in a flat tabletop (photo 15). The router is fixed to the underside of the table and wood, laid flat on the table, slides across it.
While its possible to use the plunge mechanism of a normal router upside down, this is very awkward and further hindered by the springs pushing down. For this reason, many large router tables come with a lift mechanism to raise and lower the router while keeping the router’s plunge mechanism locked (photo 16).

Template cutting
As with a hand-held router, there’s a risk of the cutter biting into the wood, but this time it’s the wood that’s likely to shoot off rather than the router itself, which is luckily firmly fixed to the table. Larger cutters can be more safely used on a router table and guide bush cutters provide one way of limiting depth of cut. By fixing a template to the wood, it can be steered to cut precisely to the template’s outline (photos 17 & 18).
Because the router table leaves both hands free, there’s different hazards to consider. At all times hands must be kept at a safe distance from the cutter, which could inflict serious injury, and push-sticks used when it’s necessary to hold the wood close to the cutter. Router tables should be equipped with a No Volt Release (NVR) switch, to facilitate safe turning on and off from above.
Coving & moulding
Router tables are usually fitted with a movable fence; this has a gap in the middle where the cutter sits so that wood can be slid across the cutter (photo 19). Because the router is now upside down, the cutter therefore rotates anti-clockwise. Wood must be slid along the fence from right to left, so that the leading cutting edges push the wood against the fence. The cutter spindle must always be behind the fence otherwise wood may be dragged between cutter and fence with disastrous consequences.
Router extensions
Router cutters are purposely designed to have short shanks so they can’t project too far out of the router. It’s also important that the cutter’s shank is fully inserted and clamped in the router collet. This reduces the risk of vibration; however, mounting a router below the table decreases its useful length, which prevents certain cutters being used.
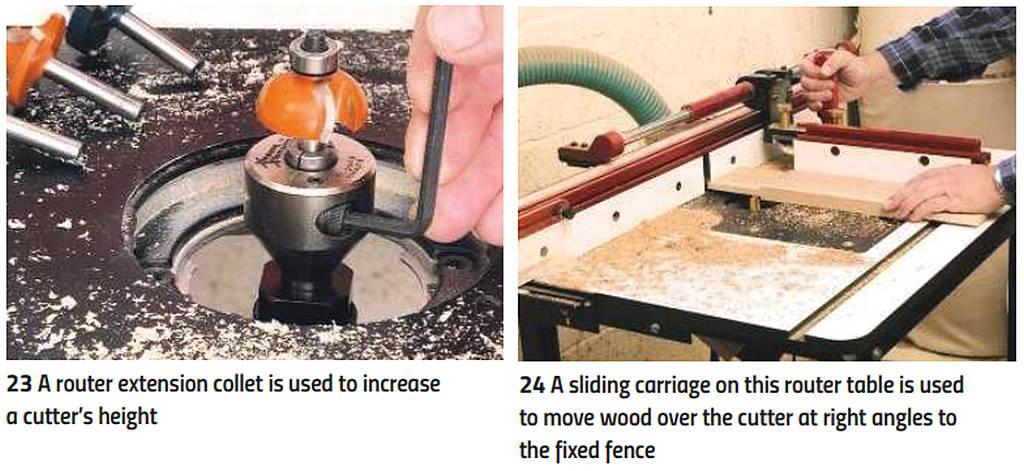
A router extension collet used in a router table – these shouldn’t be used hand-held – increases cutter height, allowing a greater variety of cutters to be used with a router table (photo 23).

Sliding carriages
As well as having a fixed fence clamped either side of the cutter for edges to be slid along, some router tables offer the option of a sliding carriage at right angles to the fence so a board end can be passed over the cutter in a controlled manner (photo 24). This is useful for moulding ends or shaping narrow end joints on a router table.
Noise & dust
Routers produce a high-pitched whine and throw off a lot of chippings and dust. For all its virtues, this isn’t a tool to be used when others are trying to sleep!
Manufacturers provide clear shields to reduce the spread of dust and prevent accidental cutter contact These aren’t shown here because they’re not compatible with flash photography, but should be used in accordance with the supplied instructions.
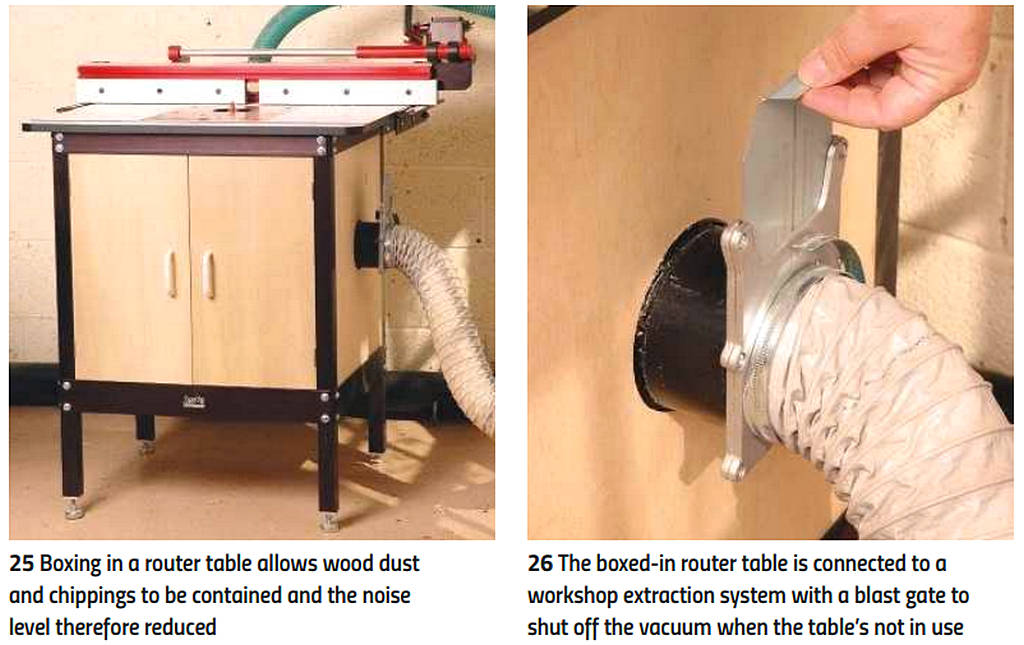
A router table, if sturdy enough, will cut down some of the noise but prevents standard shields being fitted, so there’s still a big dust problem. By boxing in the table with heavy gauge plywood or MDF, you can contain the dust and considerably reduce noise levels (photos 25 & 26).
Conclusions
The router is undoubtedly the most versatile hand-held power tool in a furniture maker’s workshop. To be fair, this is a modest claim because furniture makers tend to use hand tools and electrically powered machines rather than hand-held power tools. Even so, a router, in skilled hands, can perform great work.
The router table turns a tool designed for hand-held use into a miniature spindle moulder. Spindle moulders – which we’ll look at in a future article – have a reputation for being tricky machines, which require care in order to use safely. To a lesser extent, the same is true of router tables, so it’s important to follow a manufacturer’s instructions. We’ll look at the router’s more specialised uses, such as the cutting of dovetail joints, in future articles.

