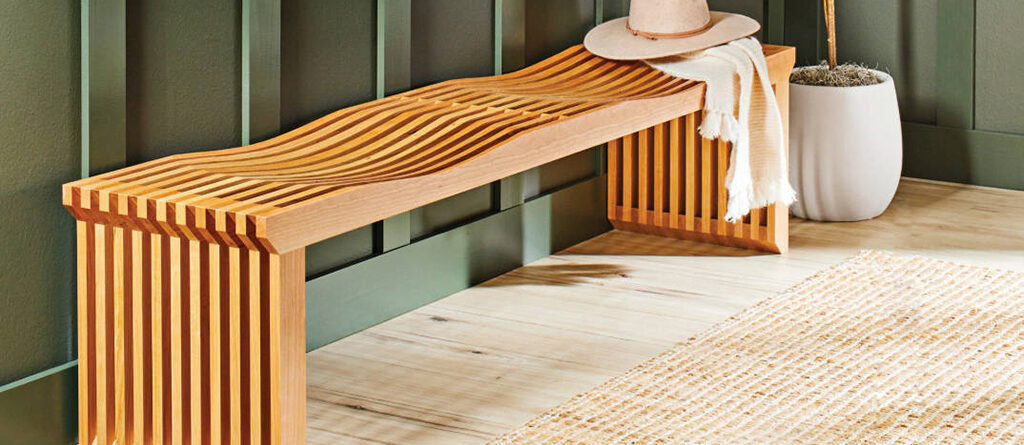
Gentle curves add comfort and make this seat a stunner. Just as stunning? The simple technique used to shape the seat.
Shaping a dished seat from solid wood is usually a time-consuming task requiring special tools. This bench takes a different approach, because you’ll bevel-cut the dished portion of each seat rail prior to assembly. And it’s easier than it looks. We’ll show you how.
START WITH THE SEAT
1. Cut the legs and seat rails (A, B) to size [Materials List], but don’t miter the ends yet. Arrange the seat rails on your benchtop and number them 1-11 to keep them in order as you cut the seat curves.
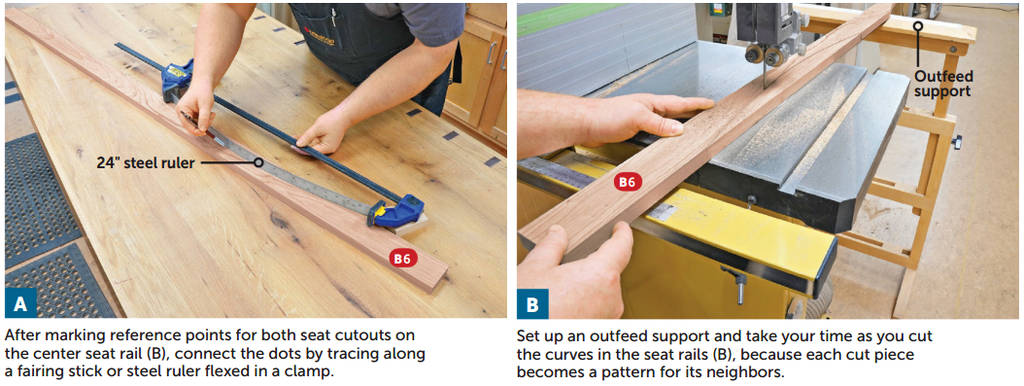
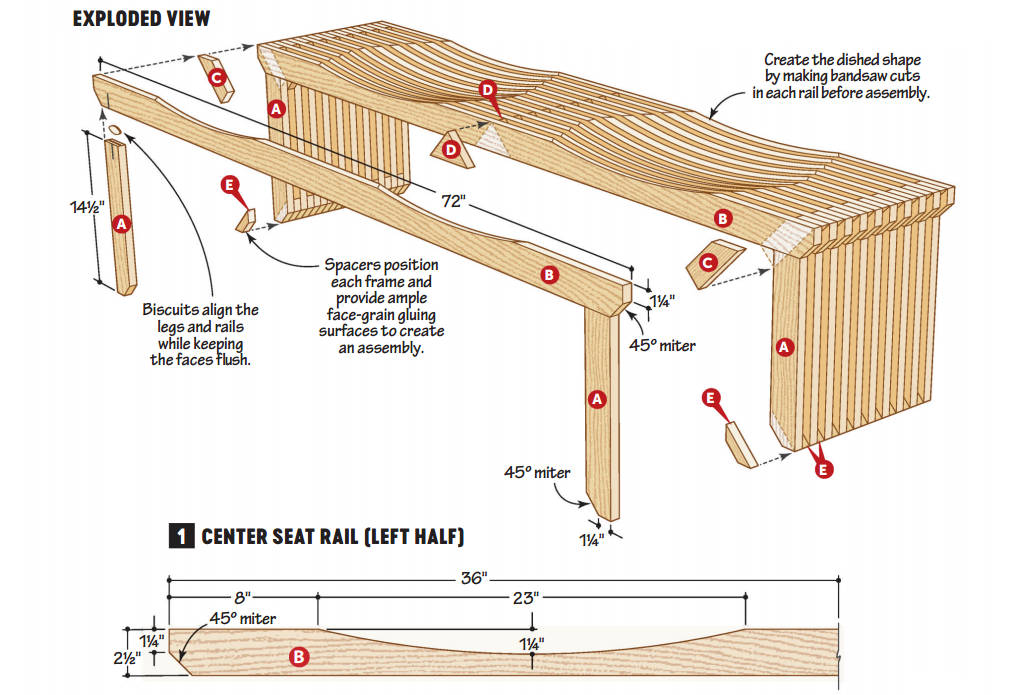
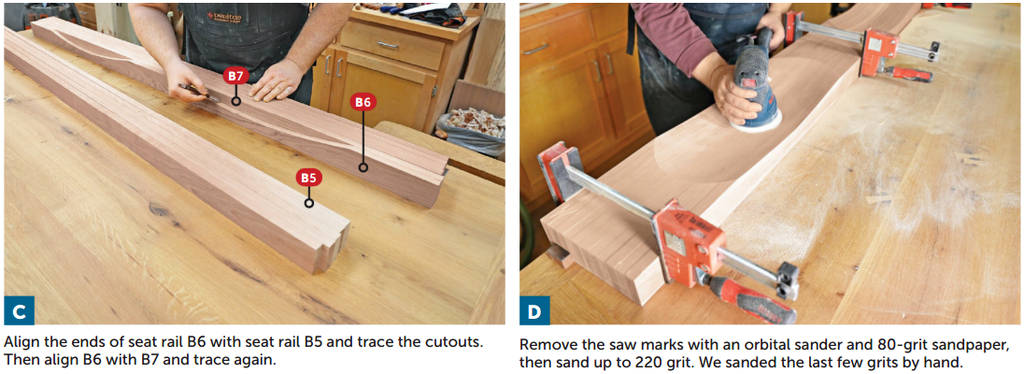
2. Lay out the curves on the center seat rail (6) [Drawing 1, Photo A], then cut it to shape at the bandsaw [Photo B].
3. Trace the center seat rail curves onto the adjacent rails (5 and 7) [Photo C].
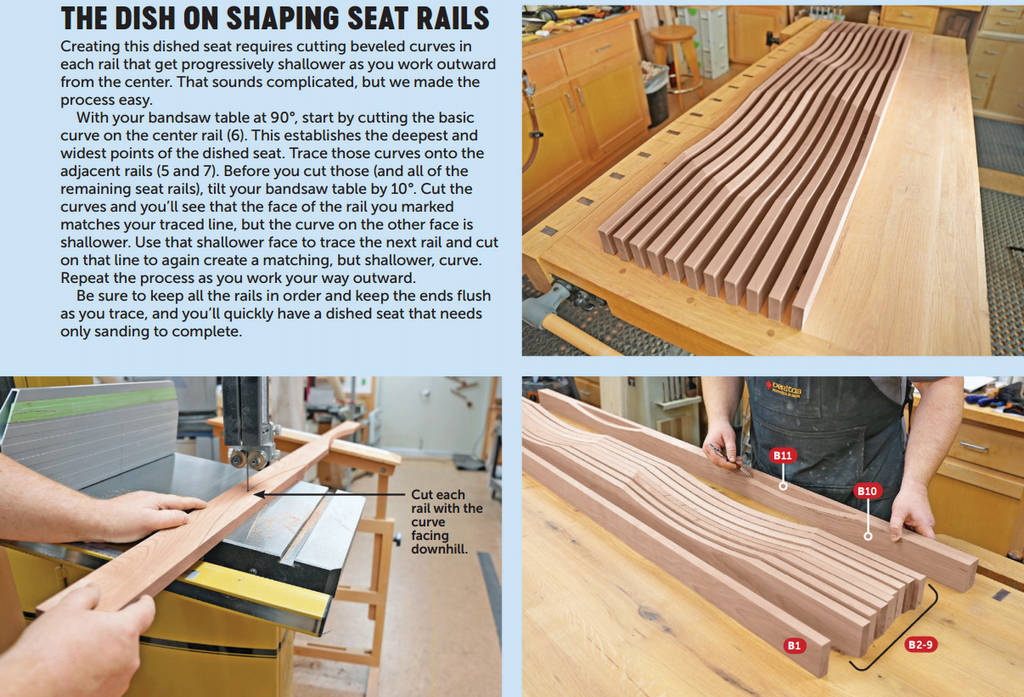
4. Tilt the bandsaw table to 10° and cut the curves in rails 5 and 7 (see the Dish on Shaping Seat Rails, below). Continue tracing and cutting the remaining seat rails, working your way from the center outward.
5. Once you’ve cut all 11 rails to shape, clamp them together and sand the sawn edges smooth [Photo D].
BUILD THE FRAMES
1. Miter-cut both ends of the seat rails (B) and the bottom end of each leg (A) [Exploded View, Drawing 1].
2. To mark the biscuit locations, add a line at the top (unmitered) end of each leg, centered on the face. Align the outside edge of each leg with the corner of the miter on a seat rail and transfer the leg line to the rail [Exploded View]. Cut slots for #10 biscuits at these marks in the bottom edge of the seat rails and top end of the legs.
3. While checking for square, glue and clamp the legs to the seat rails, using biscuits to keep them flush. Finish-sand the assemblies after the glue dries and lightly break the edges.
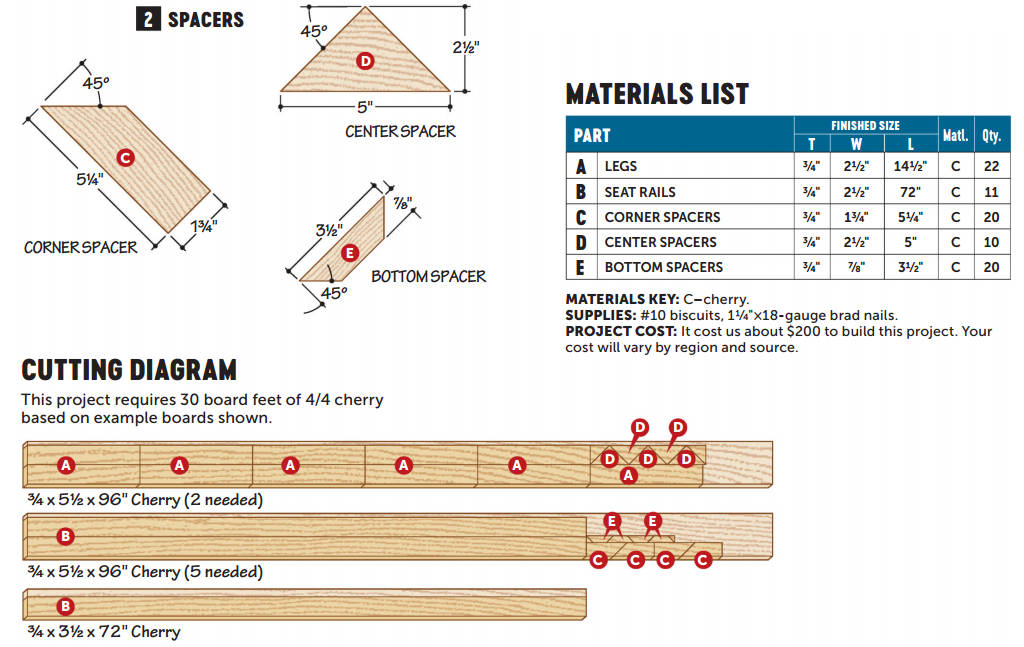
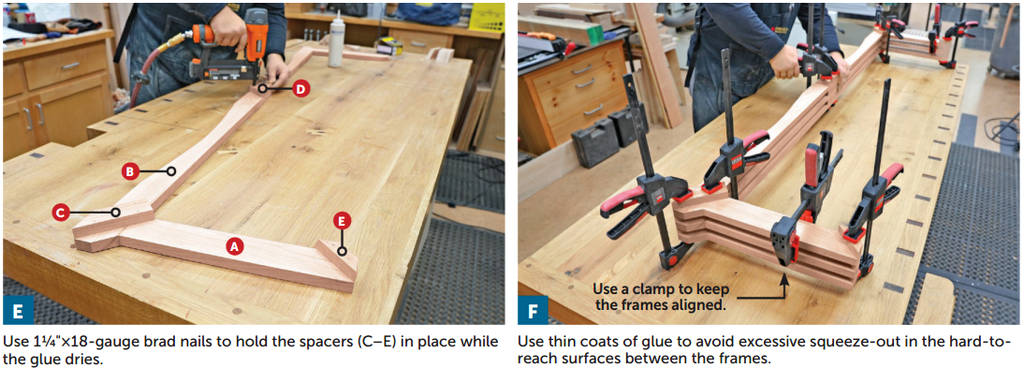
4. Cut the comer, center, and bottom spacers (C-E) to size and shape [Drawing 2]. Glue and nail them to 10 of the 11 frame assemblies [Exploded View, Photo E].
FINAL ASSEMBLY AND FINISHING
1. Glue and clamp together the frame/ spacer assemblies [Exploded View, Photo F].
2. Once the glue dries, finish-sand the bench and apply a finish. We wiped on three coats of Danish oil, buffing between coats with fine steel wool. Work from above and below to maximize your reach between rails.
3. Place the bench in your entryway, and it’s sure to invite curious guests to take a seat.
