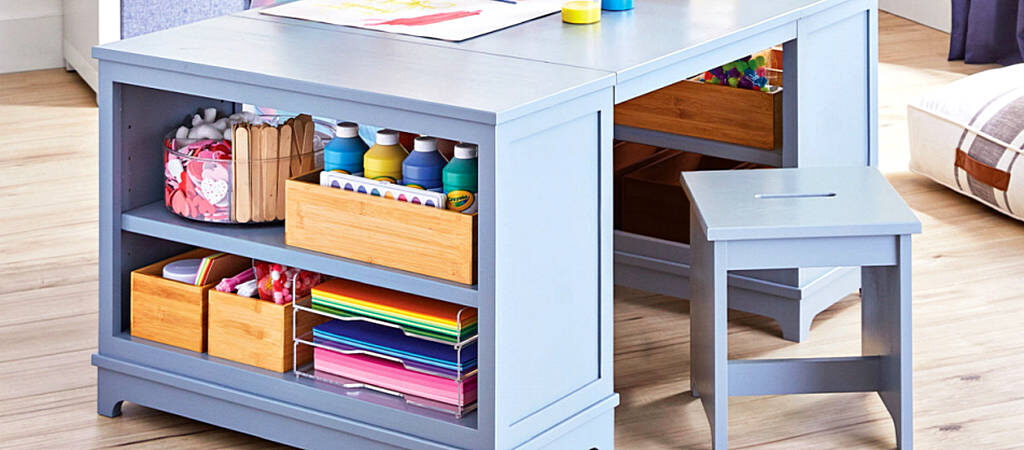
Reclaim the kitchen table with a dedicated space for kiddo crafts and art projects.
Featuring ample storage and work space, this craft center puts everything in reach for kids to help themselves whenever they feel the creative urge.
The top connects easily between the two cabinets, making it simple to disassemble and move the whole setup as needs change. Another great feature prevents this craft center from becoming obsolete as kids grow: The cabinets can live on as a pair of bookcases.
A PAIR OF CABINETS
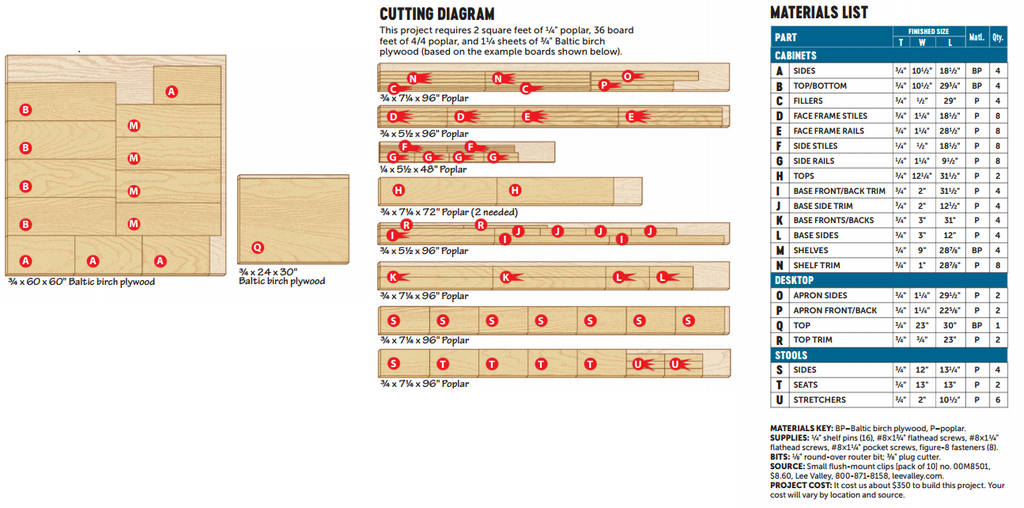
1. Cut the cabinet sides, tops, and bottoms (A, B) to size [Materials List]. Drill shelf-pin holes, then form the dado and rabbet on each side (A) [Drawing 1].
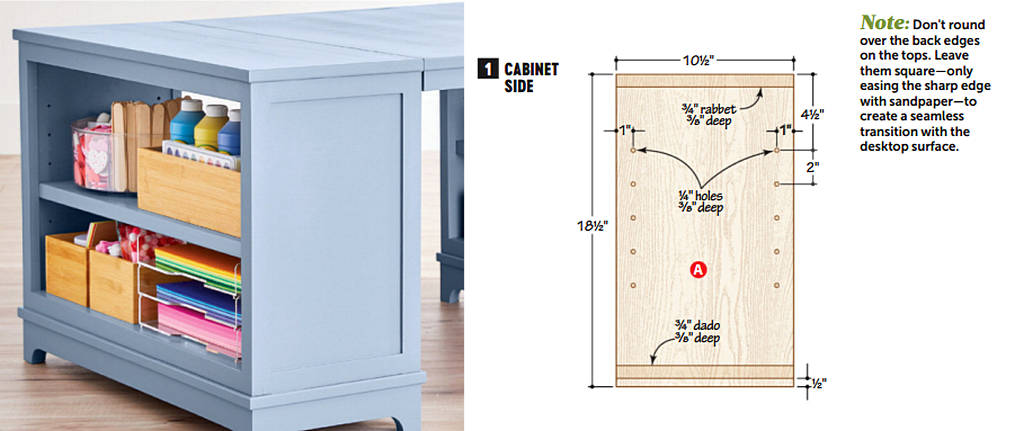
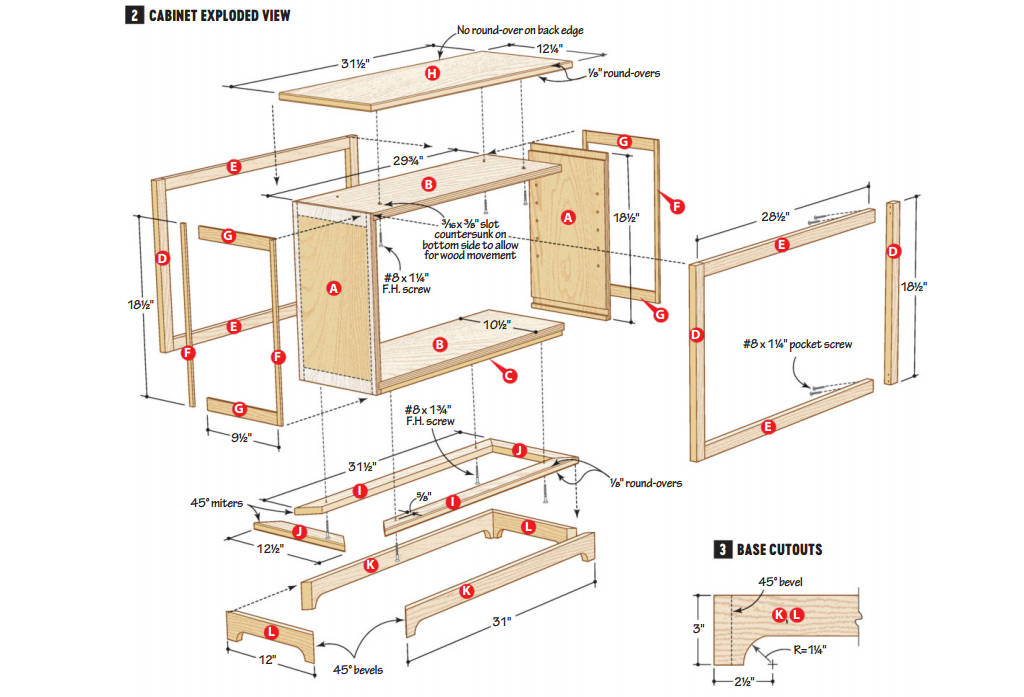
2. Glue and clamp together the sides, top, and bottom for each cabinet [Photo A, Drawing 2]. Once the glue dries, cut the fillers (C) to size and glue them to the cabinet bottoms [Photo B].

3. Cut the face frame stiles and rails (D, E) to size, then pocket-screw the face frames together [Drawing 2]. Glue and clamp the face frames to the front and back of each cabinet, flush at the top and centered so they overhang the cabinet equally side-to-side.
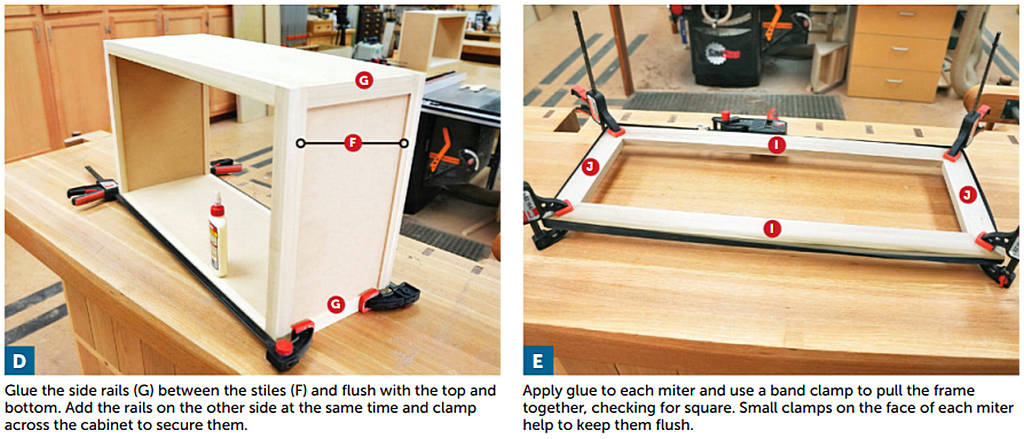
4. Thickness the side stiles and rails (F, G) to match the overhang of the face frame stiles (D). Cut the side stiles to size and glue them to the sides of the cabinets [Drawing 2, Photo C]. Measure between the side stiles and cut the side rails to fit. Then glue the side rails to the cabinets [Photo D].
5. Glue up panels for the tops (H) and cut them to size. Round over the front edges and ends [Drawing 2], then screw the tops to the cabinets so they’re flush with the back face frame and centered side-to-side.
6. Cut the base trim (I, J) to size, mitercutting the ends [Drawing 2]. Assemble the frame [Photo E] and, after the glue dries, round over the edges.
7. Cut the base fronts/backs (K) and sides (L) to size, bevel-cutting the ends [Drawing 2]. Lay out the cutouts on the bottoms of the base parts [Drawing 3], then cut and sand them to shape.
8. Apply glue to each bevel and clamp the bases together [Drawing 2]. Then, glue and clamp the trim frames centered on top of each base. Once the glue dries, invert the cabinets and screw the base assemblies to the cabinet bottoms, centered [Exploded View].
9. Cut the shelves and shelf trim (M, N) to size, then glue the trim to the shelves flush with the top face [Exploded View]. Round over the edges of the trim and finish-sand the shelves.
DESKTOP CONNECTION
1. Cut the desk aprons (O, P) to size. Drill counterbored pilot holes, then glue and screw the apron assembly together [Exploded View]. Plug the holes and, once the glue dries, cut the plugs flush and finish-sand the apron assembly.
2. Cut the desktop and trim (Q, R) to size, then glue the trim to the ends of the top [Exploded View]. Round over the edges of the trim and finish-sand the top.
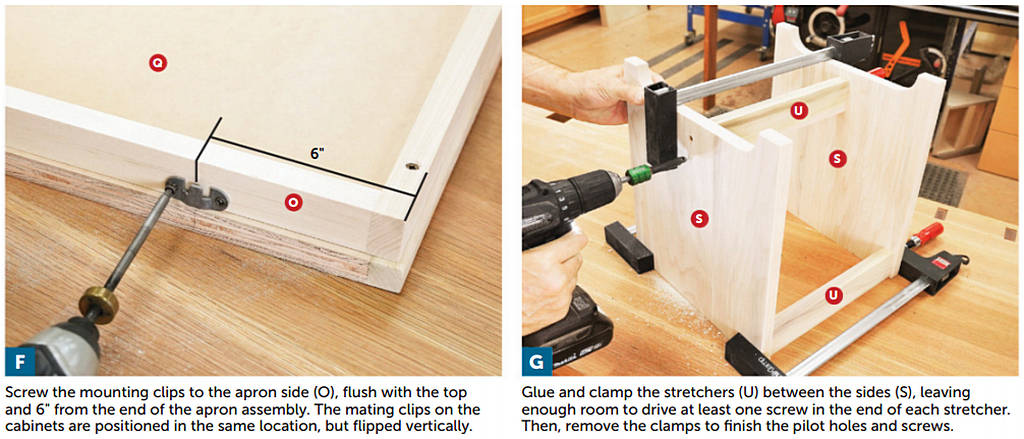
3. Glue and screw’ the apron assembly, centered, to the underside of the desktop [Exploded View]. Screw’ the mounting clips to the apron sides of the desktop [Photo F] and to the backs of the cabinets.
STOOLS FINISH THE SET
1. Glue up panels for the stool sides and seats (S, T) and cut them to size. Form the cutout on the sides [Drawing 4].
2. Form the centered slot in the seats and round over the edges [Drawing 5]. Cut the stretchers (U) to size, then finish-sand all of the stool parts.

3. Clamp the stretchers between the sides [Drawing 4, Photo G] and assemble the stools. Plug the holes and, once the glue dries, cut and sand them flush. Drill holes in the sides and the seats for the figure-8 fasteners [Exploded View], but don’t attach the seats yet.
4. Remove the mounting clips from the cabinets and the desktop and touch up any finish-sanding. Apply a finish to the cabinets, shelves, desktop, and stool frames and seats. We primed the parts with a water-based primer, sanded with 320-grit paper, then sprayed on two coats of latex paint.
5. Once the paint dries, reattach the mounting clips to the cabinets and desktop and attach the scats to the stool. Place the desktop between the cabinets and install the shelves using V-T shelf pins. Stock the shelves with plenty of tools and craft supplies.
