Our art director builds an over-the-top sanding station. From casters to worktop to dust connectors, he really goes all in!
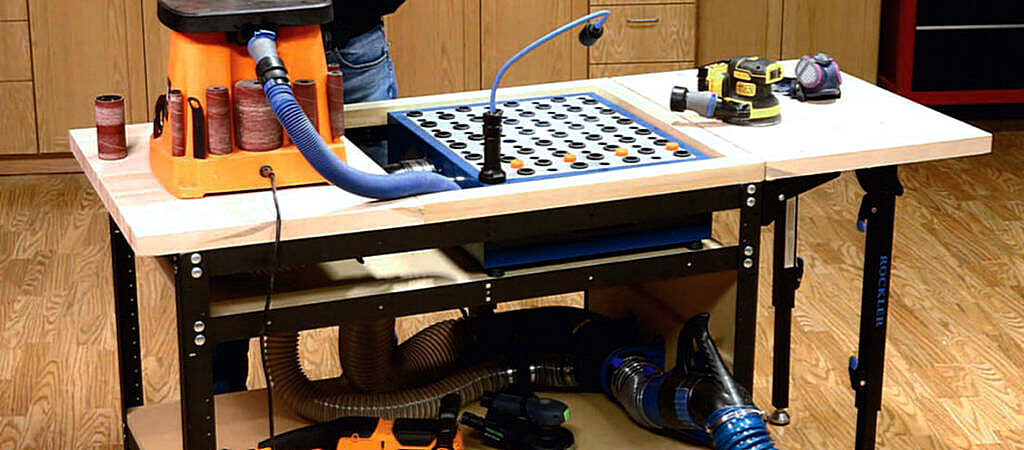
Our magazine’s workshop has needed a multipurpose sanding station for quite awhile, so I set out recently to design one using Rockler’s Rock-Steady legs and 28″ and 44″ stretchers for its framework. My goal for this project was pretty ambitious: I wanted it to house our Dust Right Downdraft Table, have room on top for a benchtop spindle sander when needed, plus have an ample amount of work area on top to sand longer or larger workpieces by hand or with other handheld sanders. I wanted all the sanding dust to be corralled by a single dust collector, which meant accommodating dust port connections for random-orbit and other sanders, the 2½” ports of benchtop sanders and the 4″ port of the downdraft table. And I intended the whole station to be mobile — casters never hurt!
Now, we all here recognize that this project is a bit aspirational for most woodworkers. Heck, you might only have one sander or very little money to spend. And judging by the very long list of components I’ve integrated into this unit, you might shake your head in disbelief. But my hope is that once I walk you through this project’s design, there might be a few features to tuck away in the back of your mind for when you DO need a sanding station of some sort. And I hope this project overview of mine encourages you to visit rockler.com for the almost astonishing variety of dust collection fittings and accessories you’ll find there. If you need a dust collection solution, whatever it might be, Rockier probably has it.
A Walk Through the Station’s Basic Construction
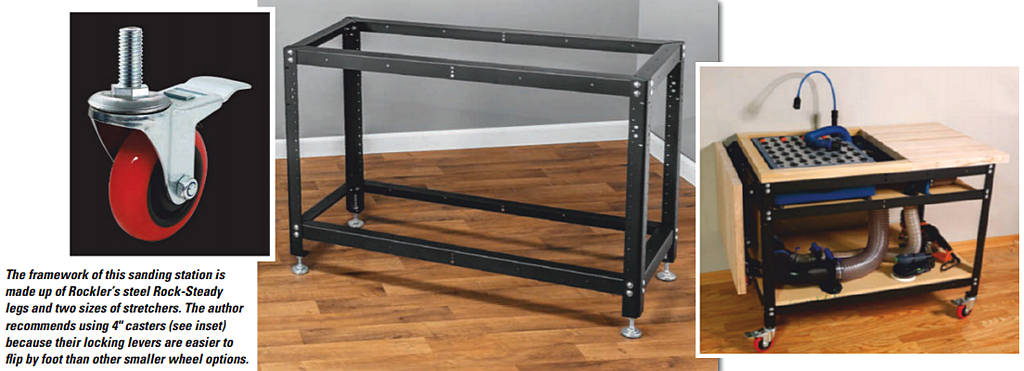
In the top right photo, you’ll see my starting point: it’s an amalgam of Rockler’s Rock-Steady Shop Stand legs, four 28″ stretchers and six 44″ rails. (I used four long rails for the basic stand and an extra two longs rails serve as supports for the upper shelf that holds our downdraft table.) The shelf is also a raceway of sorts for the 4″ and 2½” dust hoses that pass through it on the way to the station’s top. Both the upper and lower shelves are made of 3/4″ MDF, and so is a side wall I built for mounting a central “trunk line” of dust collection fittings on the station’s lower shelf. You can see that wall on the photos.
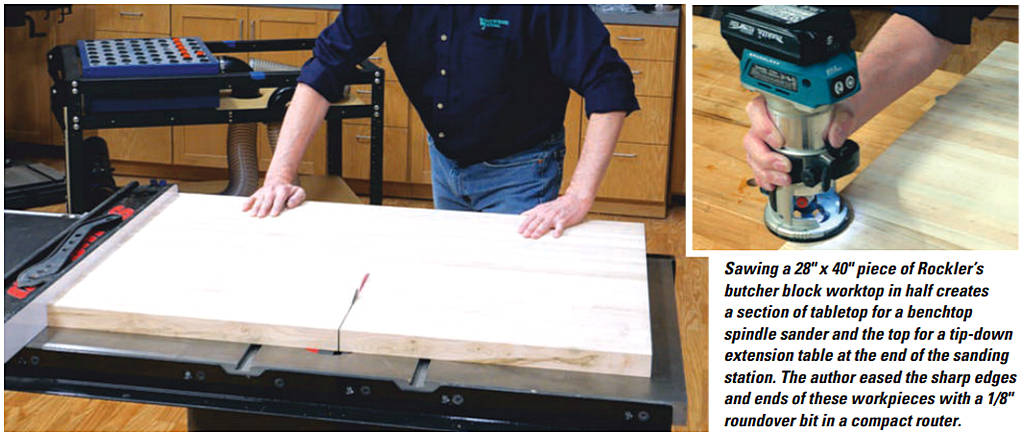
The top surface of my sanding station is a piece of Rockler’s 1½”-thick x 28″ x 40″ prefab hardwood butcher block, which I split in half, width wise, on the table saw. Its 28″ width fits the top of the Rock-Steady stand perfectly, and the material is rigid enough not to need any intermediate cross supports underneath. One half of the butcher block serves as a “table” for our spindle sander.
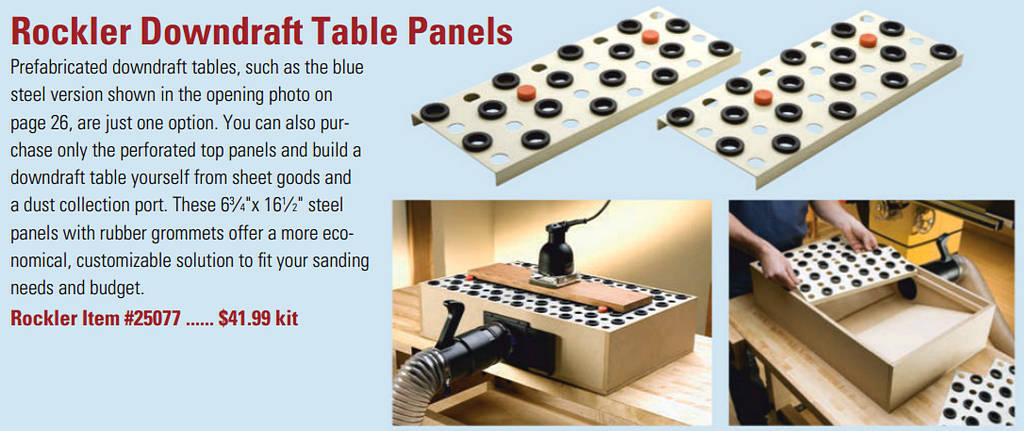
If you look closely at the opening photo of this article and the bottom right photo on this page, I surrounded the downdraft table on three sides with two layers of 3/4″ x 2″ MDF strips to create a flush surface the rest of the way around the top of the Rock-Steady stand. After laminating these MDF strips together, I simply screwed them and the butcher block section to the top stretchers of the stand with #6 x 3/4″ flathead wood screws, driven up from underneath.
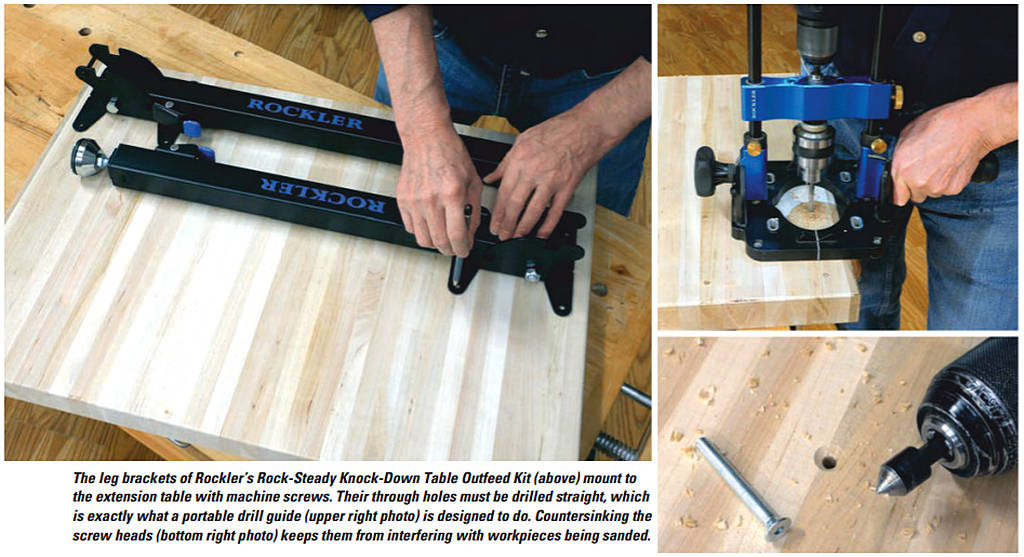
The other half of the butcher block is on the opposite end of the station. It mounts to the project with brackets from Rockler’s new Rock-Steady Knock-Down Table Saw Outfeed Kit. The kit’s folding, telescoping legs make it possible for us to extend the cart’s worktop length when we need to by tipping this section of the worktop up. It folds down for storage when we’re done sanding. I think it’s a handy addition!
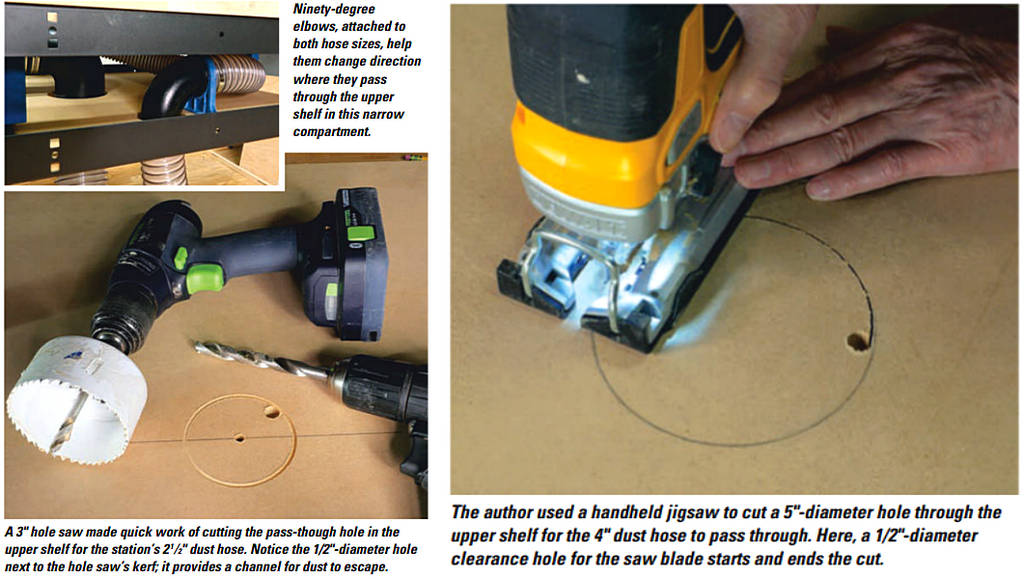
In terms of the basic order of operations for assembling the project, after I had wrenched together the steel stand and installed oversized casters on its legs, I cut the two shelf panels to shape. The upper shelf needed a couple of large holes cut through it for the two dust hose sizes to pass through. I located these holes quite a ways away from the bottom trunk line of dust collection to ensure that the bends in the hoses would be as broad and gentle as possible; I didn’t want to restrict airflow by bending the hoses any more severely than necessary. Also, I actually reversed the orientation of the two long upper shelf stretchers so that the shelf panel could nest down inside rather than sit on top of them. With this shelf in place, the downdraft table’s height was just where I needed it to be: flush to the worktop’s surface. For both the 4″ and 2½” hoses, I used 90-degree elbows to help them change direction where they pass through the upper shelf.

The MDF wall on the bottom left end of the station went in next. It’s doubled up with a narrower piece on the inside face to provide a thicker attachment surface for the dust collection fittings. This shorter inner layer also offsets the dust collection assembly from the station’s steel legs enough so a 4″ Dust Right Quick Change Handle can plug straight into it (see photo).
After I had the shelves and wall installed, I added the tip-up portion of butcher block using the Outfeed Kit. Rockier provides thorough instructions for how to mount the hardware components of the kit and its legs, so follow those carefully. The leg brackets attach to the worktop with machine screws that pass all the way through it. I was able to easily tackle drilling those holes with my drill/driver mounted on Rockler’s Portable Drill Guide and using a long twist bit. The drill guide ensures that holes will run straight through whatever you’re drilling. (Once you have one of these drill guides, you’ll be surprised by how often it can come to the rescue for drilling through workpieces that are two big or bulky to hulk over to the drill press.) I countersunk the worktop bolt holes for the tapered heads of the machine screws so there’d be no chance of them marring anything we happen to be sanding.
A Menagerie of Dust Collection Fittings
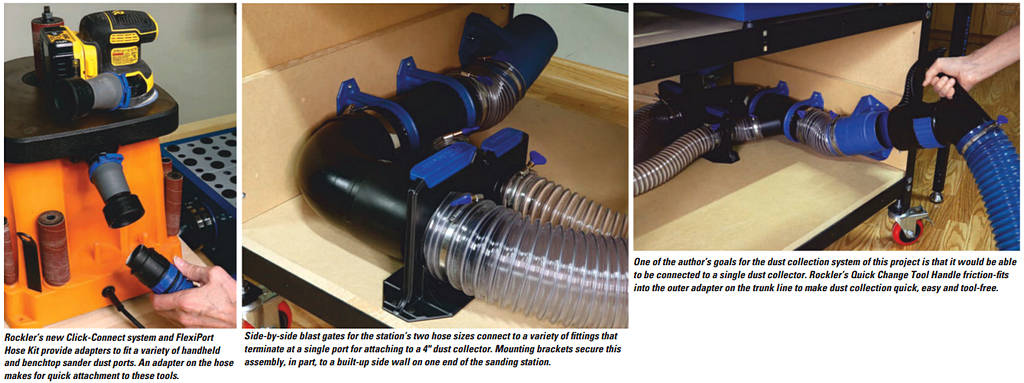
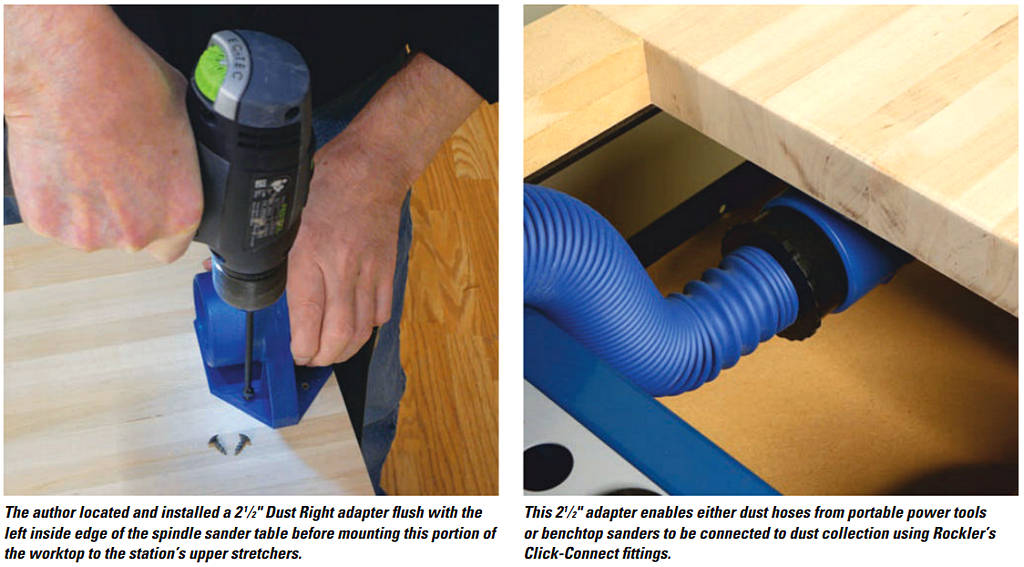
The last 13 items of the “Hard to Find Hardware” box are all dust collection hoses, fittings, adapters and brackets for creating this sanding station’s dust collection trunk line. I’ve already covered how the 2½” and 4″ hoses pass through the upper shelf. The smaller hose terminates on top in an adapter dust port that’s mounted below the worktop on the left end of the spindle sander table. This port enables smaller power tool dust hoses to be connected to the 2½” main hose with Rockler’s new Click-Connect tool adapters (see upper left photo). This makes it simple to use dust collection with any sander we’re using and to have no excuses for not keeping the work area as clean as possible. I think that’s one of the big reasons why we often don’t use dust collection — it can be a hassle to hook up quickly and easily. That’s not a problem with this setup.
What about the components that form the dust collection trunk line down below? Well, that collection of fittings, adapters and sections of hose
took a lot of figuring on my part. Because as I mentioned at the beginning of this article, one goal was to have all of the dust collection accommodations of this station be serviced by one 4″ dust collector. I also wanted the 2½” and 4″ hoses to be able to be used at the same time (for instance, to run a random-orbit sander and the downdraft table simultaneously) or to have the option of closing one or the other off when needed (say, to run just dust collection for the spindle sander or only the downdraft table when hand-sanding on top of it). Here’s how I did it. As you can see in the top right photo, the two sizes of hose attach to a pair of side-by-side blast gates attached to the bottom shelf. The 4″ blast gate connects with a coupling to a 90-degree elbow, and a coupling in turn connects it to a 4″-to-2½” Y-connector. The smaller blast gate ports into this Y-connector with a short piece of 2½” hose. From there, the remaining 4″ end of the Y-connector has a short length of 4″ hose that feeds to an adapter piece from Rockier’s Quick Change Tool Set. That’s where we attach the sanding station to our dust collector. Several Rockier Ready-Mount 4″ Brackets secure these various parts to the station’s side wall with short screws. This integrated trunk line was worth the careful planning, because so far it’s serving our sanding needs well by helping to keep the dust at bay!
