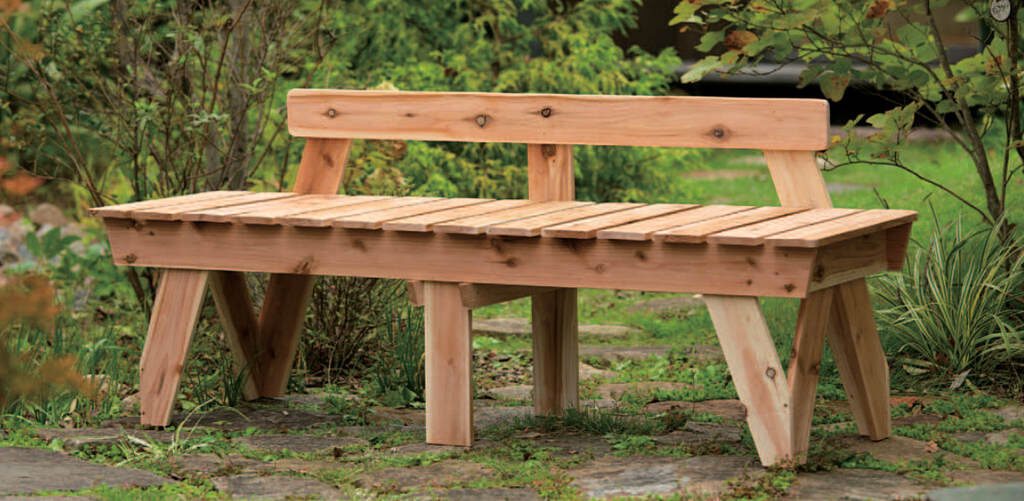
This bench is large enough for three people to sit side by side. If placed in a garden, you can relax and enjoy looking out over the greenery. When used indoors, cushions or blankets can be added to soften its rustic appearance.
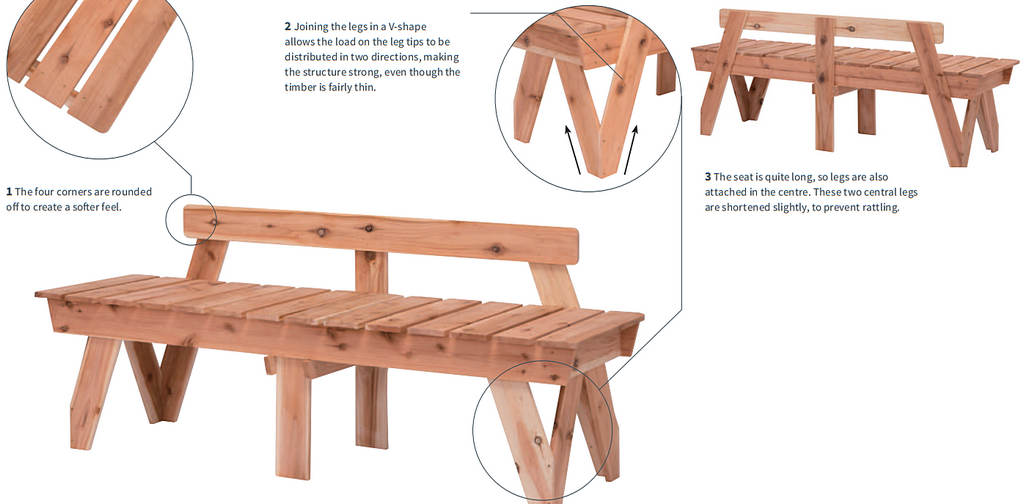
In addition to the four corner legs, there is one in the centre so that three adults can sit on the bench at the same time, without it bending. The corner legs are thin and not strong enough on their own, but by joining them in a V-shape and screwing their tips together, they become much stronger and will not rock back and forth. The centre leg is straight, but it is connected front and back with a cross-brace, so there is no danger of it wobbling.
The design of this bench was originally published in 1953 in Woodworking at Home, a book by the Japanese design group КАК. It has been updated by group monomono, which was formed in 1970 by Yoshio Akioka, who had been a central figure of КАК. group monomono are based in Tokyo and have been leaders in the revival of woodworking and other handcrafts in Japan.
Making the bench
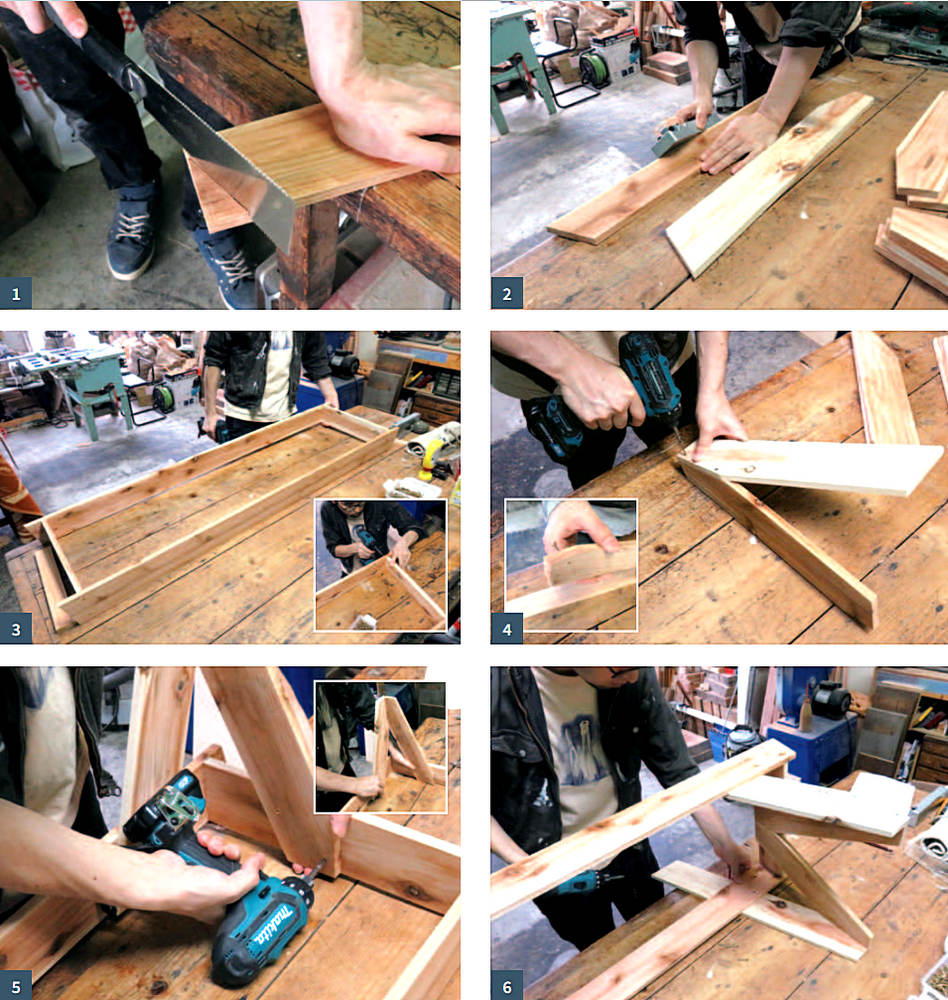
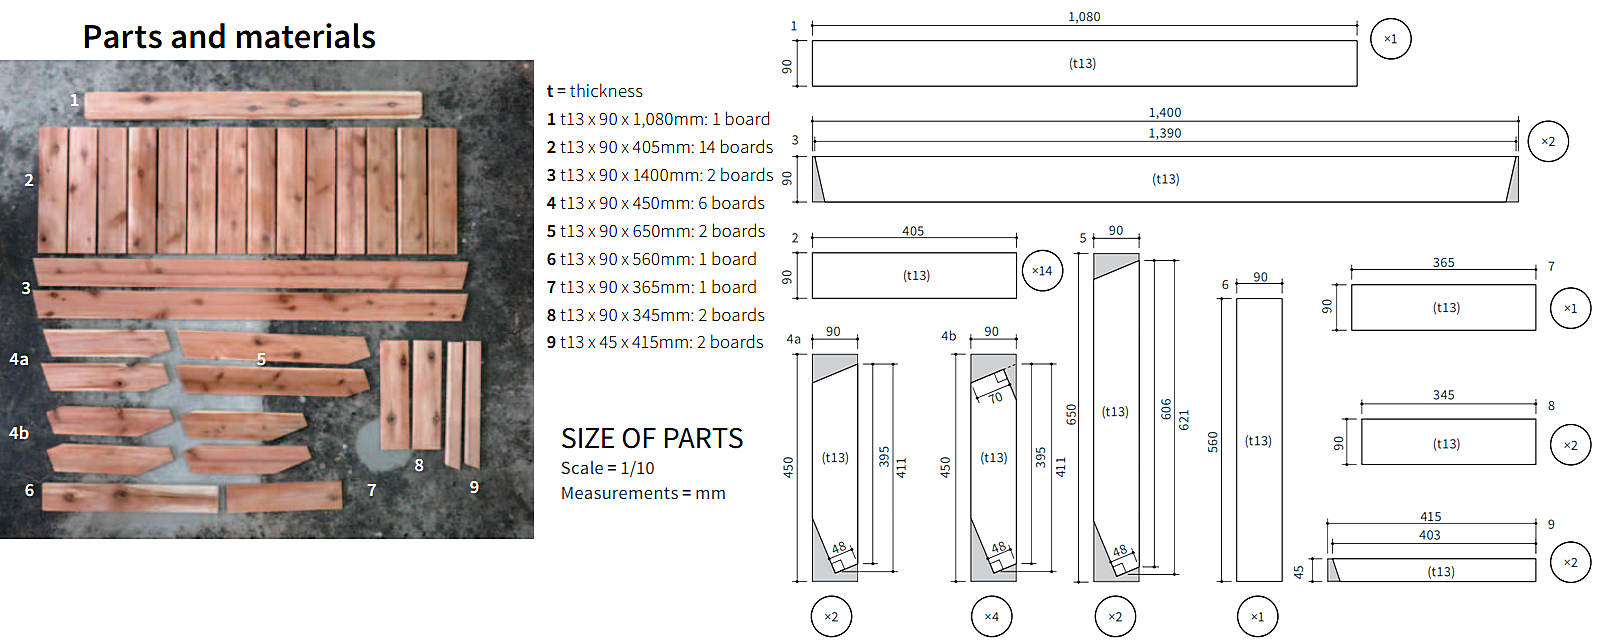
1. Use a combination square and angle finder to mark out the materials using a pencil. Then use a saw to cut all parts.
2. After cutting the materials, sand and/or plane all pieces. All edges of the backrest and the seat should be rounded nicely.
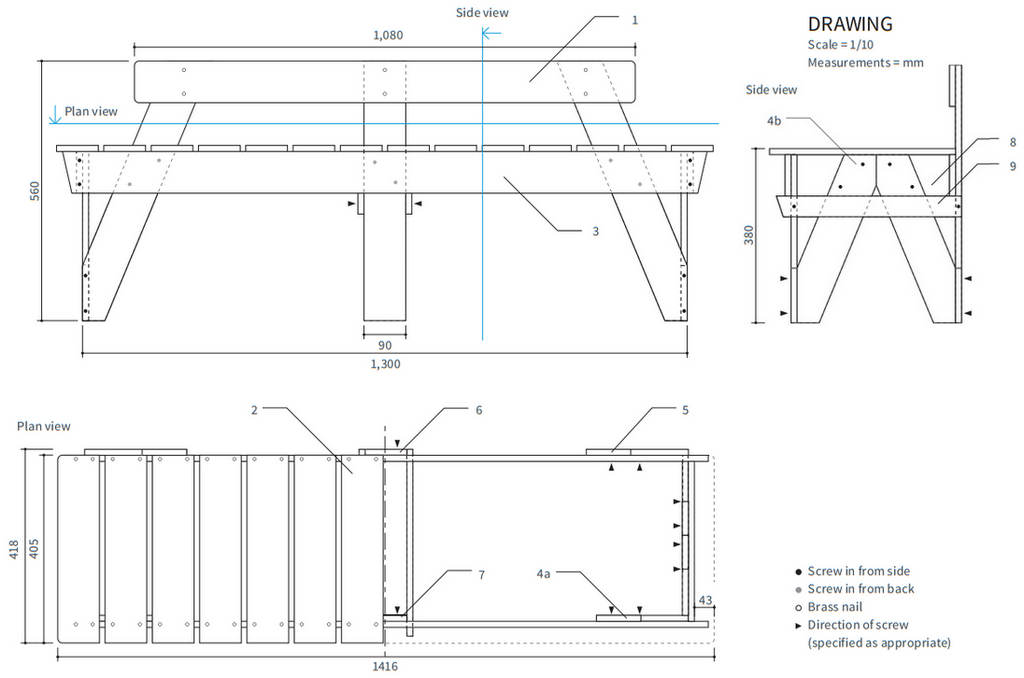
3. Construct the frame (3, 8) by applying glue to the joints. Press down firmly while screwing pieces together so they don’t separate. (Screws: 35mm).
4. To put together the V-legs (4a, 4b, 5), drive the screws in until the tips just pop out the back of the board. Stick the tip of the screw into the side to be joined, adjust if necessary and then fasten. (Screws: 35mm).
5. Align the top of the frame and front legs so that they are flush. Fasten them with screws. Use two screws at the base of each leg. Be careful not to mistake the left and right sides for each other. (Screws: 25mm).
6. Since the back legs will be fine-tuned in the next step, the base of the back legs are temporarily fixed to the frame, screwed together with a single screw. (Screws: 25mm).
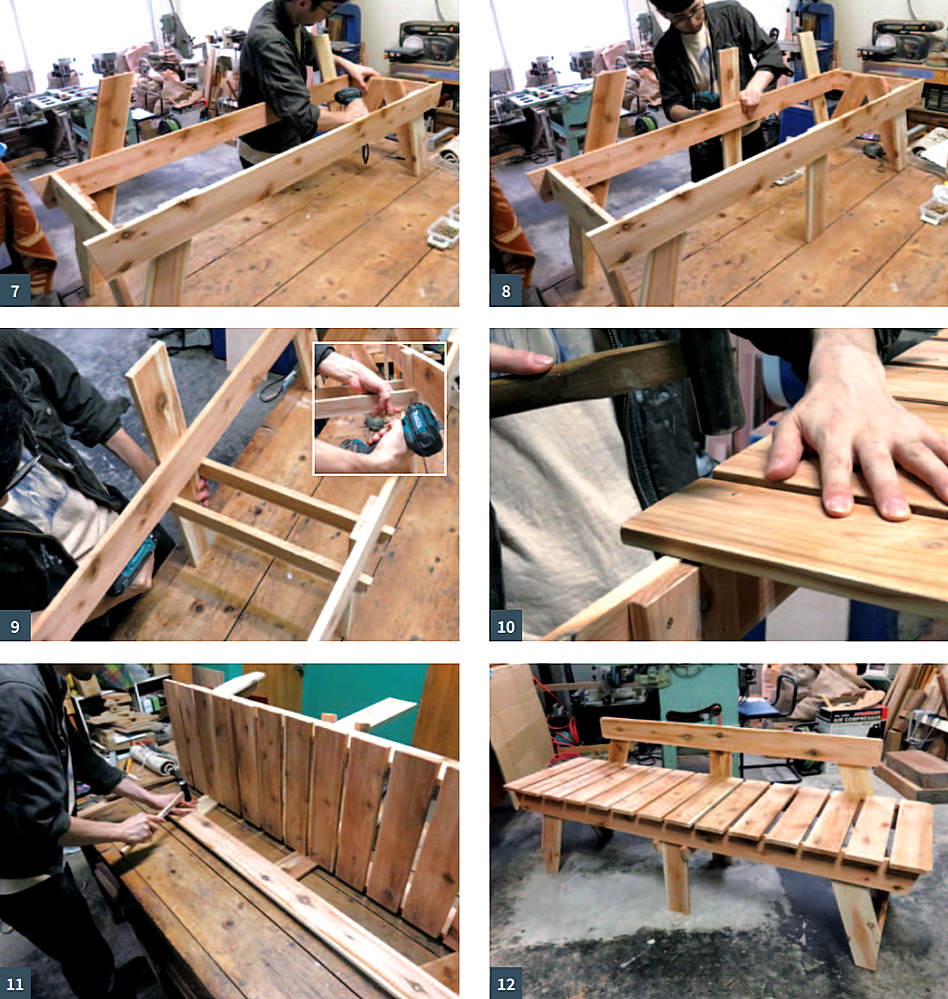
7. Check for wobbling in the main unit by standing it up. If it rattles, adjust the rear legs by moving them around a bit. Fix with screws when there is no rattle.
8. To attach the front and rear centre legs (6,7), centre each leg along the frame and fasten with screws. Make sure that the centre legs are not longer than the left and right legs. This will prevent rattling. (Screws: 25mm).
9. Attach the central brace (9) after butting it up against the frame. Make sure everything is level and then screw bracing
into centre legs from the side. (Screws: 35mm).
10. Lay out the seat plates (2), check their position and then fix with brass nails. Tack nails in all four corners of each seat plate. (Screws: 35mm).
11. To attach the backrest (1), lay the unit down to make nailing easier. Find the correct position for the backrest and then hammer in brass nails to secure. (Brass nails: 25mm).
12. Place on a flat surface and check for any wobbling. If there is a rattle, adjust by sawing or sanding the leg ends as needed.

