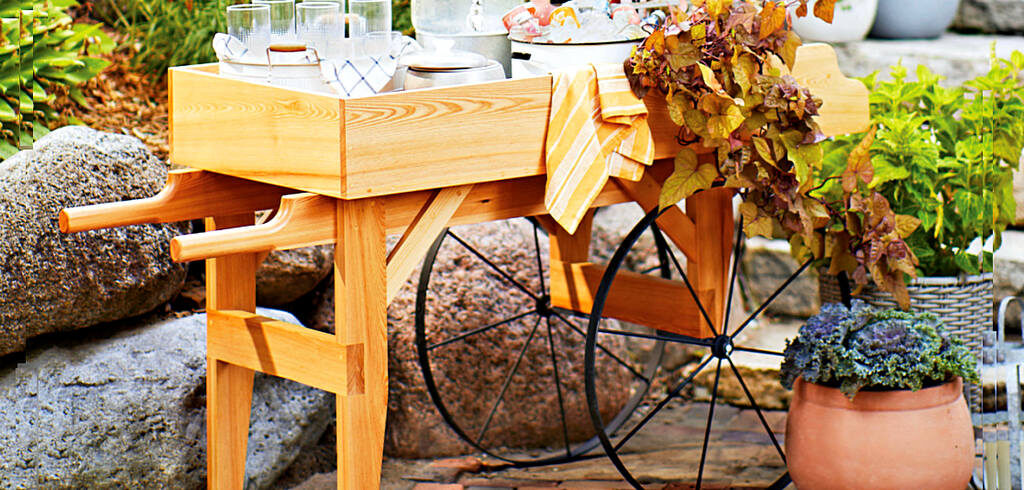
Get your backyard festivities rolling with this handsome and handy cart. Load it up with beverages, food, or even garden supplies.
Big wheels and handles make this cart easy to use and give it that classic handcart look. For our cart we used cypress, which has excellent decay resistance and is a great choice for outdoor furniture projects. The heavy-duty steel axle hardware comes predrilled, making wheel attachment a simple process.
ONE CLASSY CHASSIS
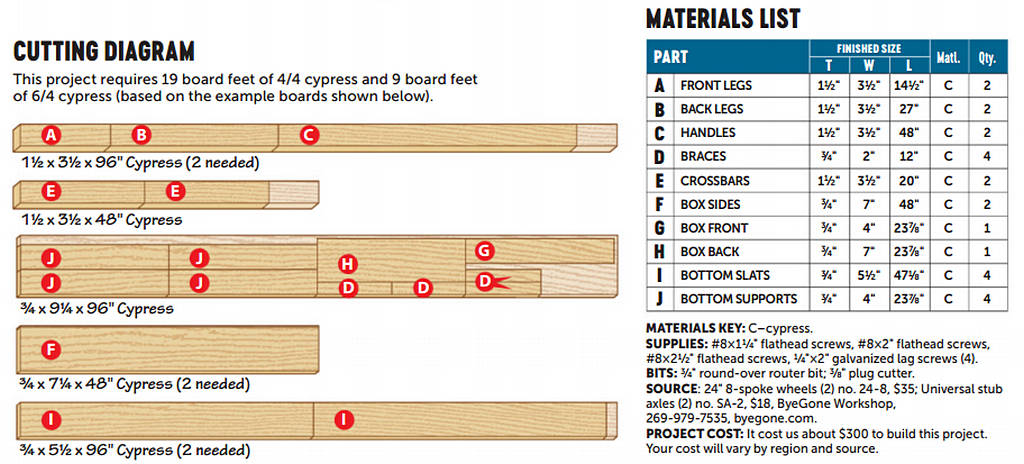
1. Cut the front and back legs (A, B) to size [Materials List]. Form the rabbets on the inside face of each leg. Add the notches, then cut and sand the tapers [Drawing l].
2. Cut the handles (C) to size. Mark the cutouts, then bandsaw or jigsaw them to shape [Drawing 2].

3. Use a handheld router to round over the upper edges of the handles [Drawing 2], then switch to the router table to shape the stopped round-overs on the lower edges [Photo A]. Round over the ends of the handles, then finish-sand, smoothing out the transitions as needed.
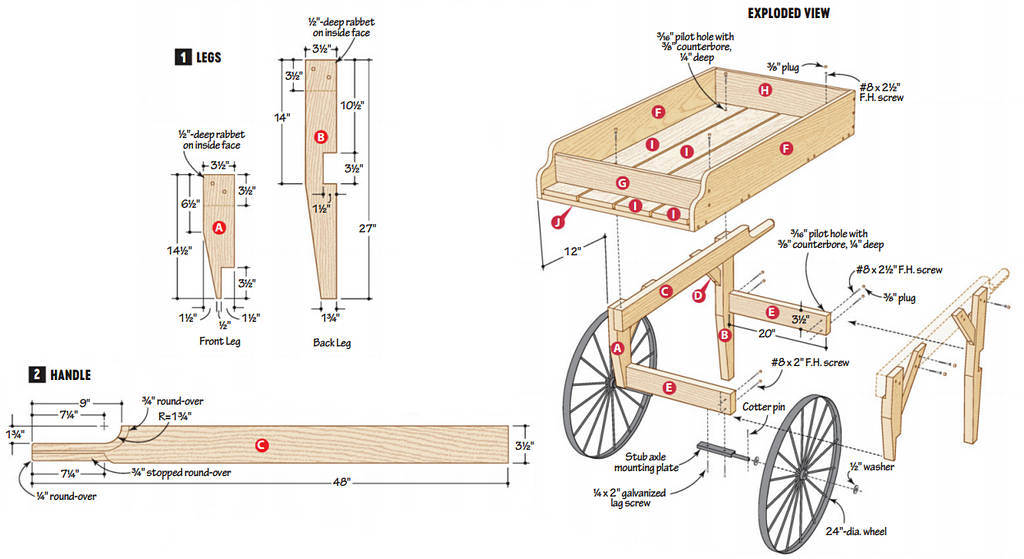
4. Cut the braces (D) to size, mitercutting the ends [Drawing 3]. Drill and counterbore the holes in the legs and braces, then glue and screw the side assemblies together [Drawing 3, Photo B].
5. Cut the crossbars (E) to size. Drill and counterbore the holes, then glue and screw them between the side assemblies, flush with the outside of the legs [Exploded View]. Plug the screw holes in the base assembly and finish-sand.
THINK INSIDE THE BOX
1. Cut the box sides, front, and back (F-H) to size. Lay out and shape the front ends of the sides [Drawing 4]. Drill and eounterbore holes in the back ends, then glue and screw the sides to the back [Drawing 5]. Set the front aside for now.
2. Cut the bottom slats and supports (I, J) to size. Place the slats facedown on the workbench to assemble the box bottom [Drawing 5, Photo C].
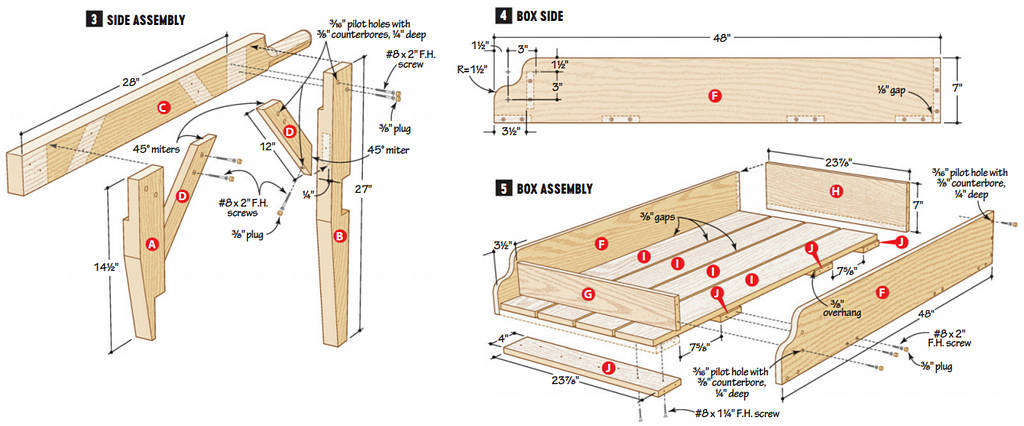
3. Place the bottom assembly inside the back/side assembly so one end of the bottom assembly is flush with the shaped end of the sides (F). This should leave a Vs” gap between the ends of the slats and the box back (H) [Drawing 4]. Drill counter-bored holes in the box sides, and then screw them to the ends of the bottom supports (J) [Drawing 5].
4. Drill counterbored holes for the box front (G) and screw it between the sides. Plug the holes in the sides of the box assembly, then finish-sand.
ROLL TO THE FINISH
 1. Apply a finish to the base and box assemblies. We used General Finishes Outdoor Oil.
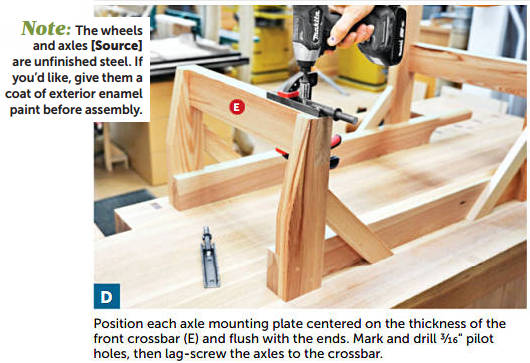
2. Lag-screw the axles to the front crossbar [Exploded View, Photo D], then add the washers, wheels, and cotter pins.
3. Flip the base upright and place the box assembly on top, centered side-to-side and with the front edge 12″ from the front of the base [Exploded View]. Drill and counterbore the pilot holes, then screw the box to the top edge of the handles (C). Plug the holes and touch up the finish.
4. Stock up your serving cart and roll it to the pool, patio, or wherever the party may be!
