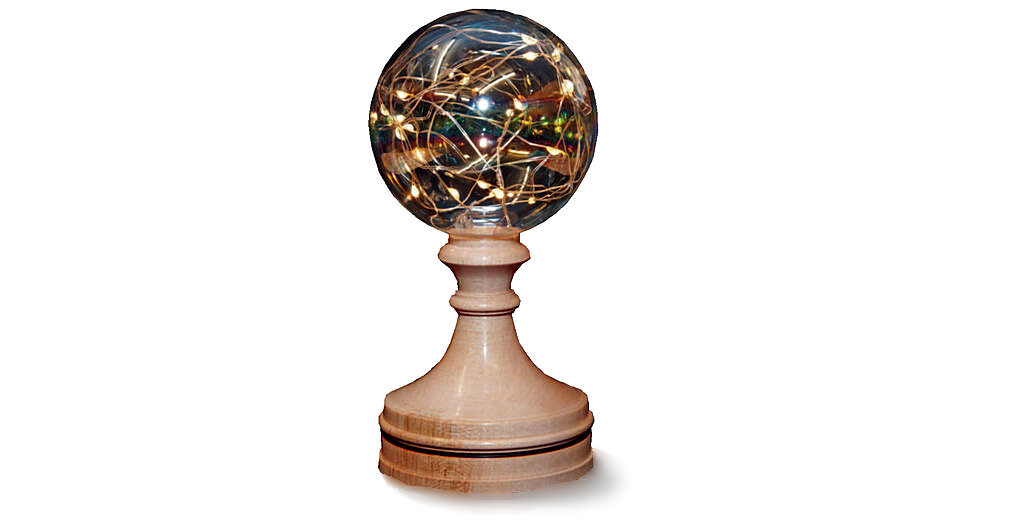
This item makes a nice decorative feature for a table or windowsill and the lights come in a variety of colours. The glass globe is in the form of a bauble illuminated by LED lights. In this instance, the wood has been given a natural finish and a warm white light was selected, but the design offers plenty of scope for imaginative alternatives.
For example, it would be interesting to create table decorations at a wedding reception that matched the bride’s colour theme or complemented the flowers or room decor.
Milk paint in one of the many pastel shades could be used for the base and the appropriate colour for the LED lights could be a stunning combination.
Step By Step Productions
1 Mount the blank on the lathe between centres and turn to a cylinder, then form
a spigot at one end of the blank to fit your scroll chuck.
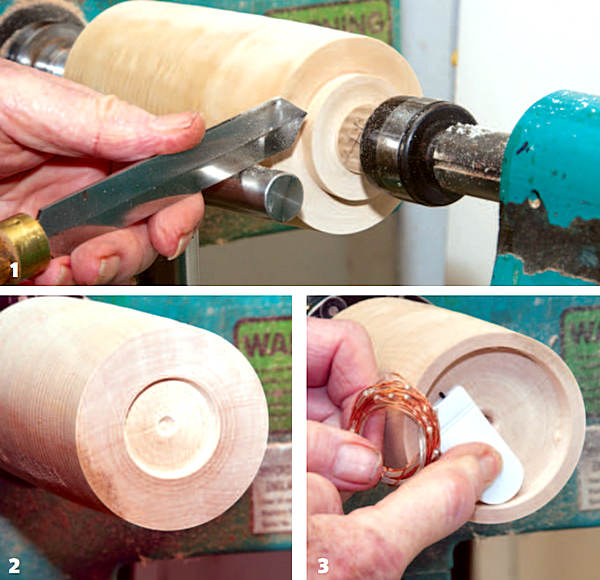
2 Mount the spigot you have just formed into the chuck and clean up the other end of the blank. The next job is to form a recess in what will become the base to house the battery and wires. Make a shallow hole in the centre with a Uin spindle gouge and slightly chamfer the edge.
3 Continue to form the recess. When you think the housing is big enough, stop and check that it is deep and wide enough so that the battery unit can fit within it. Be careful not to make the walls of this recess too thin because they need to withstand chuck jaws used in expansion mode when the blank is reversed.
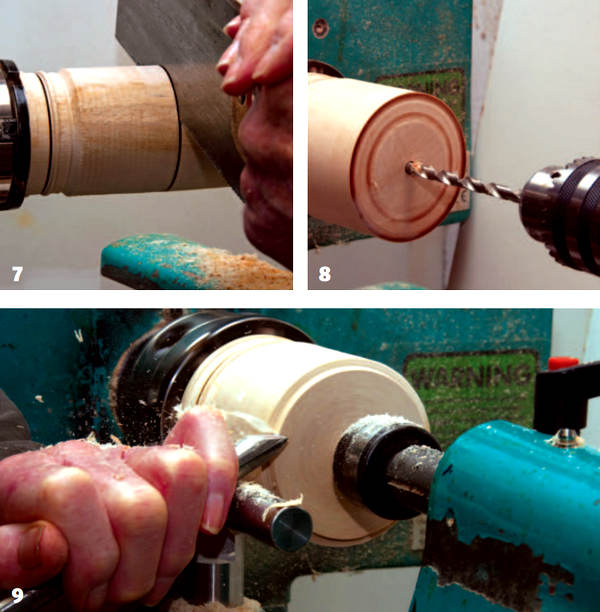
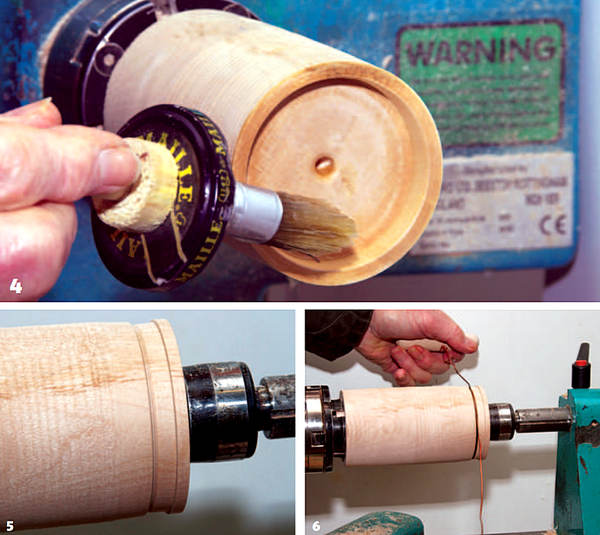
4 Take the opportunity to sand and finish the bottom while it remains readily accessible. The photo shows sanding sealer being applied to the finished recess.
5 Start shaping the outside of the base. It is a good idea to utilise support from the tailstock since the next operation is some distance from the headstock. With a skew chisel, cut a small V-groove in the blank as shown in the photo.
6 Place some copper wire in the V-groove with the lathe running at about 800rpm. The wire will start to get hot and, after a little while, the V-groove will turn black.
As a decorative design feature this is rather down to personal choice, but it does help to define the base and disguise the fact that it is visually quite dominant. Please avoid touching the wire during this operation as it does get very hot. Leave it to cool away from flammable materials such as wood shavings.
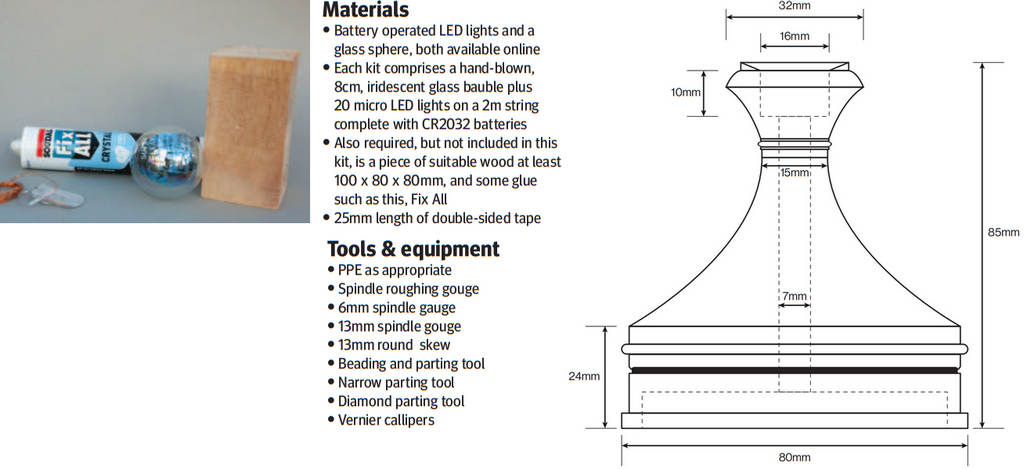
7 Using a small spindle gouge, make a small bead in the base as shown in the plan, then trim the blank to a length of about 85mm – that is to say, slightly taller than the height required for the project. I tend to use a saw rather than a thin parting tool because I find this method avoids the potential drama of the wood binding on the parting tool.
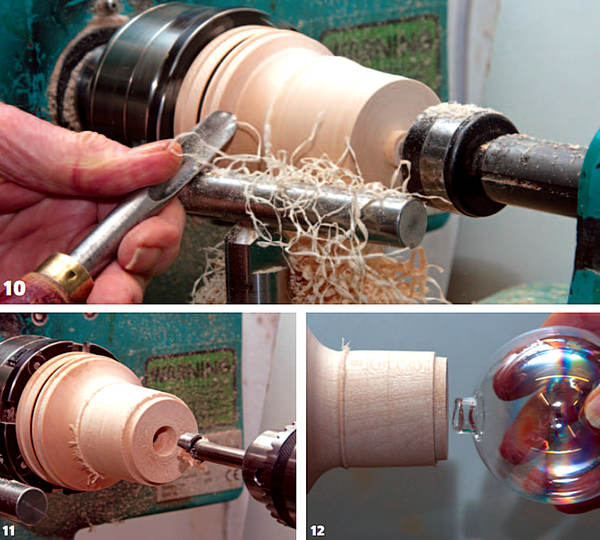
8 Reverse the blank in the chuck in expansion mode using the recess created in the base and drill a 7mm hole all the way through the blank. This diameter should suffice to feed the wire through.
9 The base section has now been turned both inside and outside, so we can start to shape the upper portion. It is worth noting the maximum and minimum diameter of a piece to help ensure you work within these guidelines. It is easy sometimes to get carried away when removing wood, only to realise that the need for a design change has been thrust upon you.
10 Continue shaping the work. I would advocate developing all elements of the design in stages rather than completing one section before proceeding to the next. This helps keep the emerging shape on track with the plan.
11 Drill a 16mm hole 20mm deep to house the spout of the bauble. Since I did not possess a 16mm diameter drill bit, I used a 15mm drill bit and enlarged the resulting hole using a small skew chisel. A comfortable rather than a tight fit is best because, if the wood shrinks, the glass might break.
12 With the lathe at rest, test fit the bauble. To improve the fit it is a good idea to chamfer the rim. If this matches the curvature of
the bauble it will increase the surface area supporting the bauble (see plan).
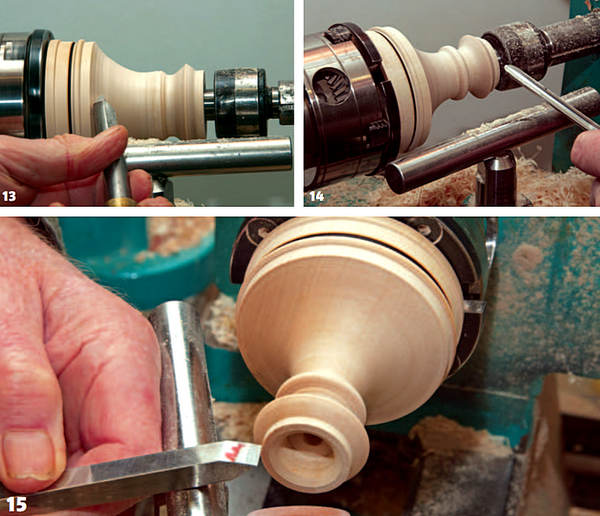
13 Once the bauble housing has been sorted, work can resume forming the outside shape. The photo shows a 13mm spindle gauge refining the shape in stages. Quite a lot of timber still needs to be removed.
14 Working room in the top area down to the first bead is a bit restricted and calls for a small Чіп spindle gouge.
15 Now that we are approaching the desired final shape it is time to clean up the tool marks with a skew or tool appropriate for the feature you are dealing with. This helps to reduce the amount of sanding required so that you can start at, say, 250 or 320 grit, which poses lower risk to the finer details.
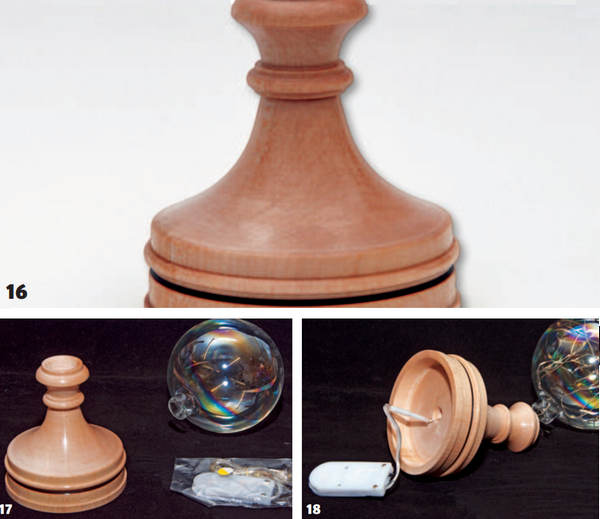
16 Once sanded, the outside can be finished as desired. The example in the photograph had two coats of sander sealer.
17 Assemble the bauble and LED light fittings prior to assembly.
18 Thread the wire with the lights through the hole in the base and then into the glass bauble. Try to space the lights evenly around the globe. Secure the white battery housing unit to the underside of the base with double-sided tape and glue the spout of the bauble to the recess in the top of the stand. Your decorative light is now ready to grace the table.

